Web Developement
Running IIS from a Docker Container in Windows Server 2016
Many of you may already aware that Windows Server 2016 now natively supports Docker containers and it means that the same shared-kernel-isolation-paradigm from the Linux world is now well and truly supported in Windows too. The advantage of this approach is that your containers will load more speedily with minimum amount of resources. Please go through this link to read more about it. In this post, I will show how to host IIS in a docker container in Windows Server 2016 machine.
Step 1 : Get the base image for IIS
First you need to pull the latest image for IIS from the Docker hub by executing the following statement.
docker pull microsoft/iis
It will pull the image with the tag latest from the docker repository. If you want specify a different tag, then you need to specify that after the image name with a color(:) prepended to it
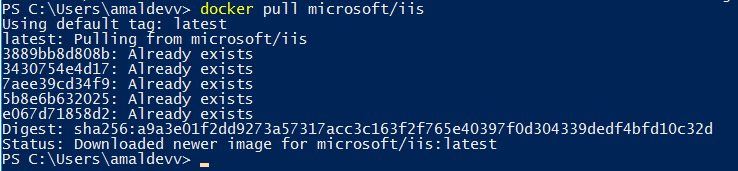
If you execute the docker images, our newly downloaded image will be shown in the list as shown below.

Step 2 : Create the Container
Now, you need to create a container based on the image which we downloaded in the earlier step. For that you will to need to execute the following command
docker run -it -d -p 80:80 microsoft/iis
With this command, we are telling Docker to create a container based on microsoft/iis image. The -d switch indicates that container should be run in the background and -p switch is used for mapping the port numbers for host and the container. In this example we are redirecting the requests coming into the port #80 in the host machine to port #80 in the container we just created. When it's successfully executed, it will emit the full container id and then returns to the prompt as shown below

You can verify whether the container is running or not by executing the docker ps command. The ps command will show all the active processes running in docker as shown below

Step 3 : Check IIS status
You verify whether the IIS running inside the container is properly serving content or not by typing in the IP address of the host machine in the browser. If everything is good you will see the default web site page of the IIS as shown below.
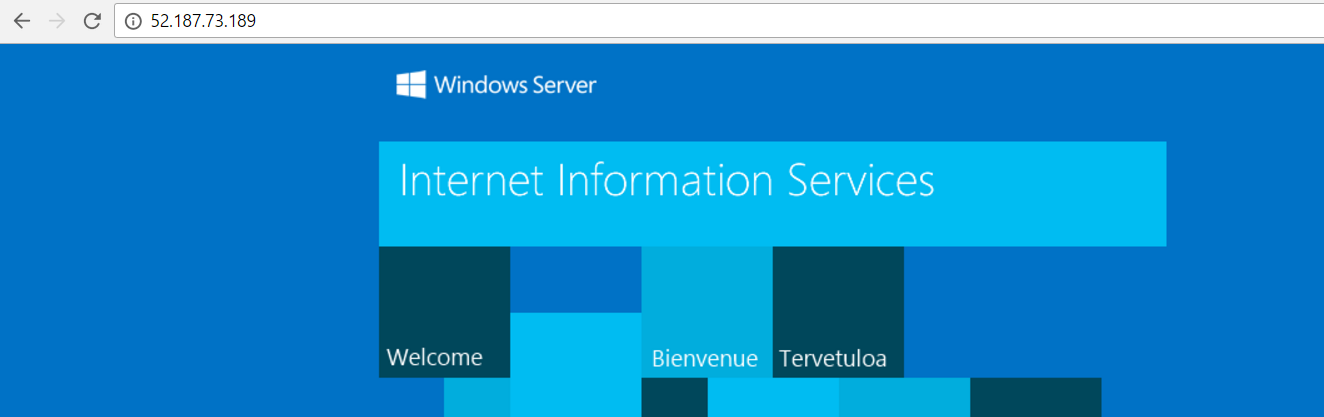
Since port # 80 is used for http by default and we don't need to provide that along with the IP address. The redirection magic is done by the daemon whom will see a request at port 80 is coming in the host machine, intercepts it and redirects it to the port#80 of our container which then spits out the default website page.
Override Default port and Host Name Used By ASP.NET Core Toolset
.NET Core is the brand new modular framework from Microsoft for creating a wide variety of applications targeting Windows, Web, Cloud, IoT devices etc. Along with that they have introduced a cross platform toolchain for the command line which will help you to create and execute .NET core apps from the command line.
So for creating a normal web app in the .NET Core we will execute the following command.
> dotnet run -t Web
Then you will restore the packages by executing the command given below
> dotnet restore
After that you will execute the run command to build and host the application locally
> dotnet run
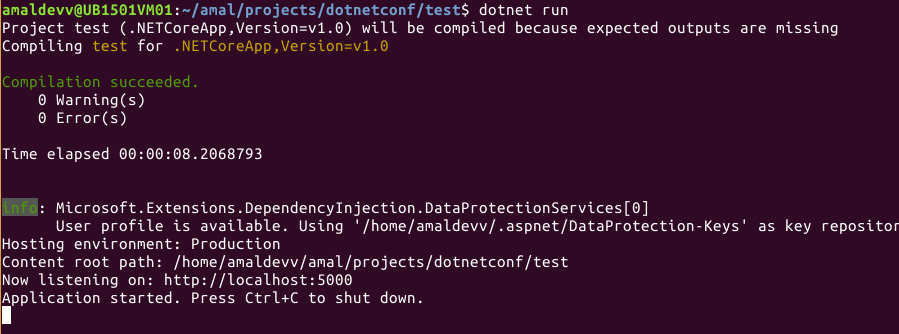
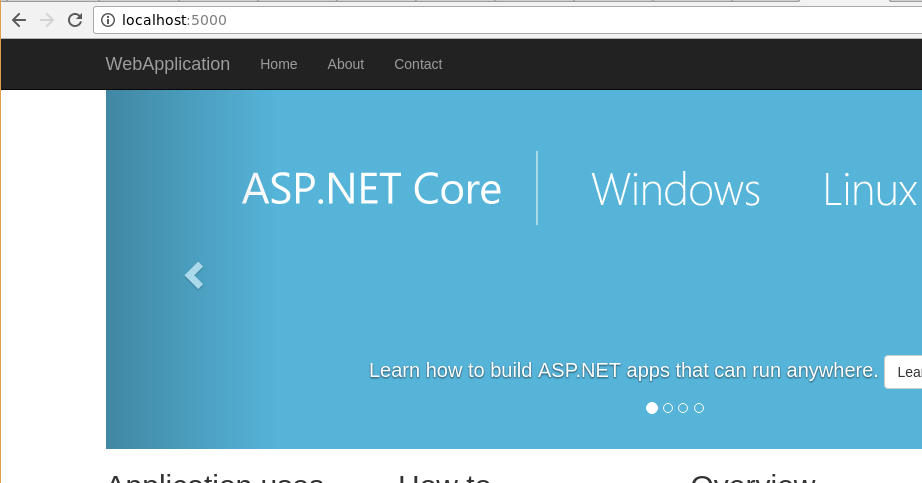
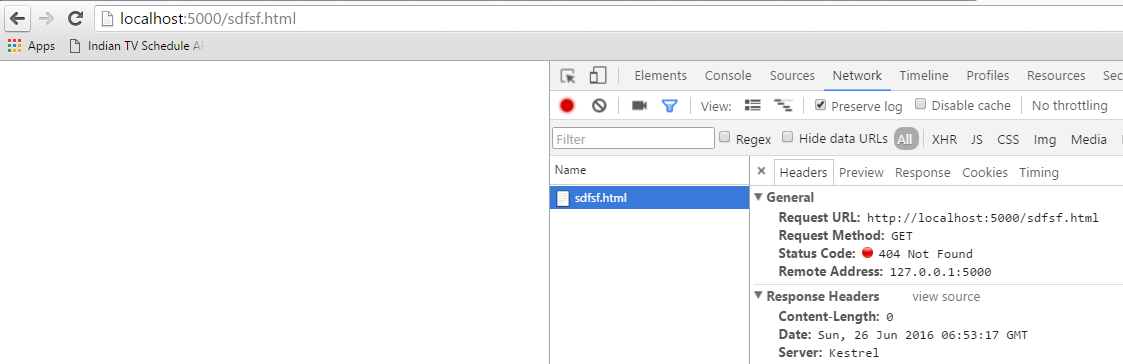
When this command is executed, it will first compile the application and upon successful build it will then host it using the built-in web server named Kestrel. Kestrel will use the port number 5000 by default for listening the requests for your app.
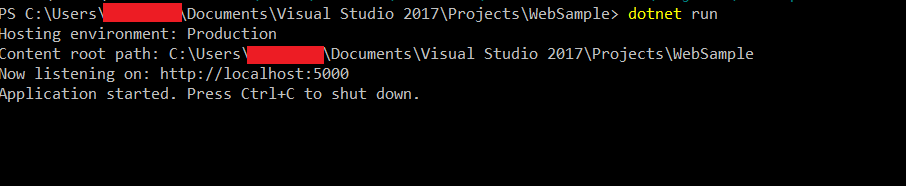
From the screenshot you can see that the app is using port #5000 and is binded to localhost. This will be perfectly ok in a Dev enviroment since the developer will creating the application and is hosting it in the same machine. But this won't work in a production environment, where the requests to our app will be coming to the server from different machines out in the wild. That means, if you try to access the site using the ip address of the machine instead of localhost you will get a 404 error.

elmah.io - Logging Exceptions to the Cloud
Elmah stands for Error Logging Modules and Handlers is a great open source application logging utility for ASP.NET which is available for some time now. Some of the features provided by Elmah are given below.
- Logging Unhandled exceptions
- Provides a web page to view the logged exceptions
- Also provides a web page to view all the details of a logged exception
- Option to send an email notification when an error occurs
- RSS feed for the last 15 errors from the log
- Options for backing store for the log includes in-memory, SQL Server, flat file, Oracle, SQL Lite etc
Normally when we log exceptions we will keep the info in a flat file or in the database, but Elmah got another option which is to directly store all the logs in the cloud via elmah.io without much change to your existing framework.
Set Up elmah.io
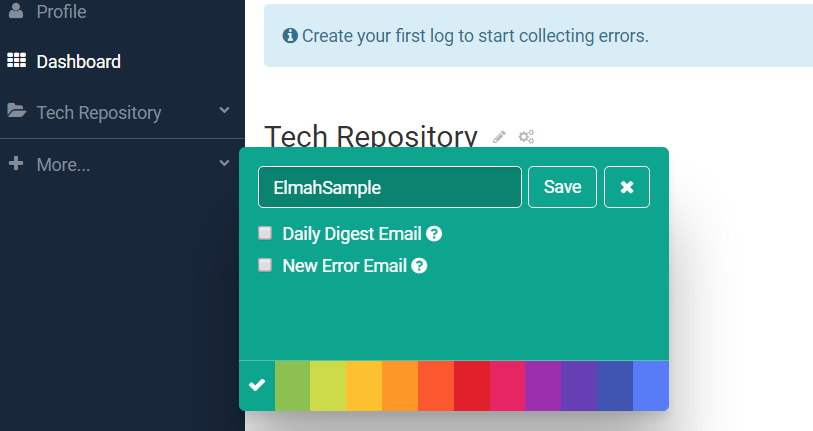
First you need to create an account in elmah.io, it's pretty simple and even you can use any of social logins provided by Twitter, Facebook, Outlook or Google. Once you create the login, just create a log for your application from the dashboard. Just give a name for the log and click save. We will leave the other options for the time being. Also whenever a log is created, Elmah will create a unique id for the log, keep a note of it as we need it later when we configure it in our project.
Setup your project to use elmah.io
Now, in our project we need to add a Elmah logger by installing the following command in the Nuget Package Manager Console.
Install-Package elmah.io

RemoteValidation Attribute in ASP.NET MVC
One great feature we have in ASP.NET MVC is ability to do client side validations using Data Annotations and it definitely save a lot of time from writing mundane client side scripts for validations such as required, number formats, email formats etc. When we decorate properties with validation attributes, the runtime will inject JavaScript automatically when the page is rendered to do that validation. But in some scenarios we will need to do the validation in the server side say in cases such as we need to verify an user exists or not when the data is entered in the text box. Most of us will invoke an ajax call on the blur event to achieve this, but in MVC there is validation attribute that can do this for you with minimal amount of code.
Remote Validation Attribute
Remote Validation is the process in which we perform the validation in the server side for a specific control without posting the entire form information to the server. In ASP.NET MVC, we will use the Remote attribute in the System.Web.MVC namespace to the decorate the property. Let's take an example wherein we need to validate an username exists or not when he type it in the form field.
Step 1 : Decorate the property
Decorate the property with the Remote attribute with first param being the action name that needs to be executed, second one is the controller name and third is the message that needs to be shown when validation fails.
using System.ComponentModel.DataAnnotations;
using System.Web.Mvc;

public class User
{
    [Required]
    [Display(Name = "Enter Username")]
    [Remote("CheckExistingUser", "User", ErrorMessage = "Username already exists!")]
    public string UserName { get; set; }
}
Step 2 : Create the Action Method and Validation Logic
Now you need to create the action method in the controller which specified in the attribute. Here I have created a method for validating the username which will return a false if the text entered in the field is admin or administrator.
public ActionResult CheckExistingUser(string UserName)
{
     try
     {
          return Json(ValidateUser(UserName), JsonRequestBehavior.AllowGet);
     }
     catch (Exception ex)
     {
          return Json(false, JsonRequestBehavior.AllowGet);
     }
}
private bool ValidateUser(String UserName) { if (UserName.ToLower().Equals("admin") || UserName.ToLower().Equals("administrator")) return false; else return true; }Disable a Module in Orchard SDF Database
Somedays ago I was dealing with an issue that caused my blog www.techrepository.in to go offline. I was playing around the SSL module in Orchard Dashboard and accidently saved it with some incorrect settings. It brought my entire site down and I was unable to login to the Dashboard too. One of the option I had was to download a backup, restore it in local and then upload it back to production which will subsequently override my incorrect setting. But I didn't want to go that way because it was time consuming and lot of work involved, so I decided to put it in the backburner for the time being and decided to consider it if nothing works out.
I googled a lot and finally stumbled on an article which explained the steps needed to disable a module using the database Orchard uses. Normally when we configure Orchard for the first time, we have the option to choose either SQL Server or SQL Server CE as the database. In my case I chose SQL CE database and now I needed to find a tool which can be used to connect and run queries against it. I found this wonderful utility called LinqPad for this and I have already published a detailed post on how to use it with a SQL CE database.
First thing you needed to do is to stop the website in IIS and download the SDF file from your hosting space. For an Orchard CMS, the default location for the database will be Site Root -> App_Data -> Sites -> Default. The structure of these two tables are given below.
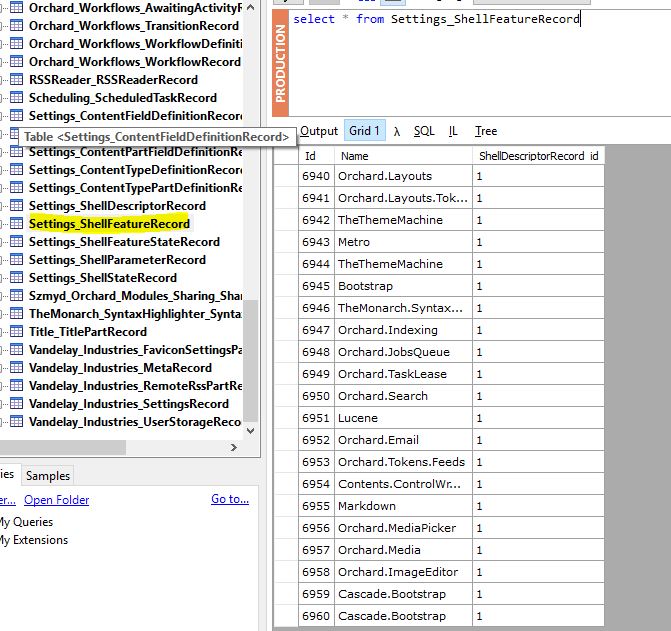
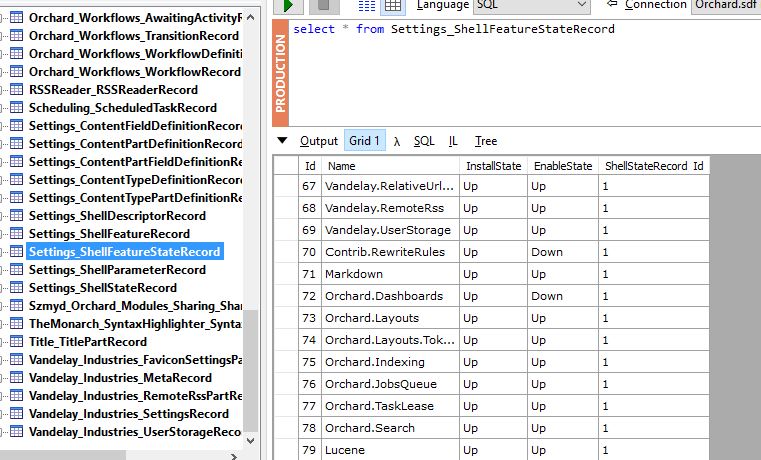
To disable a module, you will need to delete the entries for the module from the two tables
Settings_ShellFeatureRecord
Settings_ShellFeatureStateRecord
Once the entries are deleted, you can upload the SDF file back to your hosting space by replacing the existing one. Also you need to delete the cache.dat file in the App_Data folder before restarting the website in IIS. That's all you need to disable a module, now you will be able to access your site and can verify this by checking from your Orchard Dashboard.
Using LinqPad to Access Your Orchard SDF Database
Recently I was trying to setup SSL for my site www.techrepository.in and was playing around with the SSL module in Orchard. I accidently entered incorrect settings in the module which brought down the site and really wanted to bring it back as soon as possible. I definitely didn't want to download the backup, restore it in local and try to correct it by using the CLI tool available in Orchard. When I googled for solutions to resolve this issue, found one site that explained the steps to disable the module by directly updating the datastore of a blog hosted using Orchard.
I was using the SQL CE option as the backend for my blog, so I tried connecting to it using SQL Server Management Studio 2014 but only to found later that it's no longer supported. Again, I resorted to google and found this wonderful utility called LinqPad which support SQL CE databases. So in this post, I will be showing you how to connect the database and run queries against it.
About LinqPad
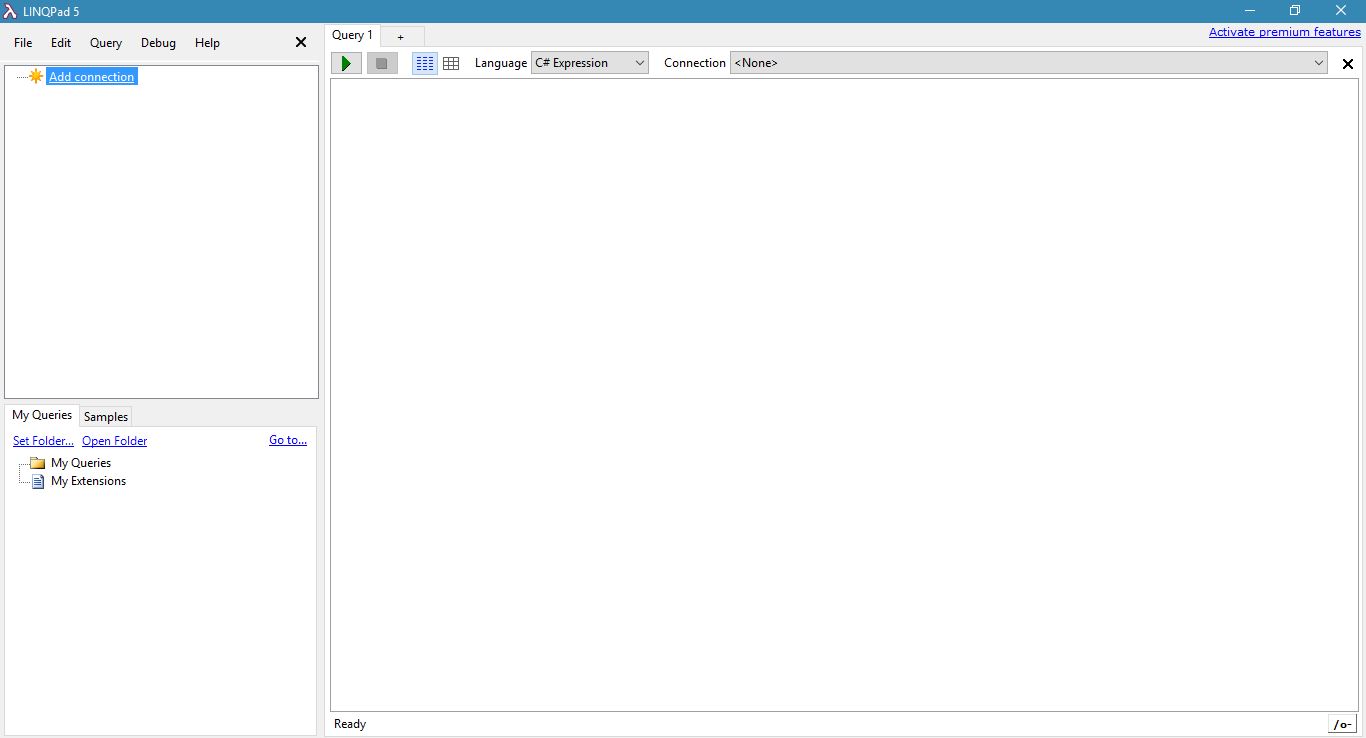
You may think that LinqPad can be used only for experimenting the Linq queries, but it's much more than that and according to the creators it's an ultimate scratchpad for C#, F# and VB. You can read more about the utility in their site and can be downloaded from here. The installer is around 14 MB only and installation won't take much of your time.
The home screen of the utility is a minmalistic one, has two list boxes on the left for showing the connections and other for showing the saved queries. The big one on the right is the playground where you can write and run queries against your database.
Consolidate Model Validation Errors as a Single String in ASP.NET Web API
As we all know that we can do validation in ASP.NET MVC by decorating the model with validation attributes and when the page is generated by the framework it will automatically generate the client side validation scripts. You can read more about it in the Microsoft Documentation here. Normally the output will be like in the figure given below.
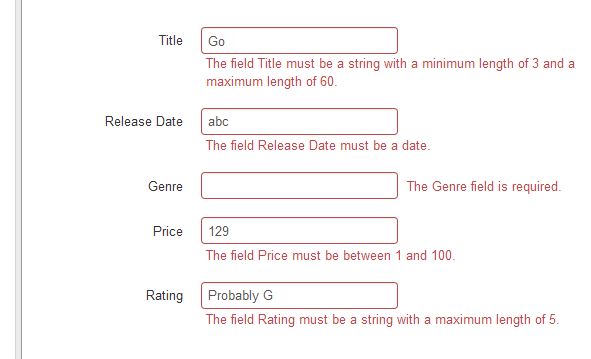
Let's see how we can use the same mechanism in ASP.NET WebAPI to do the validation. I have created a model class as shown below
public class Employee
    {
        [Required]
        [MaxLength(50, ErrorMessage="First name should not exceed 50 characters")]
        public string FirstName { get; set; }
        [Required]
        [MaxLength(50, ErrorMessage="Last name should not exceed 50 characters")]
        public string LastName { get; set; }
        [Required]
        [MaxLength(200, ErrorMessage="Address should not exceed 200 characters")]
        public string Address { get; set; }
        [Required]
        [EmailAddress(ErrorMessage="Email is invalid")]
        [MaxLength(50, ErrorMessage="EmailAddress should not exceed 50 characters")]
        public string EmailAddress { get; set; }
    }
And created a POST method as given below which basically validates the model and if any errors are found then returns an error as response.
public HttpResponseMessage Post([FromBody] Employee emp) { if (!ModelState.IsValid) return Request.CreateErrorResponse(HttpStatusCode.InternalServerError, ModelState); return Request.CreateResponse(HttpStatusCode.Created, emp); }Compile a ASP.NET Core Web App on the fly using dotnet watch command
One of the mostly used feature in Visual Studio while developing ASP.NET web applications is the ablity to make changes on the fly in the source code and able to see the changes in the browser without doing a compilation process manually. Actually Visual Studio tracks the changes made in the code and when you save the modifications, VS will automatically compile the changes in the background and restrats the session.
In the .NET Core world, most of the development is happening with code editors such as Notepad, Visual Studio Code etc. These are vanilla text editors and lacks most of the features found in Visual Studio. So .NET Core team has created a command line tool called dotnet watch to achieve this ability for .NET Core. It's basically a file watcher which restarts the specified application whenever there is change is made in the source code. You can read more about it in the documentation hosted in GitHub.
To add this functionlity in your code, you need to add the reference in the tools section in the project.json file as shown below.
"tools": {
    "Microsoft.DotNet.Watcher.Tools": "1.0.0-preview2-final"
  }
After adding the entry in the tools, you needs to restore the package using the dotnet restore command to get all the required files for the watch tool.
Syntax
dotnet watch <dotnet arguments>
The watch tool can be used to compile, run application or test and publish whenever there is a change in the source code. So the <dotnet arugments> can be compile, run, publish etc. For the run command the usage is as shown below
Usage
dotnet watch run
Now, if you make any changes in server side code, the application will be automatically compiled and the reflected changes can be seen by just refreshing the browser. In the following animation, if you look closely in the Terminal Window you can see that the application is stopped and compiled automatically when the source code is saved after making the changes.
So using this tool, whenever we need to make change in the source code there is no need to stop the running instance and executing the dotnet run command again. Similary it can be used along with any other dotnet command as discussed in the post here in the documentation.
Deploying an Optimized Image of your ASP.NET Core MVC Web App in Docker
In one of the posts I authored in the blog, I have shown you how to deploy an ASP.NET Core Web application in a Docker container, but the approach in the post has got a significant disadvantage. In that approach we always copied the entire contents of the directory which included all the static files, source code files etc, then restores all the packages inside the container and builds the application before it’s hosted in the container. This increases the boot up time of the container as well as the file size of the container.
In this post, I will show you how to publish a web application into the container rather than copying all the files into container and then build the application inside that. I am going to create an .NET Core MVC web application using the dotnet new command, you can read more about that my post here.
Step 1 : Create Project
dotnet new –t web
Step 2 : Restore Packages
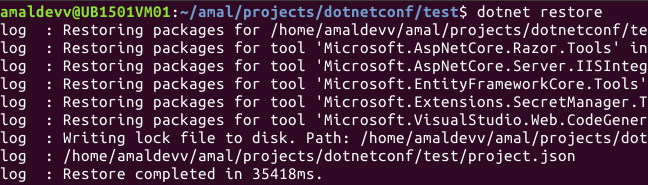
dotnet restore //restores all the packages referenced in the project.json files
Step 3 : Publish Project
dotnet publish –c Release –o publish
Publishes the output of the project to the publish folder using the Release configuration. Before running the command make sure that node, bower and gulp is installed in your machine otherwise the publish command will fail
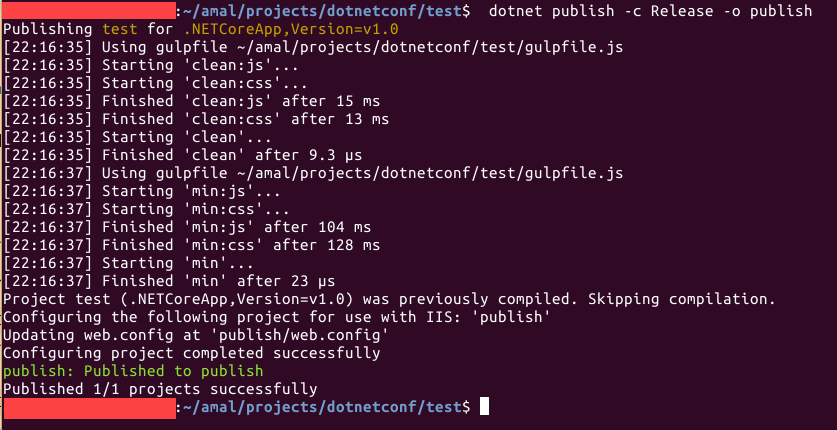
If you look inside the publish folder you will find that it has copied all our static files and resources along with the dlls of our application and the dependencies used in it
Scaffolding an ASP.NET Core MVC application using dotnet command
We all know that the dotnet new command will create a new console project containing a two files Program.cs and project.json out of the box for you
dotnet new

Output

It was of great help in getting started with a console application in .NET Core, but this command was missing a more important feature – the ability to create a ASP.NET Core Web project from the command line. So, we developers relied on scaffolding tools such as yeoman to generate Web/MVC/Web API projects targeting .NET Core. So whenever the .NET team made changes to the framework and tools, we faced some incompatibilities. Either we needed to wait till the template is upgraded to support the new changes or needed to manually update the files after the project is created.
This is now a thing of the past with the latest update to the .NET Core project implementing to facility to scaffold an MVC project targeting the Core framework.
Syntax
dotnet new –t web
Output


The process of building and running the web project remains the same by using the following statements
dotnet restore //restores the referenced packages
dotnet run //compiles the project if it’s not and then hosts the application in the default port 5000
Consuming Rest API methods in .NET Core MVC application
Up until we need to rely on third party libraries for consuming a Web API in .NET Core applications. Even though Microsoft has got the Microsoft.AspNet.WebApi.Client library that can be used for consuming API methods, the support for .NET Core was not there until now. This library had a dependency on Microsoft.Net.Http library which was not supported in .NET Core. So with the release of the 5.2.3 version of Microsoft.AspNet.WebApi.Client they have fixed this issue and now it's available for you to use in .NET Core web applications too.
Step 1 : Add reference in project.json
You need to add following entries under dependencies section in the project.json file as given below.
The Microsoft.AspNet.WebApi.Client is dependent on System.Net.Http and System.Runtime.Serialization.Xml libraries and that's why we need to add the above ones in the json file
Step 2 : Use HttpClient to consume API
We will use an object of the HttpClient class in the System.Net.Http namespace which was rebuilt for supporting .NET Core in latest version to invoke a connection to the service and for consuming the method. Then we will the base address and request headers using the BaseAddress and DefaultRequestHeaders methods respectively. To consume the web method, we will use the GetAysnc method which returns a resposne stream object containing the response from the Web API and by using the ReadAsAsync to read the result from the stream
For other operations such as Post, Put and Delete we can use PostAsAsync, PutAsJsonAsync, DeleteAsync
For more please refer here: http://www.asp.net/web-api/overview/advanced/calling-a-web-api-from-a-net-client
Using Nginx as a Reverse Proxy for ASP.NET Core Web App in Docker
One of the main features of .NET Core framework is the ability to run the applications on variety of environments such as Linux, MacOS etc. It includes a light weight server known as Kestrel which is used to run web apps targeting the .NET Core framework. But one of the main disadvantage of Kestrel is that it is primarily a development server and is not recommended for production environments. We always used IIS as server for hosting .NET Web app, but in the case of .NET Core since it's cross platform and we can't rely on IIS for platforms other than Windows. In the case of Linux, Nginx is one of the most popular web server out there and is very good at serving static content. But, for the example in this post we are going to make use of the reverse proxy(passing requests to other servers) feature in Nginx to serve our core web app from a docker container running on a Linux distro.
I had already written a post about the on how to get started with Nginx and I recommend you to go through the post here if you are working with Nginx for the first time. In this post, I am going to host a .NET Core web app in a Docker container using Nginx and Kestrel to serve the site on a Linux machine.
Before I get started with coding, here's a little advice for all you guys. It is always a recommended thing to follow a proper structure for your source files in your project. In this case, I have created two folders, one for putting all the files related to .NET and one for putting all those related to Nginx as shown in the screenshot below.

Step 1 : Create .NET Core App
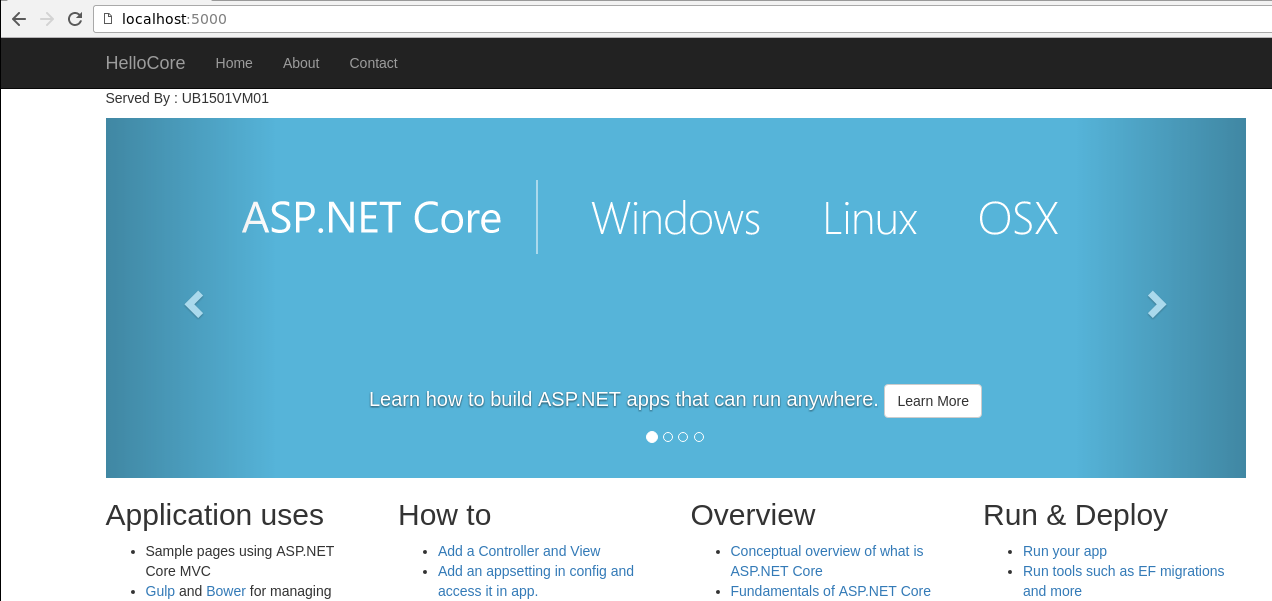
Create a sample mvc core application under the dotnet folder. I created this one using the boiler plate template provided by yeoman which generated all the folders and files showed in the above image. If you run the application now using the dotnet run command, it will host the application in Kestrel and can be accessed by using the url http://localhost:5000. I have modified the sample page to show the name of the server using the below code.
Served By : @System.Environment.MachineNameSince I'm running it from the local machine, the page will show the name of my local box as the server name as shown in the image below.
Since we are going to host our application inside the Docker container, let's create a docker file which contains some instructions to Docker to set up the container. It basically tells which base image should be used, copies the files from the current folder to a folder called app inside the container and sets it's as the working directory. Then it executes two dotnet commands to restore the packages first and then executes the build. Once the build is completed it exposes the port #8018 for serving the app from the container. The ENTRYPOINT command is used execute the application when we start the container and in our case it will execute the run command to host the application.
Serving Static Files Using nginx in Docker
nginx is an open source web server lighting up the hosting world with rapid growth and is catching up with the sector leader Apache very fast. It's very fast, light weight web server which can also act as a load balancer or a caching server. One of the main feature of nginx is it's capability to handle a large number of concurrent connections and is the main reason why the popular sites such as wordpress.com, Hulu etc is using it. In nginx, scaling is implemented using an asynchronous architecture instead of threads to handle simultaneous requests. This helps nginx to serve lot of requests concurrently without consuming lot of system resources.
In this post, I am going to take you through the various steps needed to set up nginx in a Docker container to serve static files.
Step 1 : Pulling Docker Image
The image for ngnix for Docker is available in the Docker Hub and can use the below command to pull down the latest image into your local Docker client.
docker pull nginx
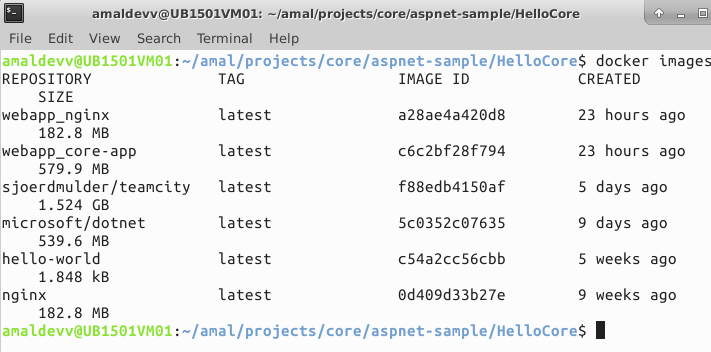
It will pull the latest image from the hub if it's not found in your local docker client and once the download is completed we can verify the same by executing the docker images command. I had downloaded the image some time back and you can see that in the below screenshot as the last item in the list.
Installing .NET Core in Ubuntu 15.10 in Azure
One of the benefits of being a Microsoft MVP is the credit you receive for using various services/resources like in Windows Azure which is now around 9.1K INR for each month. That credit is more than enough if you want to play with various options in Azure. So I went ahead and created a Linux VM in Azure using Ubuntu 15.10 distro, then subsequently installed Ubuntu Desktop, xrdp and xfce for connecting remotely into the VM using RDP from Windows machines. I am planning to write a post on the installation process and steps needed for configuring it and will share it as soon as it's available in the blog.
Many of you people may be knowing that Microsoft has released .NET Core 1.0 to the public last month. It's the new .NET framework completly built from scratch, modular and truely open source. In this post, I am going to show you the steps needed for installing .NET Core SDK in a Linux machine. .NET Core SDK consists of .NET Core CLR runtime and CLI tools which are needed for developing the applications in .NET core.
Step 1: Check Ubuntu version
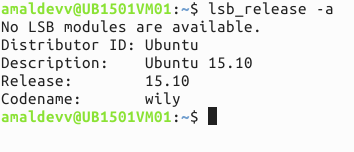
Make sure that the installed version of Ubuntu is 15.10. The following steps were tried and tested in Ubuntu 15.10 and may not work in other versions. You can check the version from terminal by using the following command.
lsb_release -a
Step 2: Set up feed and update packages
Add the feed for downloading .NET Core SDK to dotnetdev.list by executing the following command.
sudo sh -c 'echo "deb [arch=amd64] https://apt-mo.trafficmanager.net/repos/dotnet-release/ trusty main" > /etc/apt/sources.list.d/dotnetdev.list'
Add the following key to the list so that packages authenticated with this key will always be considered as a trusted one.
sudo apt-key adv --keyserver apt-mo.trafficmanager.net --recv-keys 417A0893
Execute the apt-get update command to fetch the latest version and dependencies
sudo apt-get update
Bundling & Minification in ASP.NET Core MVC Application
Bundling is the process of concatnating a set of files into one single file and Minification is removing all the whitespaces and comments in the code, removing extra statements to make the file smaller in size. By doing bundling and minification in our application will reduced the request payloads as well as the number of requests to the server for downloading the assets such as CSS and JS files.
.NET Framework had an in-built bundling and minification feature for sometime and since the advent of .NET Core they moved to use Grunt and Gulp for doing the same in both the RC versions. These tools primarily used JavaScript for operations such as file manipulation, automation, bundling and minification. Using these tools, we can also schedule tasks to run during a build or a publish event and is very useful in setting up a workflow for these opertions. The only downfall of these were we need to have some knowledge of programming in JavaScript and if you are not a fan of JavaScript then you will have some difficulties playing with it.
So Mads Kristensen created an extension which automates these processes and the functionality can be achieved with no code. So when Microsoft released .NET Core 1.0 they integrated this into the ASP.NET Core Web project template and is now available for you out of the box, if you are using Visual Studio 2015 for your developement. Basically it supports
- Bundling your assets into a single file
- Minification of your assets
- Create triggers for doing re-bundling automatically
- Globbing patterns
- MSBuild support
Also the same is available as a NuGet package so that non Visual Studio users will also be able to use that in their projects. In this post, I am going to show how to do this a ASP.NET Core MVC project using Visual Studio Code and .NET CLI tools.
Adding Reference & Configuring BundlerMinifier
The first is to add the BundlerMinifier package in your json file as shown below
tools": {
    "BundlerMinifier.Core": "2.0.238",
    "Microsoft.AspNetCore.Razor.Tools": "1.0.0-preview2-final",
    "Microsoft.AspNetCore.Server.IISIntegration.Tools": "1.0.0-preview2-final"
  },
Now we need to add a configuration file in which we will specifiy the files that needs to be bundled and minified. The default name for the config file is bundleconfig.json, the advantage being that the tool will take it automatically by the bundle command. If we specify a different filename, then we need to set it explicitly while executing the command for bundling.
As you can see from the above snippet, we can specify multiple files that needed to be bundled into a single file as input and when the bundling operation is completed the unified file will be named using the value set in the outputFileName property. To minify the files, just set the value as true for the enabled property in the minify element.
Adding Google Verification File in Orchard CMS
Whenever you want to serve a static file from your Orchard website, you will get a 404 error(page note found) error by default. This is happening for Orchard because in the web.config file the default configuration is set to return a page not found error for all the static files in the root. This will become an annoying issue whenever you try to verify the identity of the website by uploading a verification file in the root folder as I found out when I wanted to verify the identity of my site from Google Search Console.
This is issue can be resolved in two ways,
1. Configure a route in ASP.NET MVC to serve the static page.
2. Modify the web.config file in the route to return the correct page instead of 404
I will explain the steps needed to overcome this issue using the second approach. In this step, you needs to make couple of changes in the web.config file in the root directory of your Orchard site. The modifications is to be done in the sections <httpHandlers> and in <handlers> inside <system.webServer>. It is recommended to make these changes in both the places so that it works both on IIS6 and IIS7.
By default the <httpHandlers> and <handlers> sections will have the following entries in it
<httphandlers>
    <add path="*" verb="*" type="System.Web.StaticFileHandler"></add>
</httphandlers>

<system.webServer>
   <handlers accessPolicy="Script">
     <add name="NotFound" path="*" verb="*" type="System.Web.HttpNotFoundHandler" preCondition="integratedMode" requireAccess="Script"/>
   </handlers>
</system.webServer>
I have omitted some entries from the config file in the following snippet as it's not relevant for the topic which is being discussed in this post. Basically these two entries are telling the web server to return a page not found error whenever we request for a static file. So we will add the following entries into the config file for ignoring this rule.
<httphandlers>
   <add path="file.html" verb="*" type="System.Web.StaticFileHandler" />
   <add path="*" verb="*" type="System.Web.StaticFileHandler"/>
</httphandlers>

<system.webServer>
  <handlers accessPolicy="Script, Read">

     <add name="VerificationFile" path="file.html" verb="*" modules="StaticFileModule" preCondition="integratedMode"
       resourceType="file" requireAccess="Read" />

     <add name="NotFound" path="*" verb="*" type="System.Web.HttpNotFoundHandler" preCondition="integratedMode" requireAccess="Script"/>
  </handlers>
</system.webServer>
Please make a note of the following points to make our solution work
- If you add the entries before the existing ones which says to serve the 404, then our entries doesn't have any effect. So you should always over statement above the existing one.
- Give Read permission in accessPolicy for handlers in <system.webServer> section.
- Make sure that the name provided is unique across the handler entries in the config file.
Logging into Console in ASP.NET Core MVC Application
One of the important upgrades happened in .NET Core is the complete rewrite of the diagnostic logging pipeline which emits different events for logging errors. .NET Core now supports logging framework out of the box and also supports extensibility to make use of third party logging frameworks such as Log4Net, NLog etc. Logging can be implemented in quick time with a minimal amount of code in your application.
Microsoft uses Microsoft.Extensions.Logging namespace for implement logging functionality and acts a wrapper for third party logging frameworks. This eradicates the need of writing our own logging framework to provide abstraction for third party frameworks such NLog, Log4Net etc. Also it has got inbuilt providers for supporting logging into Console, Event log, Trace Logging etc.
Console logging in ASP.NET Core MVC application.
As I said earlier logging has got inbuilt support provided by the ILogger class in .NET Core. For that, first we need to add a reference to the Microsoft.Extensions.Logging package in project.json file. Add the following entries under dependencies section in the json file for implementing providers for console and debug logging.
"Microsoft.Extensions.Logging": "1.0.0-rc2-final",
"Microsoft.Extensions.Logging.Console": "1.0.0-rc2-final",
"Microsoft.Extensions.Logging.Debug": "1.0.0-rc2-final",
Custom Error Pages in ASP.NET Core MVC Application Using StatusCodePages Middleware
While developing a web application, one of the best practice every developer should follow is to set up a custom error page for the site. Showing that dreaded yellow page to the user during the occurance of an exception is highly unprofessional and is prone to security risks. In one of the earlier post in the blog, I have explained the use of StatusCodePages middleware and various approaches for implementing it in a ASP.NET Core web application.
In this post, I am going to implement custom error handling in an ASP.NET Core MVC application using the StatusCodePages Middleware. I will use the UseStatusCodePagesWithReExecute method provided by the middleware for showing the error the page in the case of an error. So let's add the following line in the Configure method in the Startup.cs file as shown below
app.UseStatusCodePagesWithReExecute("/Error");This method is telling the web server to execute the action method name Index in the ErrorController. Since we are using the ReExecute method the redirection will happen in the server itself thereby avoiding a round trip between the server and the client.
Now, we need to create the controller and the action method in it. Create a file in the Controller folder, save it as ErrorController.cs and add the following lines in it
Hosting ASP.NET Core Web App in Docker and Accessing it from outside
In one of the earlier posts here, I have explained the steps needed to deploy a console application created in your local machine into a docker container. Today, I am going to go through the various steps needed for deploying a .NET Core web app into a Docker container using a dockerfile.
Please refer the links given towards the bottom of the post to know more about Docker for Windows and .NET Core Apps.
Creating the Project.
In this post, I am going to use Yeoman for scaffolding a ASP.NET Core web app from the command prompt. You can read more about Yeoman and how to set it up in machine by referring the links given below.
Getting Started With Yeoman
Scaffolding Using Yeoman
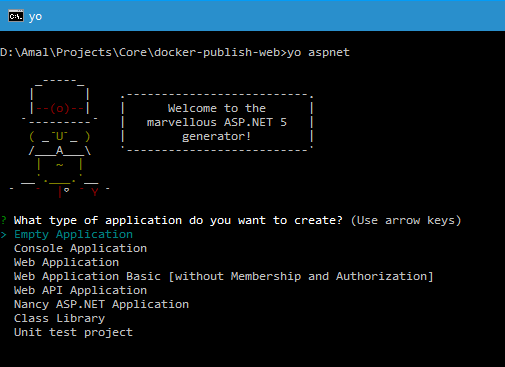
The command used for scaffolding a ASP.NET Core web app is
yo aspnet
When this command is executed, Yeoman will list the available options as shown in the image below.
Using StatusCodePages middleware in ASP.NET Core Application
In ASP.NET Web and MVC applications, we have a customErrors.Mode property in the web.config file to specify custom error pages for exceptions happening in the application.
In an ASP.NET Core web application we can make use of the UseStatusPages middleware to return a custom error page or a error message to the output stream. The middleware can be used to return a custom error message or page when there is an invlid response code between 400 and 600. Normally, the 4xx error is used for client errors where as 5xx is used for server errors.
To explain the various options available in the middleware, I am going to use a ASP.NET Core web application created using Visual Studio Code and .NET CLI tools to run the application. You can also do the same using Visual Studio IDE too.
Let's create a empty MVC project and run the application using the dotnet run command. It will self host the application and exposes port# 5000 for accessing the site. Open the site in the default browser by typing in http://localhost:5000/ and if you try to access a page which doesn't exists in the project, the browser will show an empty page or a page with a message saying that Page not found. Given below is the screenshot of the page I got in Chrome. If you open up the developer tools by pressing F12, you can see that the response from the server has 404 as status code.
Connecting Azure Blob Storage account using Managed Identity
Posted 12/9/2022Securing Azure KeyVault connections using Managed Identity
Posted 11/26/2022Manage application settings with Azure KeyVault
Posted 11/9/2022Adding Serilog to Azure Functions created using .NET 5
Posted 4/3/2021Learn how to split log data into different tables using Serilog in ASP.NET Core
Posted 4/23/2020