Memory dumps of a developer
Articles and tutorials on .NET Core, ASP.NET MVC, Kendo UI, Windows 10, Windows Mobile, Orchard
Connecting Azure Blob Storage account using Managed Identity
In the previous post, we saw that we can connect to Azure KeyVault from ASP.NET Core application using the default credentials. If you haven't read that, please find it here
Manage application settings with Azure KeyVault
But this is not a secure way of doing things obviously due to security concerns. In order to overcome this, the recommended approach is used to Managed Identity in Azure. This will work only if your application is hosted in Azure. It is similar to a service principal which connects on your app's behalf to communicate with other resources
Create Managed Identity
The first step is to create a Managed Identity resource in Azure and then give read permission for this identity in the Keyvault which you need to communicate
You can refer to the official documentation given below to perform this step
Managed identities for Azure resources
Connecting to KeyVault from ASP.NET Core Web App
In my sample code, I want to connect to a storage account using MI, I have added the necessary configuration entries is my appsettings.json. This can change depending our your requirement
Securing Azure KeyVault connections using Managed Identity
In the previous post we saw that we can connect to Azure KeyVault from ASP.NET Core application using the default credentials. If you haven't read that, please find it here
Manage application settings with Azure KeyVault
But this is not a secure way of doing things obviously due to security concerns. In order to overcome this, the recommended approach is used to Managed Identity in Azure. This will work only if your application is hosted in Azure. It is similar to a service principal which connects on your app's behalf to communicate with other resources
Create Managed Identity
The first step is to create a Managed Identity resource in Azure and then give read permission for this identity in the Keyvault which you need to communicate
You can refer to the official documentation given below to perform this step
Managed identities for Azure resources
Connecting to KeyVault from ASP.NET Core Web App
Add a Nuget package called Azure.Identity
<PackageReference Include="Azure.Identity" Version="1.6.0" />
Modify the entries in your appsettings.json to add entries for the key vault URL and managed identity id
Manage application settings with Azure KeyVault
Securing your data and application configuration should be of prime importance for an application developer/architect and needs to be taken care of during the design phase itself. It is always better to take preventive steps rather than do firefighting after an incident. There are a lot of best practices out there to safeguard the data, but from time to time we ignore/forget to securely store app configuration settings.
Very often developers tend to store hard-coded passwords, tokens, authorization keys, etc in the code or in the application configuration files and then commit the code into the version control. If your repo is publically available or some bad actors got access to it, then you may end up in a lot of trouble. There are automated bots that look for this kind of information by scanning the repos publically available in GitHub or BitBucket and then target your infrastructure with these credentials
Securing the configuration settings
There are a lot of ways you can make that secure, for example by encrypting the entries in the configuration files or by keeping that sensitive information in some other medium such as a database. Another option is to rely on resources provided by cloud vendors such as Microsoft or Amazon.
Azure KeyVault is one such cloud service provided by Microsoft for securely storing and accessing not only secrets but also certificates, keys, passwords, etc. Please refer to this official document for more details about Azure KeyVault. Apart from storing it securely, KeyVault provides additional features such as access control, audit logging, versioning, validity, and much more. With the help of these features, we can make sure that only authorized personnel/app has access to the data with proper auditing and expiration controls.
Adding Serilog to Azure Functions created using .NET 5
The post is based on .NET 5.0Before the release of .NET 5, all functions developed using .NET ran as a class library in Azure and it was running inside the same process as the host. But with .NET 5, a function app built with .NET 5 runs in an isolated worker process which lets you decouple your function code from the runtime. A .NET isolated function is basically a console application targeting .NET 5 and requires the following files
- host.json file
- local.settings.json file
- C# project file which defines the project and dependencies
- Program.cs file(entry point of the app)
In this post, I will go through the steps that are needed for creating a .NET 5 Azure function, integrating Serilog for file logging, debugging, and running it locally, and then move on to publishing the function to Azure. You may already know that Azure functions already support some form of logging out of the box, but you may need to implement custom logging mechanisms depending on your need or for satisfying organizational requirements. I am going to use Serilog, which is a third-party logging provider which supports .NET and is also one of the most widely used in the ecosystem
Pre-requisites
There are some things you need before you start implementing this one. Azure Subscription is needed for hosting the functions in Azure, .NET 5 SDK, and Azure Functions Core Tools. Azure CLI is needed for developing, debugging, and publishing the app to Azure and VS Code for writing code.
Azure Subscription
.NET 5 SDK
Azure Function Core Tools version 3.0.3381 or greater
Visual Studio Code
Azure CLI
Step 1
The first step is to create a new Functions project, we will be using the func command to create a new one from the command line. Even though you can edit and debug the project in Visual Studio, full support is not yet available as the project templates for creating the project and all. The following command will create a new Azure Function project and specifying the runtime as dotnetisolated enables you to run the app on .NET 5
func init FunctionLogger --worker-runtime dotnetisolated
When this command is executed, it will create all the necessary files including the host.json and local.settings.json files. The host.json file contains the configuration options affecting all the functions in your app whereas the other file can be used for storing options such as connection strings, secrets, and other settings used by your app. Since this file can have sensitive data, it is excluded when you check in the code to source control
Step 2
Next, we will move on to create a new function in the project which is triggered by an HTTP request. The below statement creates a function named HttpExample using the HttpTrigger template and enables anonymous authentication
func new --name HttpExample --template "HTTP trigger" --authlevel "anonymous"
Learn how to split log data into different tables using Serilog in ASP.NET Core
For most of the application developers, file systems are the primary choice for storing the information generated by the logging providers. One of the main drawbacks of using the files is that it's very difficult for the search for information or to do an analysis of the information written to it over time. Third-party logging providers such as Serilog have facilities to persist the data in database tables instead of the file system. Even then, if you use a single table to write all you errors and other debug information, the size of the table will grow considerably over time which can affect the performance of the whole operation itself.
So, in this post, I will explore the possibility of using multiple tables for storing the logging information using Serilog. If you are new to Serilog, please refer to my previous articles on the same here using the links given below.
- Implementing Logging in a .NET Core Web Application using Serilog
- Rollover log files automatically in an ASP.NET Core Web Application using Serilog
- Write your logs into database in an ASP.NET Core application using Serilog
Code snippets in this post are based on .NET Core 5.0 Preview 5
Step 1: Create a Web Application in .NET Core
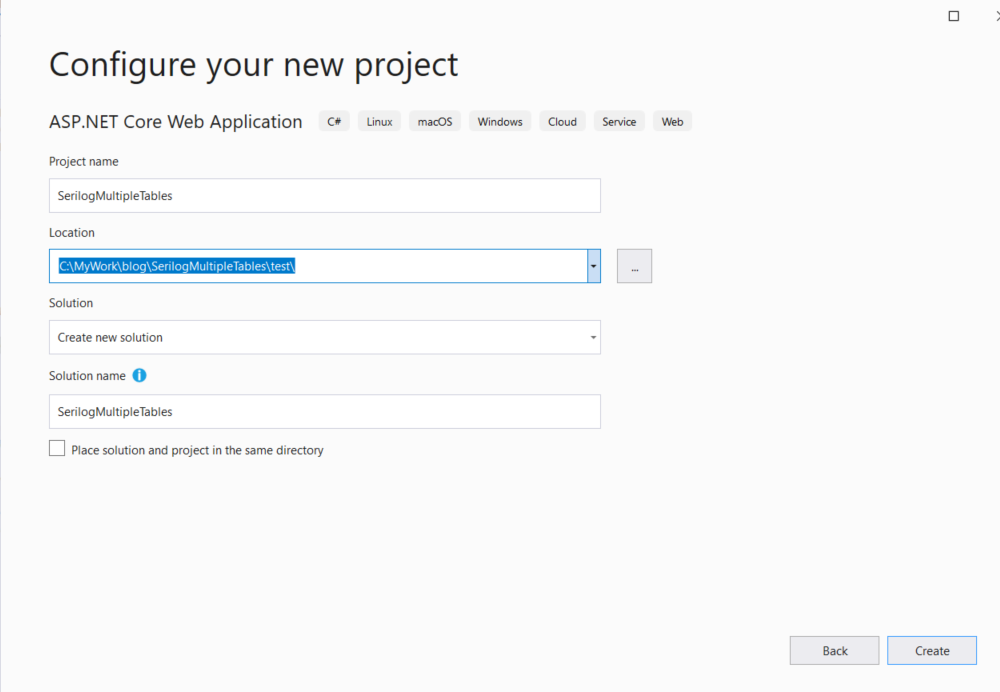
To get started we will create a new empty web application using the default template available in Visual Studio. Goto File -> New Project -> ASP.NET Core Web Application
Give a name for the application, leave the rest of the fields with default values and click Create
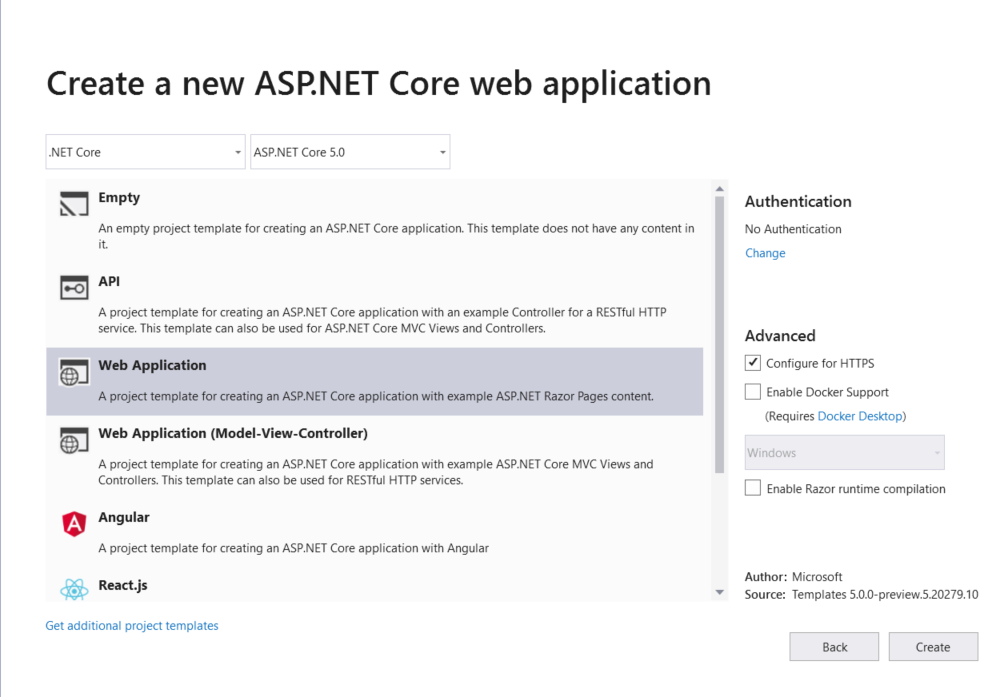
In the next window, select Web Application as a project template. Before you click on the Create button, make sure that you have selected the desired version of .NET Core in the dropdown shown at the top. Here, for this one, I selected .NET 5.0
You can also do this from .NET CLI using the following command
dotnet new web --name SerilogMultipleTablesWhen the command is executed it will scaffold a new application using the MVC structure and then restores the necessary packages needed for the default template.
Writing logs to different files using Serilog in ASP.NET Core Web Application
Application log files play an important role in analyzing the bugs and for troubleshooting issues in an application. It’s worth noting that the log files are also used for writing information about events and other information that occurs when the application is running or serving requests in the case of a web application. Most application developers use a single file to log everything from errors, warnings, debug information, etc. There is no harm in following this approach, but the downside is that it will be harder for you to segregate information from the file easily. We can easily overcome this by maintaining multiple log files depending on the need. In this post, I am going to show how we can achieve this with Serilog
Serilog is a popular third party diagnostic logging library for .NET applications, I have already written some post about it and it’s usage already. If you are new to Serilog, please refer to those posts using the links given below.
- Implementing Logging in a .NET Core Web Application using Serilog
- Rollover log files automatically in an ASP.NET Core Web Application using Serilog
- Write your logs into database in an ASP.NET Core application using Serilog
Code snippets in this post are based on .NET Core 5.0 Preview 5
Step 1 : Create a Web Application in .NET Core
Create a new ASP.NET Core MVC application using the below command
dotnet new mvc --name MultiLogFileSampleYou can also do this from Visual Studio by going into File -> New Project -> ASP .NET Core Web Application
When the command is executed it will scaffold a new application using the MVC structure and then restores the necessary packages needed for the default template.
By default, it will create two
jsonfiles named,appsettings.jsonandappsettings.development.json. These are the configuration files for the application and are chosen based on the environment where your application is running. These files will have a default configuration as shown below basically sets the default level for logging.{ "Logging":{ "LogLevel":{ "Default":Information", "Microsoft":Warning", "Microsoft.Hosting.Lifetime":Information" } } }By default, it is set as
Information, which writes a lot of data to the logs. This setting is very useful while we are developing the application, but we should set it higher severity levels when the application is deployed to higher environments. Since Serilog is not going to reference this section, we can safely remove this from the configuration filesWrite your logs into database in an ASP.NET Core application using Serilog
In most scenarios, we normally use a flat-files for writing your logs or exception messages. But what if you write that information into the table in a database instead of a file. To implement this functionality, we can make use of third-party providers such as Serilog to log information in a SQL server database. Even though it's not a recommended approach, one can easily search the logs by executing SQL queries against the table.
Installing Packages
Serilog provides the functionality to write logs to different sources such as files, trace logs, database and the providers for these are called Serilog Sinks. To write logs to a table in a SQL Server database, you will need to add the following NuGet packages
Install-Package Serilog
Install-Package Serilog.Settings.Configuration
Install-Package Serilog.Sinks.MSSqlServer
The first package contains the core runtime, the second package can read the key under the "Serilog" section from a valid IConfiguration source and the last one is responsible for making the connection to the database and writing information into the log table.
Configuring Serilog
Modify the
appsettings.jsonfile to add a new section called "Serilog". We will set up the connection string to the database, provide the name of the table and instruct Serilog to create the table if not found in the DB"Serilog": { "MinimumLevel": "Error", "WriteTo": [ { "Name": "MSSqlServer", "Args": { "connectionString": "Server=(localdb)\\MSSQLLocalDB;Database=Employee;Trusted_Connection=True;MultipleActiveResultSets=true", "tableName": "Logs", "autoCreateSqlTable": true } } ] },Rollover log files automatically in an ASP.NET Core Web Application using Serilog
We all implement logging in whatever applications we develop and over time it will grow bigger by each passing day. If we don't control that over time we will run into problems, especially with the size. Most of the logging providers help to overcome this by using rolling log providers which automatically archives the current log file when it reaches specific criteria or a threshold and creates the new file to resume the logging. In this article we will how we can make of the rolling file provider supported by Serilog to implement this functionality.
Step 1: Install Packages
First, install the following packagesInstall-Package Serilog
Install-Package Serilog.Extensions.Logging
Install-Package Serilog.Sinks.FileThe first package has all the core functionalities of Serilog whereas the second one is a provider for the logging subsystem used by ASP.NET Core(Microsoft.Extensions.Logging). The third package is responsible for writing the log information to the file, manages the rollover and all the related functionalities
Step 2: Configure Serilog
Modify theappsettings.jsonfile to include the path for the log file"Logging": { "LogPath": "logs//ex.log", "LogLevel": { "Default": "Information", "Microsoft": "Warning", "Microsoft.Hosting.Lifetime": "Information" } }Then, configure the sink to read this path from the config file and set it up to write to the file by modifying the
CreateHostBuildermethod inProgram.csfilevar configSettings = new ConfigurationBuilder() .AddJsonFile("appsettings.json") .Build(); Log.Logger = new LoggerConfiguration() .WriteTo.File(configSettings["Logging:LogPath"], rollOnFileSizeLimit:true,fileSizeLimitBytes:10) .CreateLogger()Implementing Logging in a .NET Core Web Application using Serilog
Setting up default logging
Create a new MVC application from Visual Studio. By default, Logging is enabled in the application via the ILogger interface. It has got some built-in providers for writing the log information to the console, event log as well as for third-party providers such as NLog, Serilog, etc.
For example, if you want to write logging information to the console window or event log, you will need to configure it in the
CreateDefaultHostBuildermethod in theProgram.csfile as shown below.public static IHostBuilder CreateHostBuilder(string[] args) => Host.CreateDefaultBuilder(args) .ConfigureLogging(logging => { logging.AddConsole(); logging.AddEventLog(); }) .ConfigureWebHostDefaults(webBuilder => { webBuilder.UseStartup(); }); In the case of a web app, you will get an
ILoggerfrom the DI container and use that object for writing into the configured log providers. Let's see how we can do that in theHomeControllerFirst, create a private variable for the logger interface.
private readonly ILogger<HomeController> _logger;Then modify the constructor as shown below
public HomeController(ILogger
logger) { _logger = logger; } Generate Help Pages for your ASP.NET Core Web Api using Swagger
For any Web API developers, documenting your API and its methods is of paramount importance. Because these are intended to be consumed third parties, they will find it hard to incorporate it without any proper documentation. Creating a document is a very tedious and time-consuming job and most of the developers are least worried about it. This is where tools like Swagger which can automatically generate the documentation for you by examining your API code.
Adding Swagger
To set it up, you will need to add the below package to your project. This is can be done using the NuGet Package Manager in Visual Studio or by executing the following command in the Package Manager Console window
Install-Package Swashbuckle.AspNetCore
This package will add the following components
- Swashbuckle.AspNetCore.Swagger : Middleware used to expose Swagger Document as a JSON endpoint
- Swashbuckle.AspNetCore.SwaggerGen : a generator that builds the Swagger Document by looking into your controllers and action methods
- Swashbuckle.AspNetCore.SwaggerUI : interprets the JSON outputted by the endpoint and builds an interactive UI
Configuring Swagger in your API Project
Adding and configuring Swagger is done in the Program class, first, you will need to import the following namespace
using Microsoft.OpenApi.Models;
Then in the ConfigureServices method, register the Swagger generator and define a document
services.AddSwaggerGen(c =>
 {
     c.SwaggerDoc("v1", new OpenApiInfo { Title = "Swagger Sample API V1", Version = "v1" });
 });
In the Configure method, add the two statements given below. The first one will enable the middleware to serve the generated document and the second one this document to show the interactive UI
Connecting Azure Blob Storage account using Managed Identity
Posted 12/9/2022Securing Azure KeyVault connections using Managed Identity
Posted 11/26/2022Manage application settings with Azure KeyVault
Posted 11/9/2022Adding Serilog to Azure Functions created using .NET 5
Posted 4/3/2021Learn how to split log data into different tables using Serilog in ASP.NET Core
Posted 4/23/2020