Memory dumps of a developer
Articles and tutorials on .NET Core, ASP.NET MVC, Kendo UI, Windows 10, Windows Mobile, Orchard
Serializing enums as strings using System.Text.Json library in .NET Core 3.0
.NET Core 3.0 uses the System.Text.Json API by default for JSON serialization operations. Prior versions of .NET Core relied on JSON.NET, a third party library developed by Newtonsoft and the framework team decided to create a brand new library that can make use of the latest features in the language and the framework.
The new library has got support for all the new features that got introduced in the latest version of C#. And this was one of the main reasons behind the development of the new library because implementing these changes in JSON.NET meant a significant rewrite.
While serializing an object into JSON using the new library we can control various options such as casing, indentation, etc, but one notable omission is the support for enums by default. If you try to serialize an enum in .NET Core 3.0 with the default library, it will convert it into an integer value instead of the name of the enum.
For example, let consider the following model and see if what happens when we serialize it using the System.Text.Json librarypublic enum AddressType { HomeAddress, OfficeAddress, CommunicationAddress } public class Employee { public string FirstName { get; set; } public string LastName { get; set; } public AddressType CommunicationPreference { get; set; } }and when you serialize it using the serialize method
List
employees = new List { new Employee{ FirstName = "Amal", LastName ="Dev", CommunicationPreference = AddressType.HomeAddress }, new Employee{ FirstName = "Dev", LastName ="D", CommunicationPreference = AddressType.CommunicationAddress }, new Employee{ FirstName = "Tris", LastName ="Tru", CommunicationPreference = AddressType.OfficeAddress } } JsonSerializer.Serialize(employees); it will produce an output like the one given below
[ { "FirstName":"Amal", "LastName":"Dev", "CommunicationPreference":0 }, { "FirstName":"Dev", "LastName":"D", "CommunicationPreference":2 }, { "FirstName":"Tris", "LastName":"Tru", "CommunicationPreference":1 } ]Avoid conversion errors by using Custom Converters in System.Text.Json API(.NET Core 3.0)
The post is based on .NET Core 3.0
SDK used : 3.0.100One of the most common error encountered while doing JSON serialization and deserialization is the data type conversion errors. Till now, we were using the Json.NET library from Newtonsoft for performing the serialization and deserialization in .NET/ASP.NET/.NET Core, but in the latest iteration of .NET Core which is currently under preview, they have removed the dependency on Json.NET and introduced a new built-in library for doing the same. Along with that, the all new library that is going to be introduced with .NET Core 3.0 provides you to define custom converters that can be implemented to get rid of this kind of errors. If you are not aware of it, I have already written a couple of posts about it which you can refer to using the following links.
Serializing and Deserializing Json in .NET Core 3.0 using System.Text.Json API
Step-By-Step Guide to Serialize and Deserialize JSON Using System.Text.Json
The new API is included with the System namespace and you don't need to add any NuGet package to get started with it. Along with the normally used methods for serializing/deserializing JSON, it also includes methods for supporting asynchronous programming. One of the known limitation in the v1 of the API is the limited support for the data types, given below is the list of currently supported types. For more detail, please refer this link Serializer API Document
- Array
- Boolean
- Byte
- Char (as a JSON string of length 1)
- DateTime
- DateTimeOffset
- Dictionary<string, TValue> (currently just primitives in Preview 5)
- Double
- Enum (as integer for now)
- Int16
- Int32
- Int64
- IEnumerable
- IList
- Object (polymorhic mode for serialization only)
- Nullable < T >
- SByte
- Single
- String
- UInt16
- UInt32
- UInt64
Step-By-Step Guide to Serialize and Deserialize JSON Using System.Text.Json
The post is based on .NET Core 3.0 version.Update : In preview 7 few changes were made to the API. For serialization use Serialize method instead of ToString and Deserialize method instead of Parse. Post updated to reflect these changes. SDK version : 3.0.100-preview7-012821
In the last post, I have already given an overview of the System.Text.Json API that is going to be introduced with the release with .NET Core 3.0. This API will replace the Json.NET library by Newtonsoft which is baked into the framework for doing serialization and deserialization of JSON. You can read more about it using this link.
Step 1: Refer the namespaces
Add the following lines in your code. If you are working .NET Core 3 project, then there is no need to add any NuGet packages to your project. For .NET Standard and .NET Framework project, install the System.Text.Json NuGet package. Make sure that Preview is enabled and select install version 4.6.0-preview6.19303.8 or higher
using System.Text.Json;
using System.Text.Json.Serialization;
Step 2: Serializing an object into
JSON stringSerialization is the process of converting an object into a format that can be saved. JSON is one of the most preferred format for encoding object into strings. You will be able to do this conversion by calling the ToString method in the JsonSerializer class available in the System.Text.Json API
For example, to convert a Dictionary object to a JSON string we can use the following statement
JsonSerializer.ToString<Dictionary<string,object>>(dictObj)
Serializing and Deserializing Json in .NET Core 3.0 using System.Text.Json API
The post is based on .NET Core 3.0 versionLast October, the .NET Core team at Microsoft has announced that they are stripping out Json.Net, a popular library used by developers for serializing and deserializing the JSON from the upcoming version of the framework. Along with that, they also announced that they are working on a new namespace System.Text.Json in the framework for doing the same. With the release of the latest preview version of .NET Core 3.0, developers will now be able to make use of this namespace for performing JSON operations.
The new namespace comes as part of the framework and there is no need to install any NuGet packages for using it. It has got the support for a reader, writer, document object model
and a serializer.Why a new library now?
JSON is one of the most widely used formats for data transfer especially from the client-side, be it web, mobile or IoT to the server backends. Most of the developers using the .NET Framework were relying on popular libraries like Json.NET because of the lack of the out of the box support provided by Microsoft.
One of the major reasons to develop a new library was to increase the performance of the APIs. To integrate the support for Span<T> and UTF-8 processing into the Json.NET library was nearly impossible because it would either break the existing functionality or the performance would have taken a hit
Even though Json.NET is getting updated very frequently for patches and new features, the tight integration with the ASP.NET Core framework meant these features got into the framework only when an update to the framework is released. So the .NET team has decided to strip the library from the framework and the developers will now be able to add it as a dependency in .NET core 3.0 meaning they will be free to choose whichever version of the Json.NET library they want
Now the developers
has got two options for performing the Json operations, either use System.Text.Json namespace or use Json.NET library which can be added as a NuGet package and using AddNewtonsoftJson extension method.Referring the library in your projects
.NET Core
To use it in a .NET Core project, you will need to install the latest preview version of .NET Core..NET Standard, .NET Framework
Install the System.Text.Json package from NuGet, make sure that you select Includes Preview and install version 4.6.0-preview6.19303.8 or higherAs of now, the support for OpenAPI / Swagger is still under development and most probably won't make be available in time for .NET Core 3.0 release.
Reference : Try the new System.Text.Json APIsPart
2 : Step-By-Step Guide to Serialize and Deserialize JSON Using System.Text.JsonBreaking Changes coming your way for ASP.NET Core 3.0
Microsoft is in the process of releasing a new version for their .NET Core framework and there are some significant changes coming your way in that release. The most important ones are
- Removal of some sub-components
- Removal of the
PackageReference to Microsoft.AspNetCore.App - Reducing duplication between NuGet packages and shared frameworks
In v3.0, the ASP.NET Core framework will contain only those assemblies which are fully developed, supported and serviceable by Microsoft. They are doing this to reap all the benefits provided by the .NET Core shared frameworks like smaller deployment size, faster bootup time, centralized patching etc
Removal of some sub-components
In this version, they are removing some sub-components from the ASP.NET Core shared framework and most notable among them are the following
Json.NET
JSON format has become so popular these days and has become the primary method for transferring data in all modern applications. But .NET doesn't have a built-in library to deal with JSON and relied on third-party libraries like JSON.NET for some time now. In ASP.NET Core, it has a tight integration with Json.NET which restricted the users to chose another library or a different version of Json.NET itself.
So with version 3.0 they have decoupled Json.NET from the ASP.NET Core shared framework and is planning to replace it with high-performance JSON APIs. That means you will now need to add Json.NET as a separate package in you ASP.NET Core 3.0 project
and then update your ConfigureServices method to include a call to AddNewtonsoftJson() as shown below
public void ConfigureServices(IServiceCollection services) { services.AddMvc() .AddNewtonsoftJson(); }Resilient Connections in Entity Framework Core
When you work with databases in your application, you may face connection issues from time to time which is beyond our control. When this happens normally the application will raise a connection timeout or server not available exception. In Entity Framework core you can overcome this kind of scenario by setting up resilient connections with exponential retries.
The code snippet given below will retry to connect up to 10 times in case of a failure with a delay of 30 seconds in-between each try.
services.AddDbContext
(o => { o.UseSqlServer(connectionString, sqlServerOptionsAction: options => { options.EnableRetryOnFailure(maxRetryCount: 10, maxRetryDelay: TimeSpan.FromSeconds(30), errorNumbersToAdd: null); }); }); Also, when you enable retries in EF Core connections, each operation you perform will become its own retriable operation. So that means whenever we perform a query or a call to the SaveChanges method, it will be retried as a unit during a transient failure scenario. But when you initiate a transaction block in your code using BeginTransaction, then you are defining your own group that needs to treated as a single unit.
So, in this case, you will need to manually invoke an execution strategy with a delegate method that contains all that
need to be executed as a block. So, when a transient failure occurs, the execution strategy will invoke the delegate again as part of the retry operation.var strategy = blogContext.Database.CreateExecutionStrategy(); await strategy.ExecuteAsync(async () => { using (var transaction = blogContext.Database.BeginTransaction()) { blogContext.PostItems.Update(postItem); await blogContext.SaveChangesAsync(); if (raisePostChangedEvent) await eventLogService.SaveEventAsync(postChangedEvent); transaction.Commit(); }Deploying Resources to Azure using Azure Resource Manager Templates - Part #3
In the previous post, I had already explained the steps that are needed for deployment in Azure using an empty template. Let's explore further and see how we can deploy a storage account in Azure using ARM Templates.
Step 1: Create the template file
Open any text editor and create a template like the one given below. Save it as a JSON file with name StorageTemplate.json
What we are doing with this template is that we have defined two parameters named storageName andstorageLocation for accepting the name of the resource as well as the location where it needs to be provisionedAnd, under the resource section, we will use these parameters to set the name and the location properties for the storage account. Also, we will set the values for the resource type, kind and SKU
{ "$schema": "https://schema.management.azure.com/schemas/2015-01-01/deploymentTemplate.json#", "contentVersion": "1.0.0.1", "parameters": { "storageName": { "type": "string" }, "storageLocation": { "type": "string" } }, "variables": {}, "resources": [ { "apiVersion": "2016-01-01", "type": "Microsoft.Storage/storageAccounts", "name": "[parameters('storageName')]", "location": "[parameters('storageLocation')]", "sku": { "name": "Standard_LRS" }, "kind": "Storage", "properties": { } } ], "outputs": {} }Deploy to Azure using an Empty Azure Resource Manager Templates - Part #2
In the earlier post, I went through the basic concepts and terminologies for deploying resources using the Azure Resource Manager(ARM) templates. Please refer it using this link for quick reference. In this post, I will show you how to perform a deployment using an empty ARM template.
Step 1: Create an empty template
Create an empty template like the one given below using any text editor. Save as a JSON file with any name you want. In my case, I named it as EmptyTemplate.json
{
  "$schema": "https://schema.management.azure.com/schemas/2015-01-01/deploymentTemplate.json#",
  "contentVersion": "1.0.0.0",
  "parameters": {
  },
  "variables": {
  },
  "resources": [
  ],
  "outputs": {
  }
}
Step 2: Configure Azure CLI
I am going to use Azure CLI for doing the deployment. Before you start deploying, make sure that your local machine has got Azure CLI installed and configured correctly. Azure CLI is a cross-platform tool is available for download from here, which helps you to connect to your Azure subscription and execute various commands to manage and monitor it.
The best way to verify it's installed or not by executing the below command.
az --version

Deploying Resources to Azure using Azure Resource Manager Templates - Part #1
A component provisioned in Azure can contain a set of resources, say for example a Virtual Machine in Azure can have components such as Storage Accounts, Virtual Networks, IP address etc. And most of the times you may want to manage, deploy and delete these interdependent resources as a single entity. Azure Resource Manager(ARM) will help you to work with these resources in a single, coordinated operation.
ARM supports various tools for interacting with its management layer, the most used ones include Azure CLI, Azure Powershell, REST APIs, and Azure Cloud Shell. The portal gets the newly released functionalities with 180 days of the initial release.
The tools interact with the Azure Resource Manager API, which then passes it to the Resource Manager Service to perform the authentication and authorization of the request. Once this is completed, the Resource Manager then routes the request to the appropriate service for performing the requested operation.
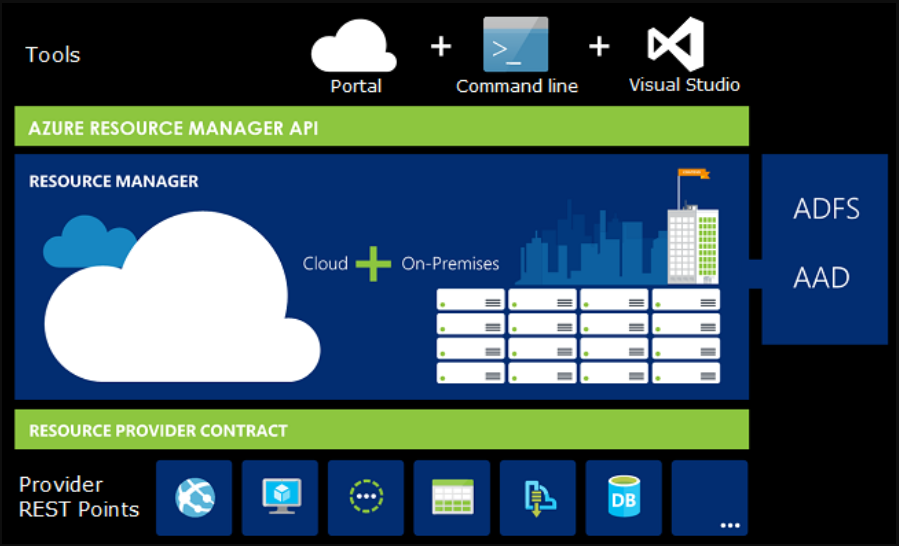
Source: docs.microsoft.com
Creating NuGet Package using .NET Core CLI
NuGet is a great tool in managing your third-party dependencies as well as in distributing your own libraries. The dotnet pack command available in .NET Core CLI toolset will help you to build the project and creates a NuGet package. The output of this command will be a .nupkg file which can be used to push to a public registry like nuget.org or to any other private registries.
Let's start with a .NET Core class library project and see how we can pack that using the CLI toolchain
dotnet new class --name SampleLib
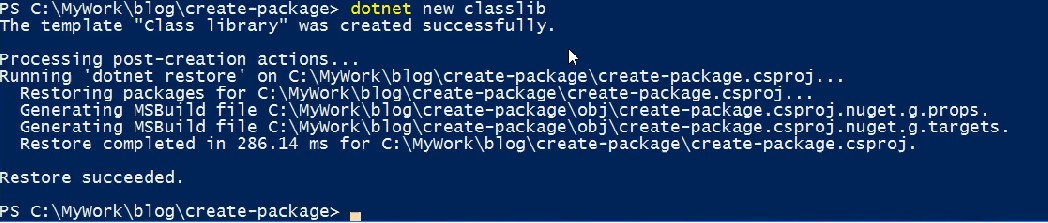
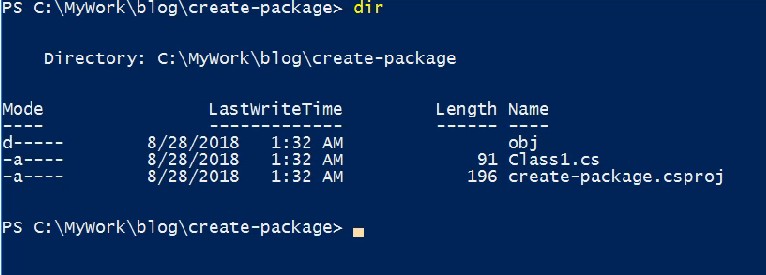
It will create a new project with one file in C# inside it. Let's create a package using the below command
Connecting Azure Blob Storage account using Managed Identity
Posted 12/9/2022Securing Azure KeyVault connections using Managed Identity
Posted 11/26/2022Manage application settings with Azure KeyVault
Posted 11/9/2022Adding Serilog to Azure Functions created using .NET 5
Posted 4/3/2021Learn how to split log data into different tables using Serilog in ASP.NET Core
Posted 4/23/2020