Hosting ASP.NET Core Web App in Docker and Accessing it from outside
In one of the earlier posts here, I have explained the steps needed to deploy a console application created in your local machine into a docker container. Today, I am going to go through the various steps needed for deploying a .NET Core web app into a Docker container using a dockerfile.
Please refer the links given towards the bottom of the post to know more about Docker for Windows and .NET Core Apps.
Creating the Project.
In this post, I am going to use Yeoman for scaffolding a ASP.NET Core web app from the command prompt. You can read more about Yeoman and how to set it up in machine by referring the links given below.
Getting Started With Yeoman
Scaffolding Using Yeoman
The command used for scaffolding a ASP.NET Core web app is
yo aspnet
When this command is executed, Yeoman will list the available options as shown in the image below.
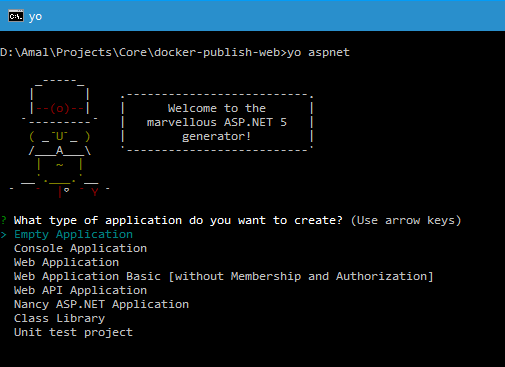
Select Empty Application option using arrow keys and press enter key to move to the next page. In this page, you will be asked to give a name for the application that is going to be created. If you chose to continue without giving a name, Yeoman will create the project with Empty Application as the name. To start the scaffolding press the enter key and when the process is completed, you will get the output in the console as in the image below.
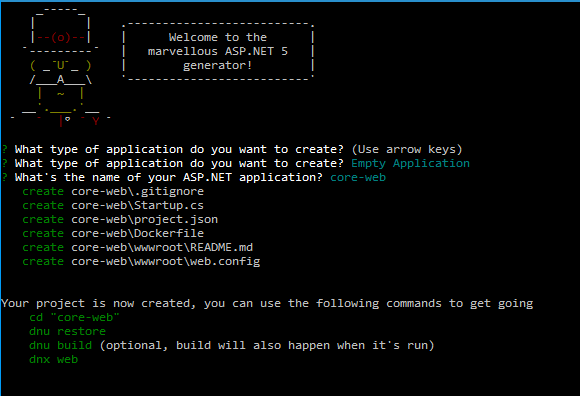
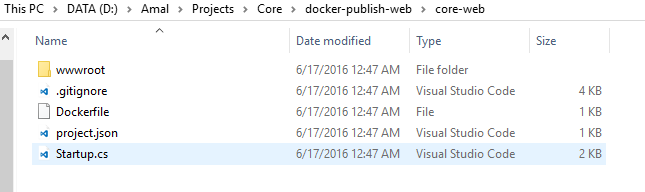
If you look at the folder structure that's created by scaffolding process, you will see a wwwroot folder for keeping all your static files and a project.json and Startup.cs files in the root directory.
Since the template used by Yeoman is based on .NET Core RC 1 we needs to do some modifications in these two files so that it compiles and executes successfully in RC 2. You can refer this link for the modification needed when converting from RC 1 to RC 2
The contents of the project.json and Startup.cs files after making the migration manually is given below
Startup.cs
        // This method gets called by the runtime. Use this method to configure the HTTP request pipeline.
        public void Configure(IApplicationBuilder app)
        {
            app.UseStaticFiles();

        }

        // Entry point for the application.
        //public static void Main(string[] args) => Microsoft.AspNet.Hosting.WebApplication.Run(args);
        public static void Main(string[] args)
        {
            var config = new ConfigurationBuilder()
                .AddEnvironmentVariables("")
                .Build();

            // You need to add these lines for accessing outside of Docker
            var url = config["ASPNETCORE_URLS"] ?? "http://*:5000";
            var env = config["ASPNETCORE_ENVIRONMENT"] ?? "Development";

            var host = new WebHostBuilder()
                .UseKestrel()
                .UseUrls(url)
                .UseEnvironment(env)
                .UseContentRoot(Directory.GetCurrentDirectory())
                .UseIISIntegration()
                .UseStartup()
                .Build();

            host.Run();
        }
project.json
  "version": "1.0.0-*",
  "buildOptions": {
    "emitEntryPoint": true
  },
  "tooling": {
    "defaultNamespace": "core_web"
  },

  "dependencies": {
    "Microsoft.NETCore.App": {
    "version": "1.0.0-rc2-3002702",
    "type": "platform"
    },
    "Microsoft.AspNetCore.Server.Kestrel": "1.0.0-rc2-final",
    "Microsoft.AspNetCore.Server.IISIntegration": "1.0.0-rc2-final",
    "Microsoft.Extensions.Configuration.EnvironmentVariables": "1.0.0-rc2-final",
     "Microsoft.AspNetCore.StaticFiles": "1.0.0-rc2-final"


  },


  "frameworks": {
   "netcoreapp1.0": {
      "imports": [
        "dotnet5.6",
        "dnxcore50",
        "portable-net45+win8"
      ]
    }
  },
Create a static file.
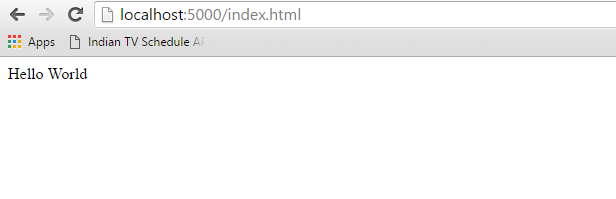
Let's create a landing page for application. Create a new file inside the wwwroot folder and save it as index.html.
<div>Hello World</div>
Compiling and Executing the Web App in Local Machine.
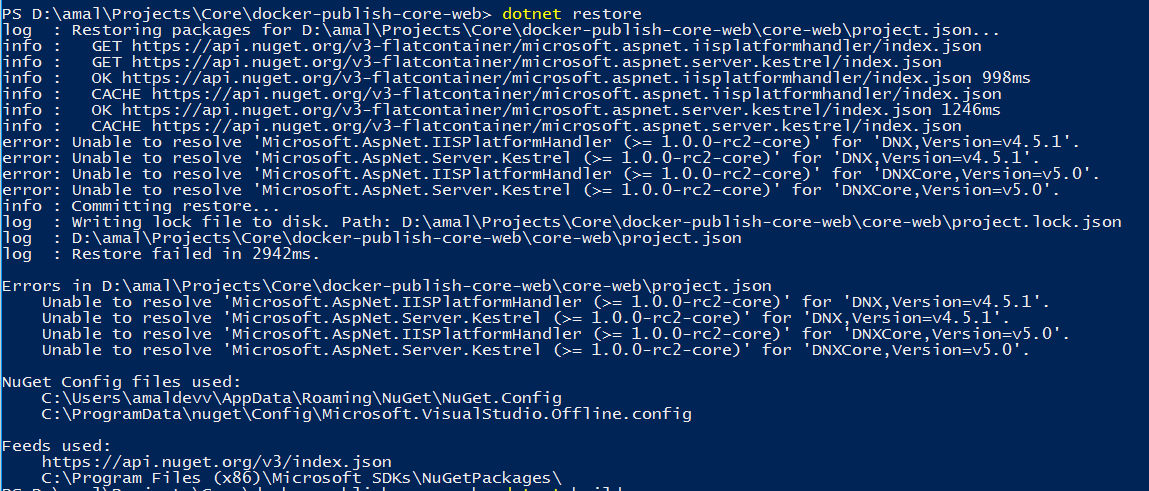
To compile and host the web application, first you need to restore all the dependencies mentioned in the project.json file. For that we can use the dotnet restore command as shown in the image below.
Once the restoration is completed, we can compile and self host the application using the dotnet run command. When this command is executed, it will first check whether this was previously compiled or not. It will do a new compilation if and only if there are changes made to the C# files otherwise it will continue with the already generated libraries. When the compilation is suceeded it will host the application in port #5000 by default.
If you looks at the contents of your project folder now, you will see the bin and debug folders created by the compilation process.
To run the web application locally, execute the dotnet run command from the prompt.

To view the site, open up your browser and type in http://localhost:5000/index.html in the address bar.
Creating the dockerfile
So till now we have created a web application, compiled it and then hosted it in the local machine. Now we will see how can we deploy it into a docker container and access the site hosted in docker from the local machine.
For that, first we need to create dockerfile. A dockerfile is used by Docker to build a image automatically by reading the instructions inside it. The complete help file is available in Docker documentation site and you can refer that for detailed information on the commands that can be used in the file.
Let's create one using the commands given below and save it as dockerwebconfig. Make sure that you save it without giving any extension. The comments given above the instructions are self explanatory.
#Base image that needs to be used for creating our image
FROM microsoft/dotnet

#Set environment variables
ENV ASPNETCORE_URLS="http://*:5000"
ENV ASPNETCORE_ENVIRONMENT="Development"

# Copy files from the current directory in the local machine to the app directory in the docker container
COPY . /app

# Set working directory
WORKDIR /app

# Restore NuGet packages
RUN ["dotnet", "restore"]

# Open up port
EXPOSE 5000

# Run the app
ENTRYPOINT ["dotnet", "run"]
Building Docker Image
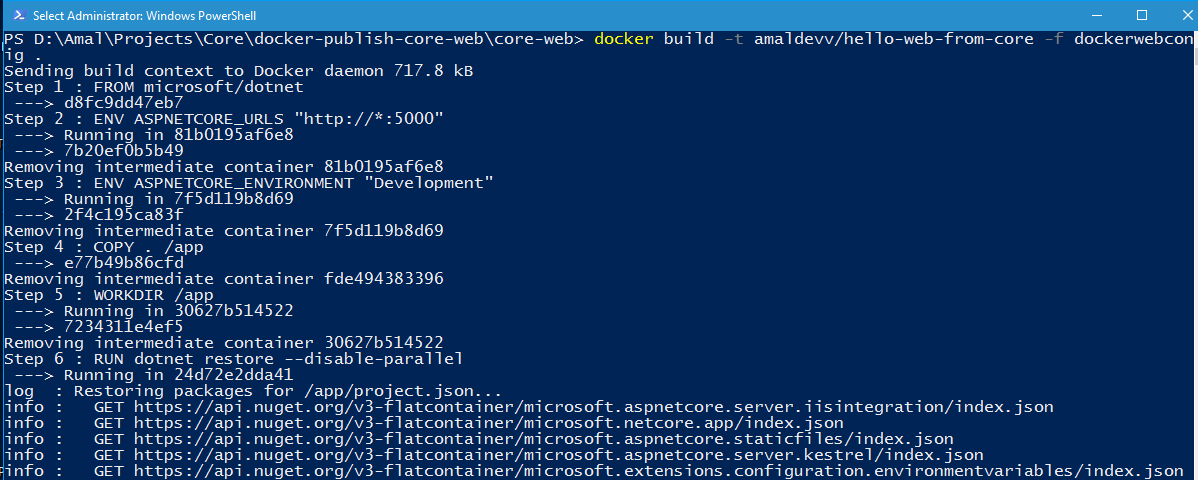
We will now create the image for Docker by using the following command in the powershell prompt. Make sure that Docker is up and running before you execute the command.
docker build -t amaldevv/hello-web-from-core -f dockerwebconfig .
This command tells Docker to create an image with the tag name specified in the -t switch using a configuration file named dockerwebconfig(-f) which resides in the current directory(.). When the command is executed, Docker will start executing the instructions in the config file one by one as illustrated in the below image.
Once the build is completed successfully, you verify it by executing the docker images command to see the list of installed images in your local Docker instance.

Running the container
That's all we need for setting up the site inside Docker and let's fire up our instance by executing the following command
docker run -t -d -p 5000:5000 amaldevv/hello-web-from-core
The above command will create a new instance of the image which we created earlier and is known as a container in Docker parlance. After spinning up the instance, it executes the command specified in the ENTRYPOINT instruction after exposing port #5000 for incoming requests.
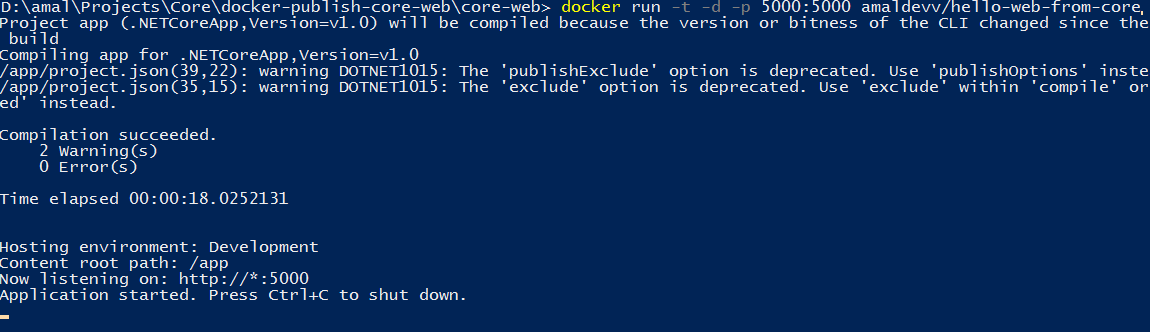
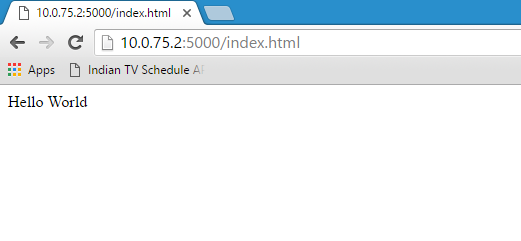
So to access our application from the local machine, just type in the ip address assigned to your docker instance which is 10.0.75.2 in the case of Docker for Windows Beta followed by the port #5000
If you run the docker ps command in the prompt, it will list our running container serving the requests.

References
Installing Docker For Windows Beta
Docker : Troubleshooting Installation Issues
Create and Run a Sample C# Program Using .NET Core RC2 Image in Docker
Publishing .NET Core Application in Docker Using DockerFile
NET Core RC2 Released with Some Major Changes
No Comments
Connecting Azure Blob Storage account using Managed Identity
Posted 12/9/2022Securing Azure KeyVault connections using Managed Identity
Posted 11/26/2022Manage application settings with Azure KeyVault
Posted 11/9/2022Adding Serilog to Azure Functions created using .NET 5
Posted 4/3/2021Learn how to split log data into different tables using Serilog in ASP.NET Core
Posted 4/23/2020