Memory dumps of a developer
Articles and tutorials on .NET Core, ASP.NET MVC, Kendo UI, Windows 10, Windows Mobile, Orchard
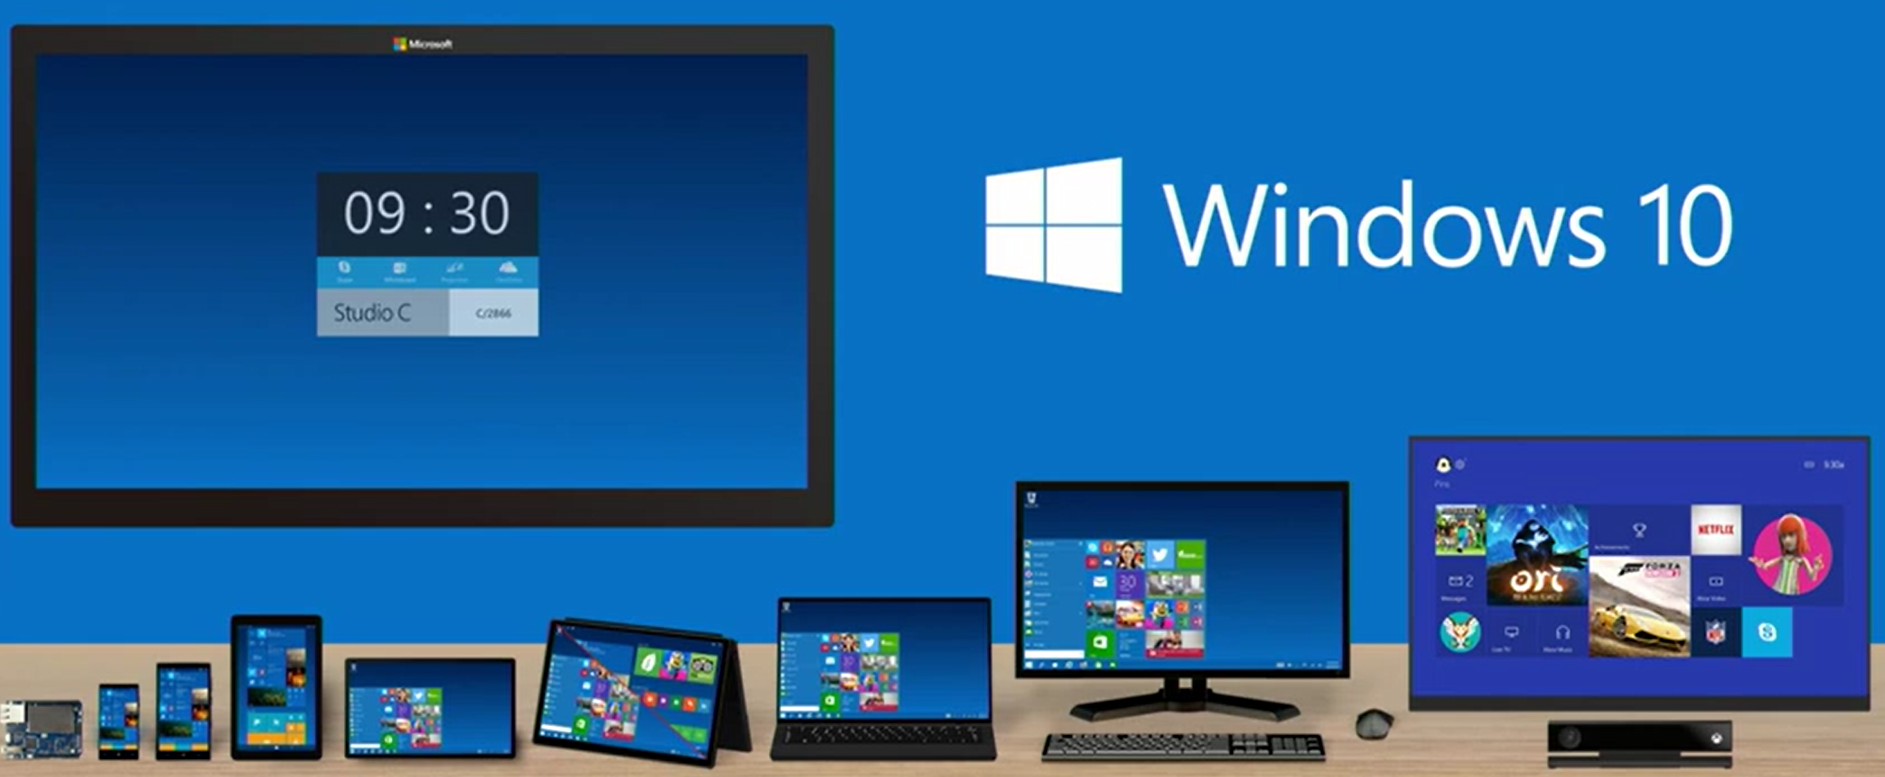
D-14 : Universal Apps - Write Once, Run on Multiple Devices
These days being an app/web developer is the one of the hardest jobs. One will have to deal to with a lot of user experiences ranging from small phones to smartphones to tablets to desktops to smart tv and even IoT devices running on diverse operating systems. So the developer needs to make a version of the app for all these devices and needs to maintain it seperately. So the tools like Xamarin, Cordova, Kony which helps you to create a hybrid application which can run on multiple devices with a single code base, but it lacks the perfomance of the native apps.
Microsoft was hard at work to bring an universal platform where you write code once and can run on a variety of devices for some time. With Windows 10 it's becoming a reality and with the Universal apps developers will be finally able to write an app once and it will take on a different appearance depending on the device it's running on. This is because with Windows 10, they have converged all their OS platforms into a single, unified core and a single universal store for all the devices. This single core helps your app to run on every device running on Windows 10, be it a desktop, laptop, phone, Xbox or an IoT device.
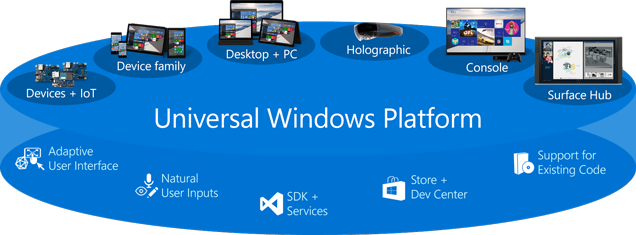
The universal app platform has capablities like Adaptive UX, Natural Universal Input, Cloud Based Services will help you to quickly build these experiences that are consistent, flexible.
D-15 : Introducing Virtual Desktops
Microsoft is finally introducing virtual desktops in Windows 10 and if you have ever used a Mac OS or Linux then you people doesn't need a second invitation. For those who are not aware of it, virtual desktops helps you to create multiple desktops and it's very nice feature for organizing your tasks. It was one of the most requested feature and I am sure that this is going to be one of the most used feature in Windows 10. It can definitely increase the productivity, for example devs like me tend to open too many windows like Visual Studio for my coding, multiple browsers for testing, mail app, edtiting software and so on. This will lead to cluttering of the desktop and task bar eventhough we have the grouping of apps feature in the taskbar. With virtual desktops you can create differnent desktops for coding, browsing and editing there by decreasing the cluttering of apps in a single desktop.
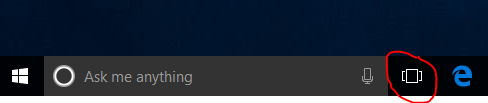
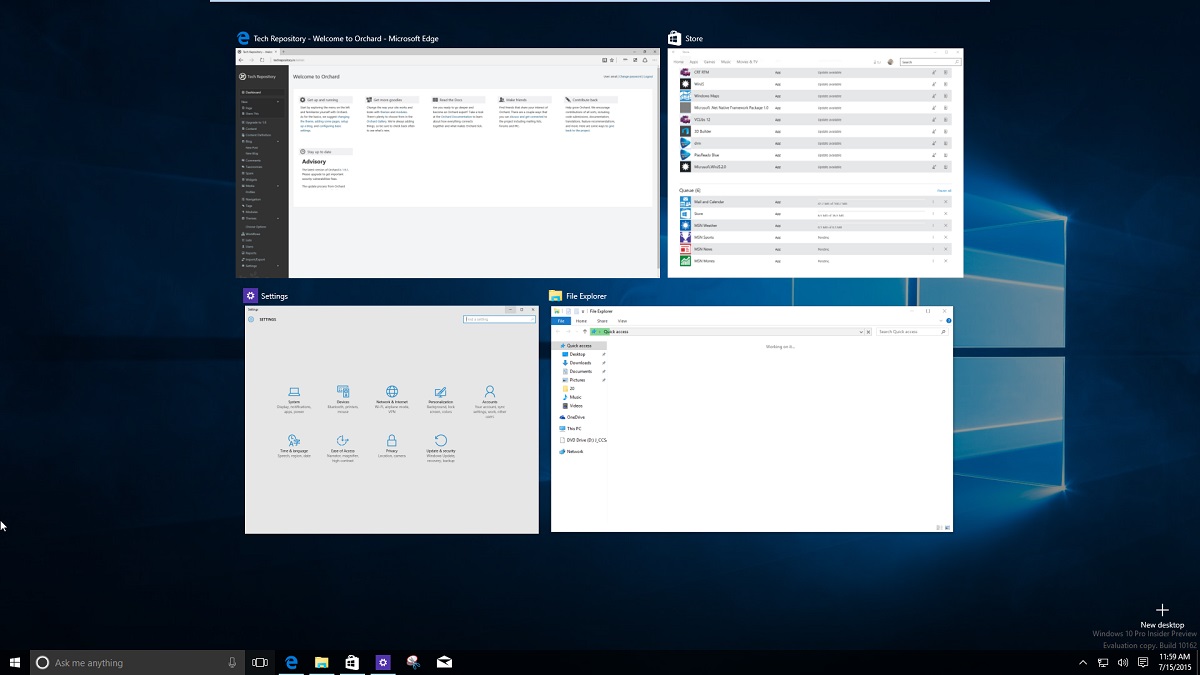
In Windows 10, the virtual desktop feature is called the Task View and can be accessed from the task bar icon sitting just next to the Cortana. Clicking on the task view will open up the interface with a list containing the open apps in the active desktop as thumbnails. You can also the Windows + Tab key combination to open up the Task View.
D-16 : The All New Action Center
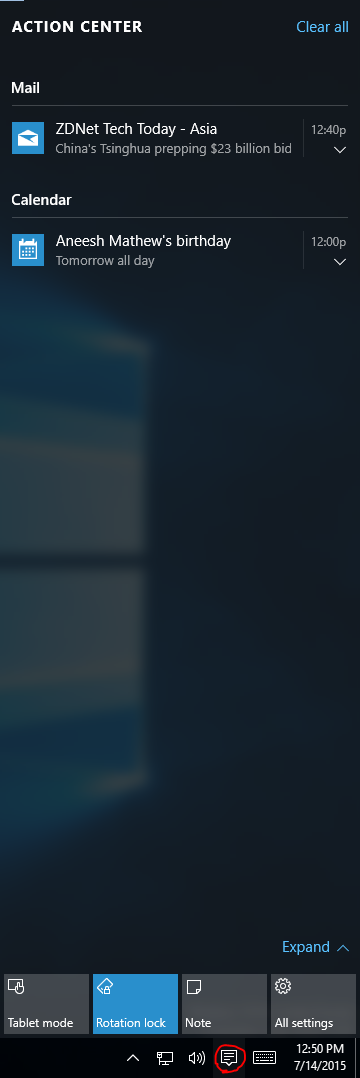
Another feature from the smaller cousin making it’s way into Windows 10 is the Action Center. First introduced with Windows Phone 8, Action Center is the notification center which acts as a universal hub for notifications to the user and quick settings. Be it a calendar remainder or twitter notifications or new emails in your inbox, you can access those all in one single place instead of going to each and every app. Also it sync automatically with other devices connected to the same account.
The Action Center has two sections, the one at the top will display notifications from various apps and bottom section willl have all the qucik action buttons. The notification area will display all the notifications such as Twitter, Mail, Facebook and it shows notifications from you phone apps too like Alarms.
D-17 : Login Options in Windows 10
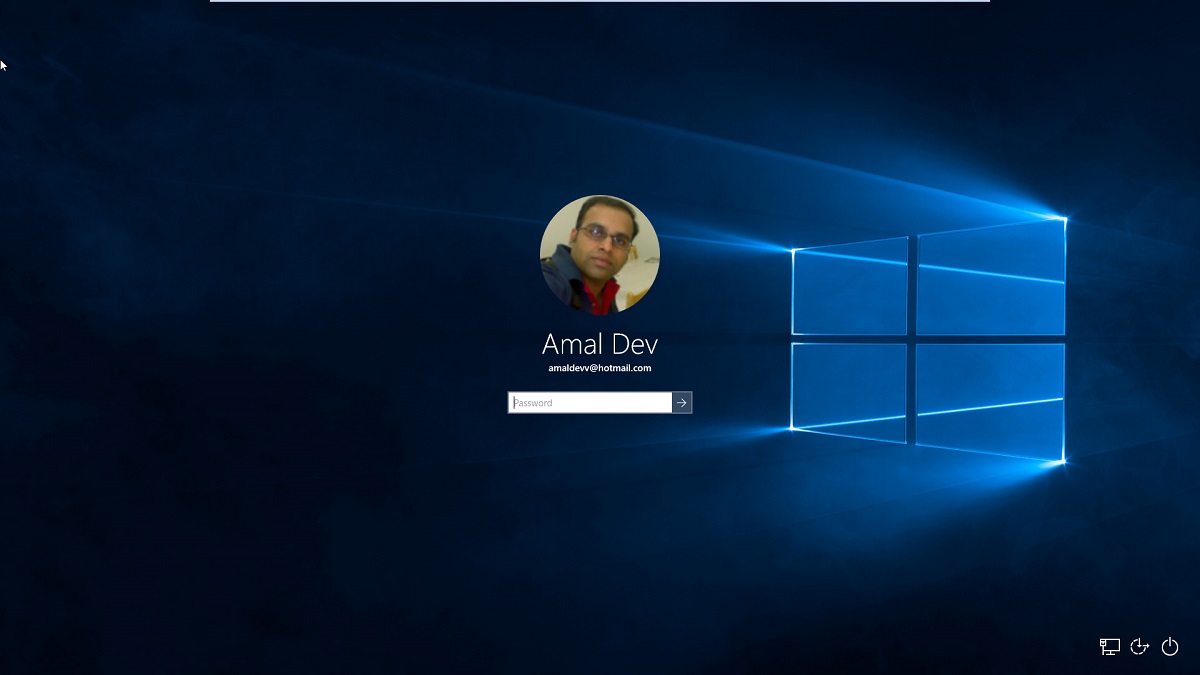
Apart from the normal login screen that’s been there Windows 7, Microsoft has include lot of other alternatives in Windows 10. It will include support for facial, iris and finger print recognition provided your desktop/laptop/tablet/phone has necessary sensors. They have built in another feature codename “Passport” which will hep the users to setup a pin for their account which can be used for logging in to the system instead of the password in the login screen.
The classic login screen will have all new icons for network, accessibility and power and the password field will have an arrow icon which acts as the submit button.
D-18 : Bye Bye Internet Explorer, Hello Edge
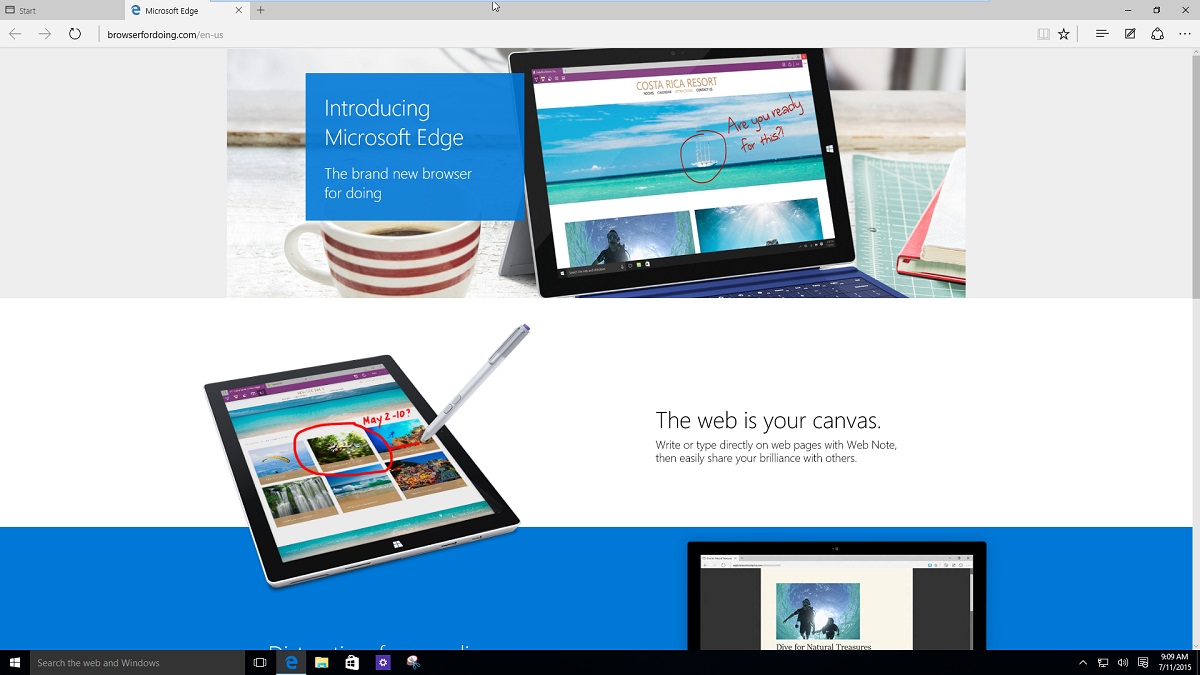
Microsoft is making a major change with the browser in Windows 10, it's been a major pain point for them since the modern web era which in turn conceded the ground to players like Firefox and Chrome. So they decided to replace IE with a modern browser in Windows 10. First announced in January with code name Spartan, it was built from the scratch and was based on Edge, the rendering engine of IE but devoid of all the old stuff that was their for compatibility with older technologies. Later they branded the browser as Edge and with a slight tweak to the existing logo, introduced it the world during the Build 2015 developer conference. I feel they should have given a new logo to get rid of the negativity surrounding IE.
1. Design
The browser is lighter, faster and does have a minimalist flat design in accordance with Microsoft's modern design principles. It has got very little chrome and simple icons won't distract users from the content of the websites and it won't take long for the users to get in love with it.
D-19 : The All New Start Menu
The Start menu which was introduced with Windows 95 is making a comeback in Windows 10. Microsoft was in line of fire for replacing the Start menu with the Start Screen in Windows 8. It was good for a touch screen device but not for a device attached to a keyboard and mouse. Microsoft did tried to lessen the damage by introducting the option to boot to desktop in Windows 8.1, users were not all intereseted in the Start Screen. It soon became an abandoned area in the OS as time went on.
In Windows 10, Microsoft went through a lot of iterations to the Start menu in various builds and as we move closer to the launch we are seeing the one which will be released to manufacturing. The familar icon reclaims it's position in the task bar and the shortcut key also remains the same.
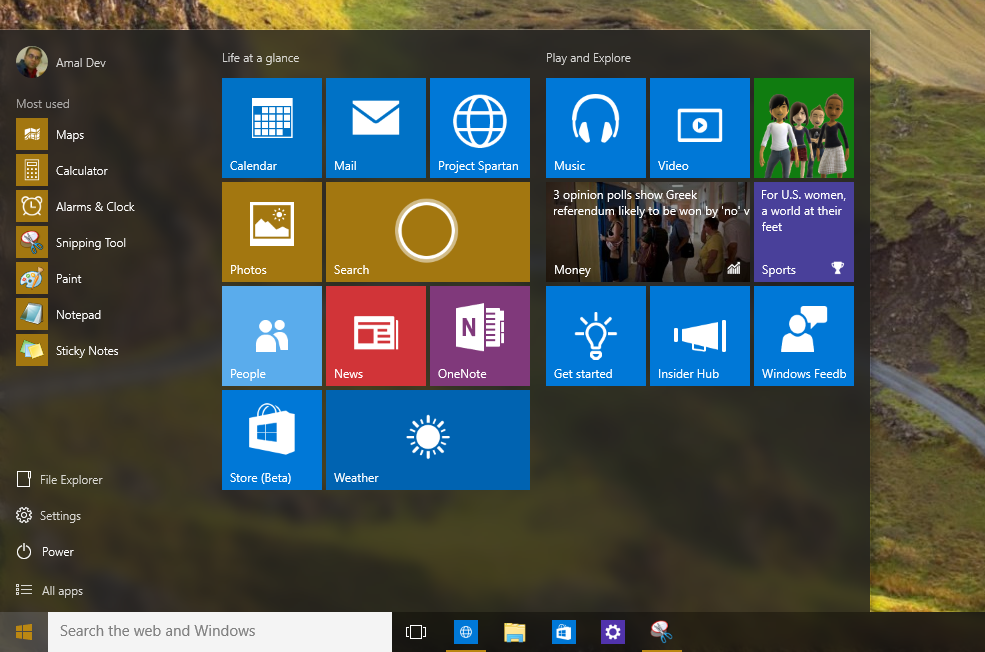
1. Bigger, Wider Start Menu
The menu will have mainly two sections, the left section may appear similar to the one in Windows 7 but it has got much more and second sections contains live tiles of various universal apps in the system. The context menu is retained from Windows 8.1 and can be accessed by right clicking on the Start button. The top left portion will display a picture of the logged in user with their name, followed by a list of most recetly used apps. It's followed by the links for File Explorer, Settings, Power and lastly the All Apps link. On the right side will have the default store apps likw Music, Edge, Search whose size can be resized.
D-20 : What's new in Windows 10
As you all know Windows 10 is going to be released worldwide on July 29 and through this series of posts, I will be posting about a number of features and changes coming to the new OS.
And the much talked about features are..
1. Start Menu makes a comeback !!!
This was one of the most requested features in the uservoice forums since the launch of Windows 8 and finally Microsoft has responded to the criticisms by bringing it back. They haven't gone back to experience that we had in Windows 7, but introduced a new user interface with the modern UI and managed to include both the apps and old program list in one place.
Upgrading Orchard to v1.9
The blokes at Orchard has released a new version of their popular content management system bumping it to 1.9. You can read more about it here detailing the features added and bug fixes. If you are using Orchard as your CMS, the following steps will help you to migrate to the latest version.
First of all to check the version of your Orchard instance, log on to your admin dashboard and scroll down to bottom right of the page.

There are multiple options for upgrading the instance which is detailed in this blog post and I will be using the approach. In this approach I will be using a copy of the site in my local machine which acts as a staging site and will upgrade the Orchard in this instance and if every thing is fine then will upload the files back to the production site.
Step 1 : Backup
It is very important to take the back up of the production site and the database so that we will be able to restore it back to the original state as a last resort if something catastrophic happens. Also if you are using the SqlCe database make sure that the sdf file inside App_Data folder is also backed up.
Step 2 : Download the latest version
You can download the package from the Download section in the Orchard website, but for my case I will be cloning the full source code from the GitHub Repository which is detailed in this blog post. Once the cloning is completed the folder structure will look like as given in the figure below.

Part 5 – Applying Styles and Themes to Kendo UI Widgets
In today’s post I will help you to apply styles and themes provided by Kendo UI to the elements in your page. These styles and themes can be applied to not only the widgets but also to the native elements in the page too.
Kendo UI comes with a number of predefined themes that can be applied to your page and to incorporate it in your page, you needs to include two css files in the head section.
kendo.common.css – contains all the styles for positioning and widget dimensions
kendo.{theme name}.css – contains the theme specific styles
Note : The common.css file is mandatory, if you want your widgets to appear and function correctly.
Let’s build a page with two text boxes, one hyperlink and a button and then we can apply the styles and themes in it.
<div > <div > <div ><span><h3>Applying Styles and Themes for Kendo Widgets</h3></span></div> </div> <div > <div > <div >Name</div> <div><input type="text" id="txtName" /></div> </div> </div> <div > <div > <div >Address</div> <div ><input type="text" id="txtAddress" /></div> </div> </div> <div > <div > <div > </div> <div > <a href="#" >Clear</a> <input type="button" id="btnSubmit" value="Search" /> </div> </div> </div> </div>
Part 4 – Binding Events to Kendo UI Widgets
Each widget available in Kendo UI exposes different events depending on the features available for each one of them. For example the DatePicker widget exposes events like open, change, close etc. Like in widget configuration, Kendo UI provides the ability to bind the events during the initialization phase itself as well as after the widget creation too.
Binding Events
First, we will see how we can bind events during the initialization phase.
<div class="col-md-4"><input type="date" id="jQDatePicker" /></div>

<div class="col-md-8"><span id="spResult"></span></div>
<script type="text/javascript">

    $(document).ready(function () {
        $("#jQDatePicker").kendoDatePicker({
            start: "decade",
            format: "dd-MMM-yyyy",
            change: DatePickerOnChange

        });
    });
    function DatePickerOnChange() {
        var resSpan = $("#spResult");
        resSpan.append("Changed date<br>");
    }

</script>


Connecting Azure Blob Storage account using Managed Identity
Posted 12/9/2022Securing Azure KeyVault connections using Managed Identity
Posted 11/26/2022Manage application settings with Azure KeyVault
Posted 11/9/2022Adding Serilog to Azure Functions created using .NET 5
Posted 4/3/2021Learn how to split log data into different tables using Serilog in ASP.NET Core
Posted 4/23/2020