Spin up Docker Containers in a Kubernetes Cluster hosted in Azure Container Service
In one of the earlier posts, I have explained in details about the steps that need to be performed for running Docker containers in a Kubernetes cluster hosted in Azure. In that example, I used the default IIS image from Docker Hub for spinning up a new container in the cluster. In this post, I will show you how to containerize an ASP.NET Core MVC application using a private Docker registry and spin-off containers in a cluster hosted in Azure using Azure Container Service
Pre-Requisites
You need to install both the CLI tools for Azure and Kubernetes in your local machine for these commands to work and needs an Azure subscription for deploying the cluster in Azure Container Service.
Step 1: Create a Kubernetes Cluster using Azure Container Service
The first step is to create the create the cluster in Azure, for that we will use the az
az acs create --orchestrator-type kubernetes --resource-group TrainingInstanceRG1 --name TrainingCluster1 --generate-ssh-keys
Step 2: Get the credentials for the Kubernetes Cluster
Now we need to download the credentials to our local machine for accessing the cluster.
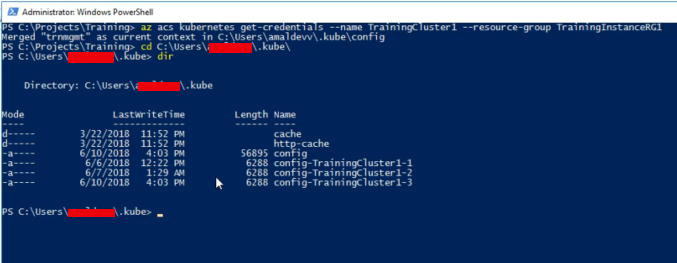
az acs kubernetes get-credentials --name TrainingCluster1 --resource-group TrainingInstanceRG1
When the command is executed it will download the key files to your local machine and by default, it will reside in a folder under user folder.
Step 3: Create the secret file for storing the private registry credentials
In this tutorial, I am going to use the docker image hosted in a private registry in Azure. If you want to about creating the same, please refer my earlier post on the topic.
In order to download the image from a private registry, we need to supply the credentials along with the request. And it's not a good practice to specify these values in configuration files in plain text format. So what we are going to do is that we will create a secret object in kubernetes which will hold the sensitive information.
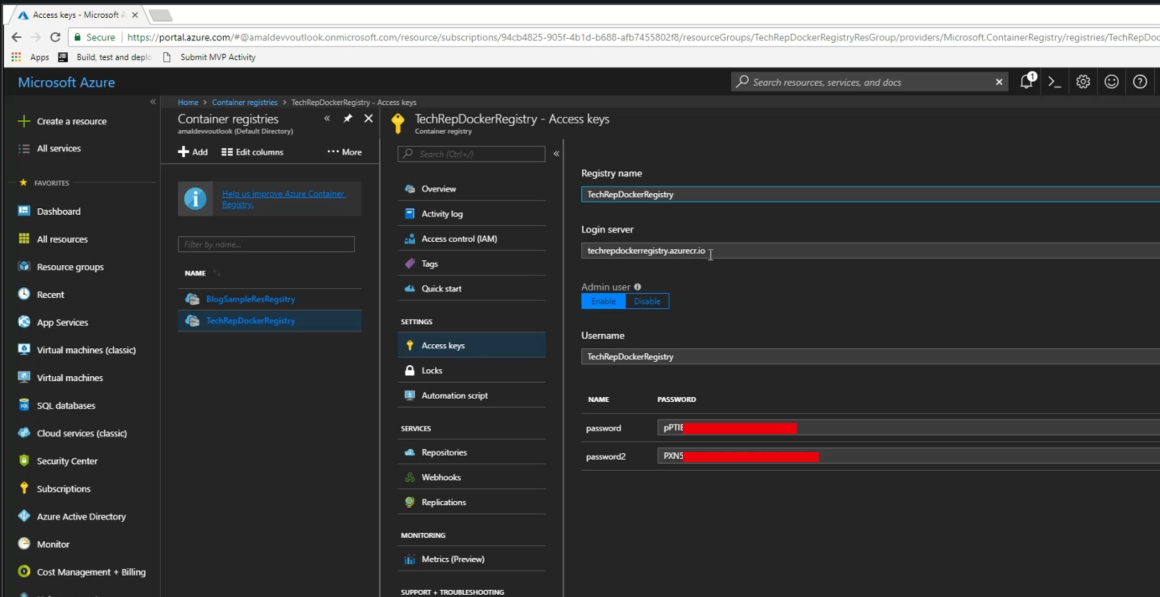
Since we are using a private registry hosted in Azure, the credentials for connecting to it can be obtained from the location as shown below.
Syntax
kubectl create secret docker-registry NAME --docker-server=server location --docker-username=user --docker-password=password --docker-email=email [--docker-server=string]The following command will create a secret object with the name provided and you can use that name to refer the object in your configuration file
kubectl create secret docker-registry tech-rep-reg-connection --docker-server=<Registry Server Name> --docker-username=<Registry username>
  --docker-password=<Registry password> --docker-email=<Mail for registry>

Step 4: Create a Configuration file for deploying Containers into the Kubernetes Cluster
Next, we will create the configuration file for deploying the containers. It will have the metadata for setting up a deployment as well as a service in Kubernetes. Deployments in Kubernetes cluster manages stateless services running on your cluster. It is also responsible for controlling as well as managing the upgrades to the pods on your cluster. The following configuration will create a single replica set, sets rolling update as the strategy for upgrading the pods. Here we also specify the fully qualified image name,
In the service section, we will create a load balancer object and specify the selector object for the app, port mapping between the host and the container
apiVersion: apps/v1beta1
kind: Deployment
metadata:
  name: training-web
spec:
  replicas: 1
  strategy:
    rollingUpdate:
      maxSurge: 1
      maxUnavailable: 1
  minReadySeconds: 5
  template:
    metadata:
      labels:
        app: training-web
    spec:
      containers:
      - name: training-web
        image: techrepdockerregistry.azurecr.io/trn/training-web
        ports:
        - containerPort: 80
        imagePullPolicy: Always

      imagePullSecrets:
      - name: tech-rep-reg-connection
      nodeSelector:
       beta.kubernetes.io/os: windows
---
apiVersion: v1
kind: Service
metadata:
  name: training-web
  labels:
    app: training-web
spec:
  type: LoadBalancer
  ports:
  - port: 8090
    targetPort: 80
  selector:
    app: training-web
Step 5: Deploy the Containers in the Cluster
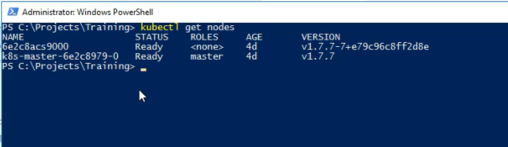
First, let check the status of our nodes using the following command
kubectl get nodes
The
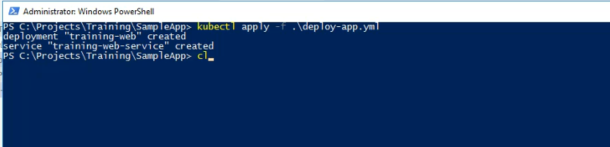
kubectl apply -f .\src\deploy-app.yml
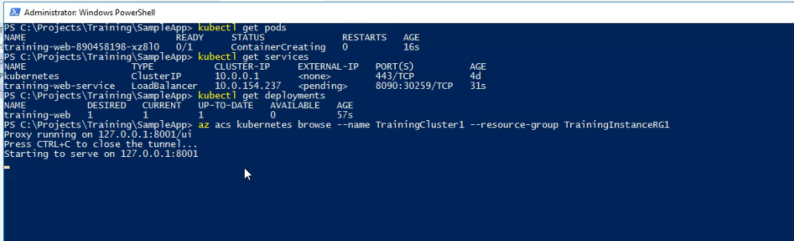
When the command is executed, it will create a deployment and service as shown below
To verify the status of the objects in the cluster, we can make use of the following commands

You can see that the provisioning of external-
Step 6: Managing the Containers from the Kubernetes Dashboard
Kubernetes also has got a web page from where you can also see these information and more. To access it execute the following command and it will open a new page in the browser
az acs kubernetes browse --name TrainingCluster1 --resource-group TrainingInstanceRG1
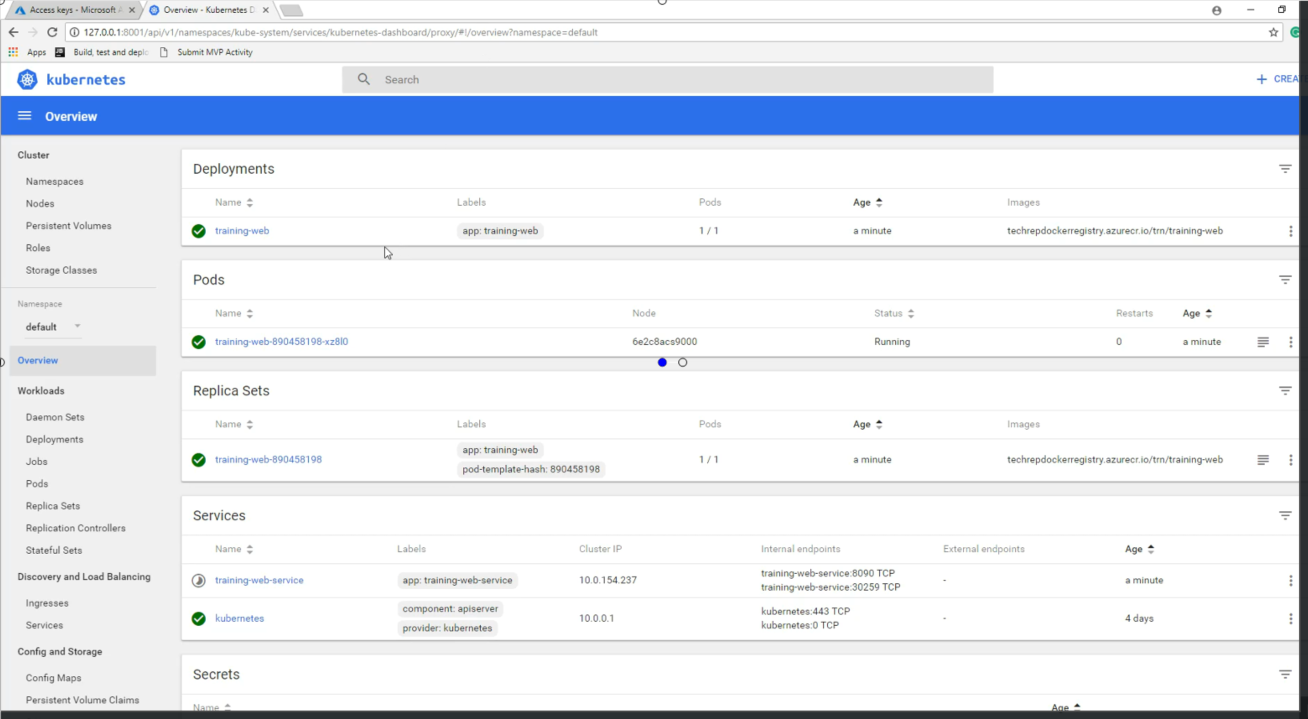
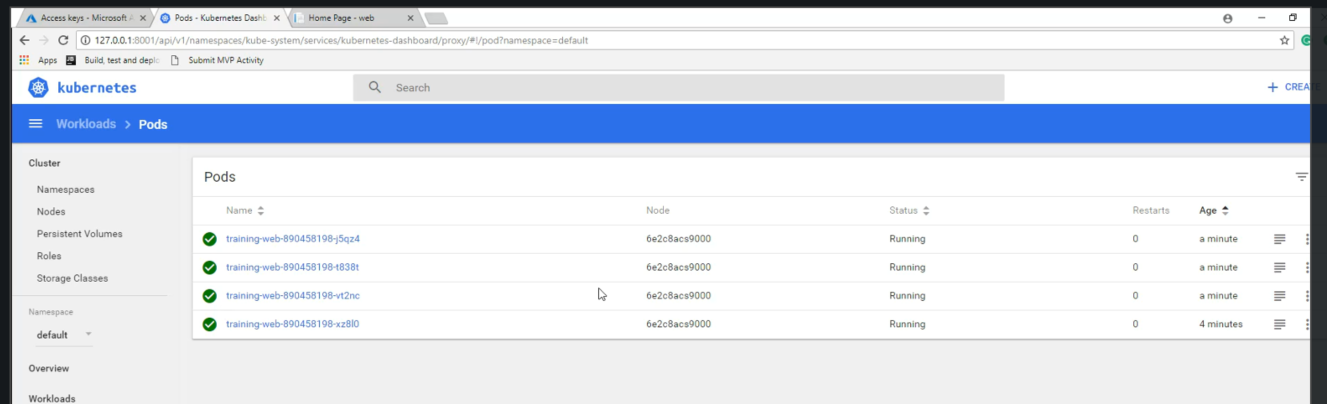
You will get information about your deployments, pods, services, replica sets from here and by clicking on the links you can drill down more information about these objects. For
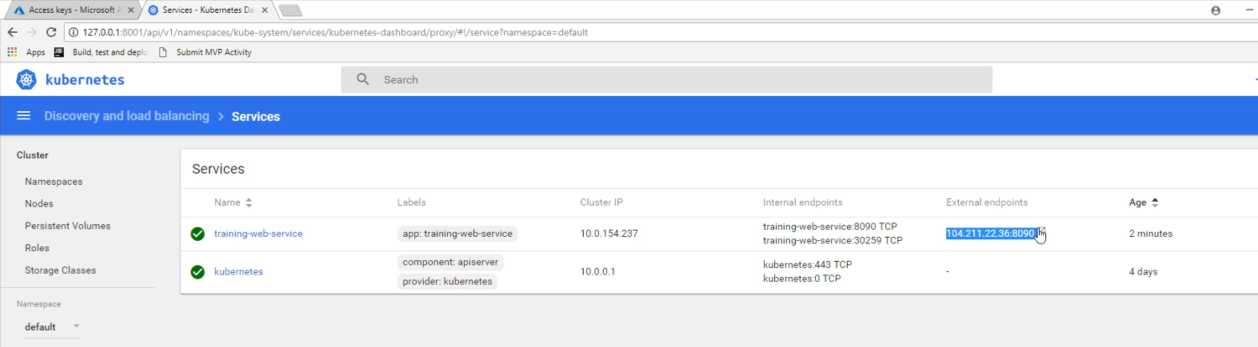
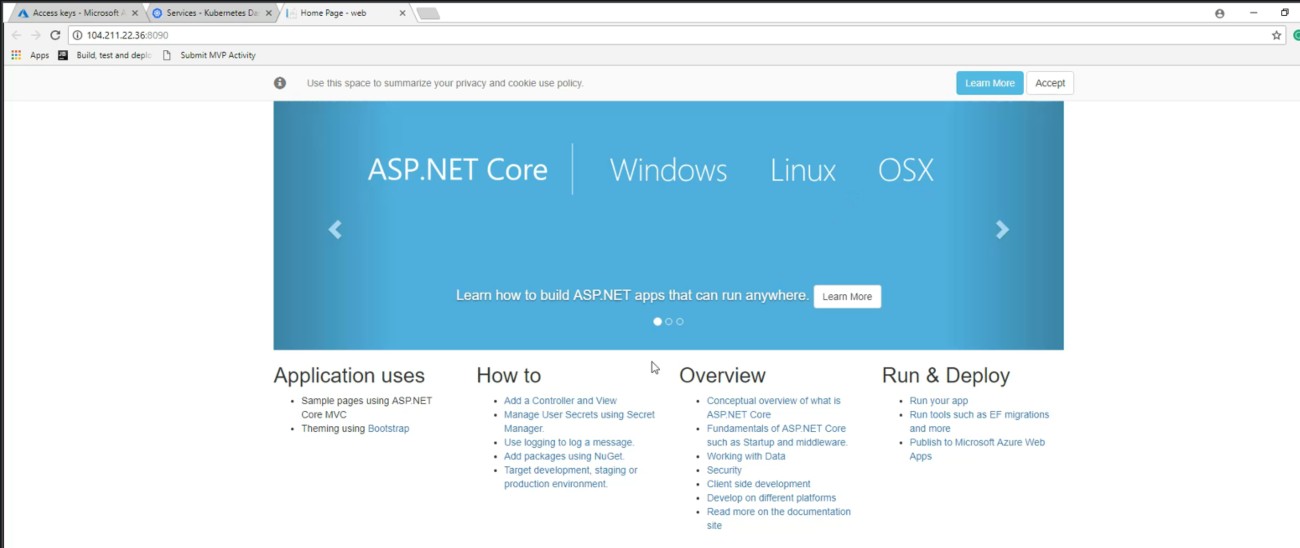
You can see here now that our external endpoint is provisioned and let' see our ASP.NET Core MVC application using that in the browser
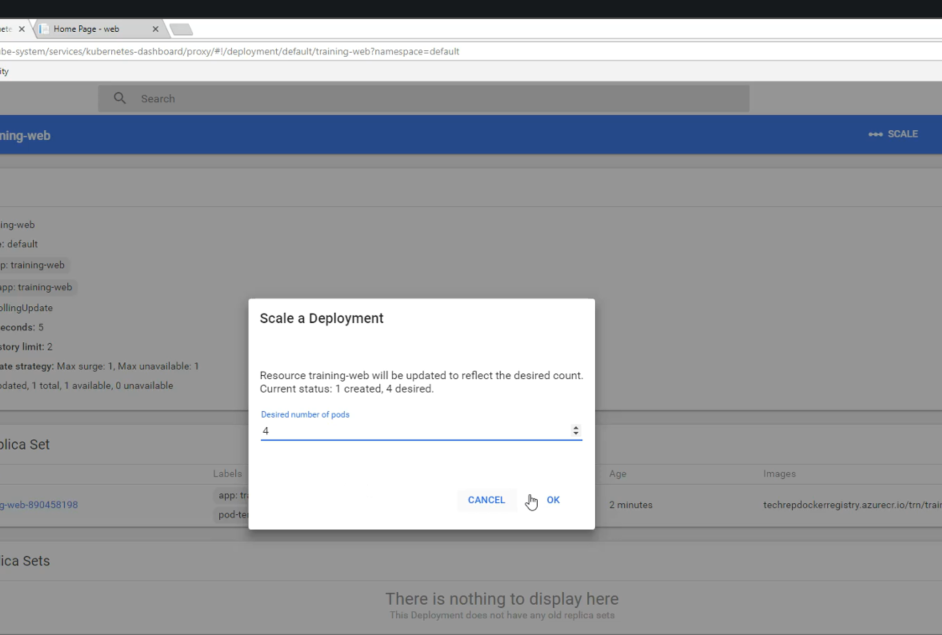
Step 7: Scaling Deployments
From the dashboard, we can scale up and down your deployments very easily. It can be done by going into your deployment and click on the Scale link in the top bar in the page. From here you can specify how much you want to scale and kubernetes will set up replica containers when you submit the form.
No Comments
Connecting Azure Blob Storage account using Managed Identity
Posted 12/9/2022Securing Azure KeyVault connections using Managed Identity
Posted 11/26/2022Manage application settings with Azure KeyVault
Posted 11/9/2022Adding Serilog to Azure Functions created using .NET 5
Posted 4/3/2021Learn how to split log data into different tables using Serilog in ASP.NET Core
Posted 4/23/2020