Getting Started With ASP.NET Web API 2
Recently Microsoft revamped the Web stack and now it has become a unified framework for writing server side web applications and APIs. One of the major change is renaming ASP.NET 5 to ASP.NET Core 1.0. There was considerable amount of confusion between ASP.NET 4.6 and ASP.NET 5, since ASP.NET 5 is a significant change from the past they decided to adopt a completely new name for it.
ASP.NET MVC 6 is now part of ASP.NET Core and it’s a completely unified framework now.In the earlier version there was an WebApi framework which has got some code from the MVC framework and it was making life difficult for the developers at Microsoft. If they made some changes in one area then they needed to make the same in other area too there by maintaining it became a difficult task. So in MVC 6 they merged both these to create a unified one and takes a simple approach for developing web apps and API.
Let’s see how we can create a new Web API using MVC 6.
I am using Visual Studio Community 2015 with Update 1 for this post and depending on your installation, the screens and options may vary. Visual Studio Community 2015 a free version of Visual Studio and is available for download from here.
Create a new project using the ASP.NET Web Application from the New Project Dialog box
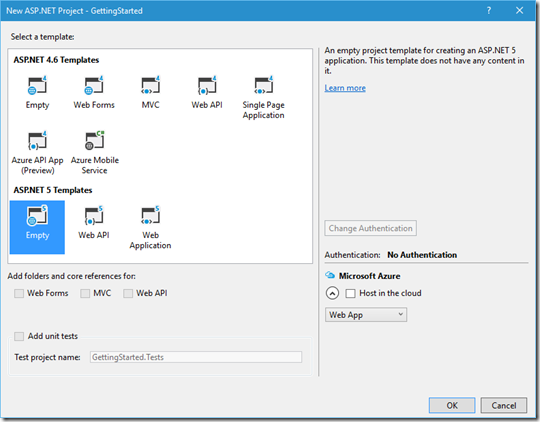
The next dialog box will list the available templates for creating projects. It will have two sections, one containing the templates of ASP.NET 4.6 and other for ASP.NET MVC 5 In this example I am going to use an empty template for creating the project and will add components and frameworks as we move on.
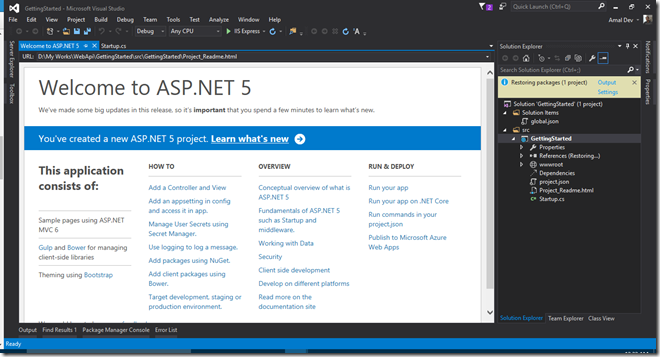
When you click Ok, Visual Studio will create the solution for you and will look like the one given below.
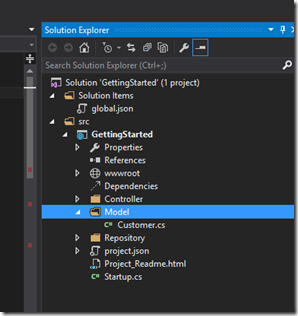
Let’s now create a model for our use. It’s always better to organize items inside different folders, so let’s create one for the models from the context menu which can be brought up by right clicking on the project. Then select Add –> New Folder, change the name of the folder to Model
public class Customer
    {
        public int CustomerId { get; set; }
        public string FirstName { get; set; }
        public string LastName { get; set; }
        public string City { get; set; }
        public string State { get; set; }
        public string Country { get; set; }
        public string Pincode { get; set; }
        public string Email { get; set; }
    }
Let’s now add a repository class to deal with data layer and will have methods for CRUD operations. In this example I am not going to deal with any database, but if you want it will be very easy to connect to a data layer from the repository methods. One advantage of using a repository between your business and data layer is that you are completely shielding the underlying DAL, so that any changes to it is minimally affected.
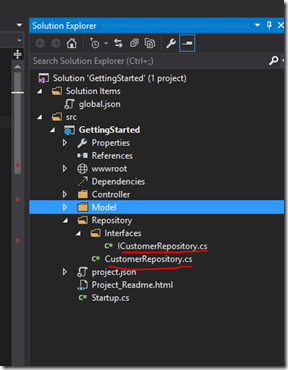
So create a folder first for repository and create the interfaces and concrete classes inside it.
Interface
 public interface ICustomerRepository
    {
        void Add(Customer NewCustomer);
        IEnumerable<Customer> GetAll();
        Customer GetCustomerByName(string NameFilter);
        void DeleteCustomer(int CustomerId);
        void UpdateCustomer(Customer UpdatedCustomer);

    }
Class
 public class CustomerRepository : ICustomerRepository
    {
        static List<Customer> Customers= new List<Customer>();

        public void Add(Customer NewCustomer)
        {
            Customers.Add(NewCustomer);
        }

        public IEnumerable<Customer> GetAll()
        {
            return Customers;
        }

        public Customer GetCustomerByName(string NameFilter)
        {
            return Customers
                .Where(e => (e.FirstName.Equals(NameFilter) || e.LastName.Equals(NameFilter)))
                .SingleOrDefault();
        }

        public void UpdateCustomer(Customer UpdatedCustomer)
        {
            var item = Customers.SingleOrDefault(x => x.CustomerId == UpdatedCustomer.CustomerId);
            if (item != null)
            {
                item.FirstName = UpdatedCustomer.FirstName;
                item.LastName = UpdatedCustomer.LastName;
                item.City = UpdatedCustomer.City;
                item.State = UpdatedCustomer.State;
                item.Country = UpdatedCustomer.Country;
                item.Pincode = UpdatedCustomer.Pincode;
                item.Email = UpdatedCustomer.Email;
            }

        }

        public void DeleteCustomer(int CustomerId)
        {
            var item = Customers.SingleOrDefault(x => x.CustomerId == CustomerId);
            if (item != null)
                Customers.Remove(item);

        }
    }
Now it’s time for adding the controller for the API.
    public class CustomerController : Controller
    {
        [FromServices]
        public ICustomerRepository CustomerRepository { get; set; }

        // GET: api/values
        [HttpGet]
        public IEnumerable<Customer> GetAll()
        {
            return CustomerRepository.GetAll();
        }

        // GET api/values/5
        [HttpGet("{name}", Name ="GetCustomer")]
        public IActionResult GetByName(string name)
        {
            var item = CustomerRepository.GetCustomerByName(name);
            if (item == null)
            {
                return HttpNotFound();
            }
            return new ObjectResult(item);
        }

        // POST api/values
        [HttpPost]
        public IActionResult CreateCustomer([FromBody] Customer item)
        {
            if (item == null)
            {
                return HttpBadRequest();
            }
            CustomerRepository.Add(item);
            return CreatedAtRoute("GetCustomer", new { Controller = "Customer", name = item.FirstName }, item);

        }

        // PUT api/values/5
        [HttpPut("{name}")]
        public IActionResult Update(string name, [FromBody]Customer item)
        {
            if (item == null)
            {
                return HttpBadRequest();
            }
            var itemSrc = CustomerRepository.GetCustomerByName(name);
            if (itemSrc == null)
            {
                return HttpNotFound();
            }
            CustomerRepository.UpdateCustomer(item);
            return new NoContentResult();
        }

        // DELETE api/values/5
        [HttpDelete("{id}")]
        public void Delete(int id)
        {
            CustomerRepository.DeleteCustomer(id);
        }
    }
I have now created the methods for Post, Get, Put and Delete api methods which are equivalent to Create, Read, Update and Delete operations. I will go in to the details of the various attributes in upcoming posts, for the time being let’s leave it as it is.
Now we need to do some changes in the startup.cs file which as the starting point for our application.
Any WebApi should return JSON in the form of camel case for making sure that any type of API client can consume it. That can be done by adding a Json formatter in the ConfigureServices method
services.AddMvcCore()
                .AddJsonFormatters(a => a.ContractResolver = new CamelCasePropertyNamesContractResolver());
ASP.NET 5 now supports dependency injection out of the box and we will be using it for creating the instance of our repository object.
services.AddSingleton<ICustomerRepository, CustomerRepository>();
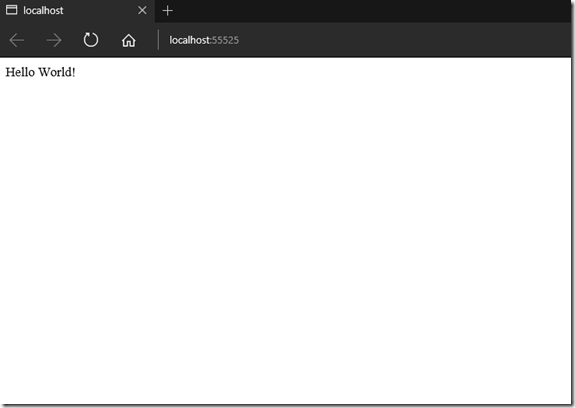
If you run the application now, we will get the output as given below
Disclaimer : The idea of this post is based on the tutorial found at www.asp.net. Soruce Code provided are written by the author
No Comments
Connecting Azure Blob Storage account using Managed Identity
Posted 12/9/2022Securing Azure KeyVault connections using Managed Identity
Posted 11/26/2022Manage application settings with Azure KeyVault
Posted 11/9/2022Adding Serilog to Azure Functions created using .NET 5
Posted 4/3/2021Learn how to split log data into different tables using Serilog in ASP.NET Core
Posted 4/23/2020

