Creating a Kubernetes cluster using Azure Container Serivce and Cloud Shell
Azure Container Service(ACS) is a service offering from Microsoft in Azure which helps you to create, configure and manage a cluster of VM's for hosting your containerized applications. It has got support for orchestrators such as DC/OS, Docker Swarm, and Kubernetes. There are a lot of ways in which you can set up ACS in Azure like setting it up directly from the Portal itself or using Azure CLI from your local machine etc. But in this post, I will be using the Azure Cloud Shell to set up the service and the orchestrator will be Kubernetes.
All the steps shown in this post is executed from the Azure Cloud Shell, it's an online terminal available in the Azure portal itself and can be invoked by clicking on the icon in the top right corner in the portal. Since Azure CLI and Kuberbetes is installed in the shell by default we can straight away go and execute the commands used in the post
Step 1
Whatever resource we creates in Azure like Web Apps, Virtual Machines, IP Addresses, Virtual Machines, Blob storage etc needs to be associated with a resource group. A resource group acts as a container that holds all the resources used by the solution in Azure and it is recommended to keep all the resources that are related to your solution in a single resource group.
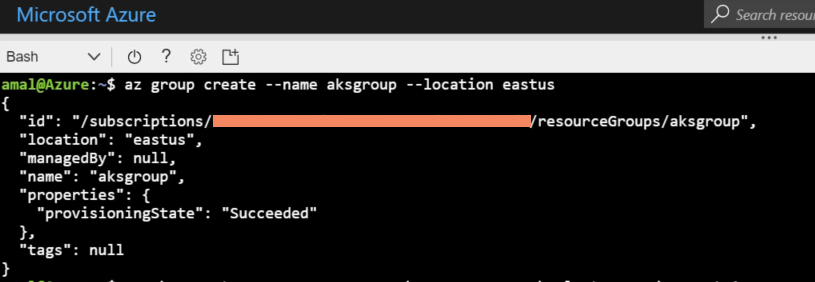
Let's create a resource group first in Azure using the following command
az group create --name aksgroup --location eastus
This command will create a new group with name aksgroup in the data center located in East US region
Step 2
To create a container service we will use the acs create command
az acs create --orchestrator-type=kubernetes --resource-group aksgroup --name=akscluster --agent-count=1 --generate-ssh-keys --windows --admin-username k8admin--admin-password k8admin
It creates a Kubernetes container service in the resource group which we created earlier with one agent based on Windows. The orchestrator for managing the clusters will be Kubernetes and with the supplied username and password you will be able to login to the Windows node.

Step 3
While creating the container service, we have provided the --generate-ssh-keys to create public and private key files so that these can be used to SSH into the container service. Let's retrieve those using the below command
az acs kubernetes get-credentials --resource-group aksgroup --name akscluster
By default, it gets saved into the .kube folder in your user directory in the shell under the filename config

Step 4
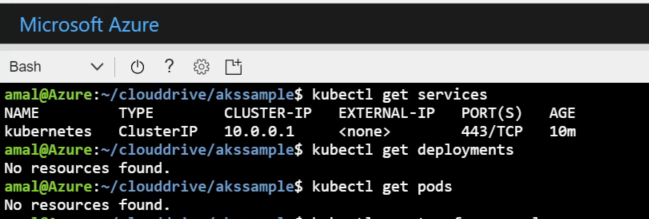
Creating the container service will take some time as it provisions the necessary resources and once it's completed we can verify the status of Kubernetes components using the following statements
Step 5
That's all we need in the infrastructure part to host our windows containers in the cloud orchestrated by Kubernetes. Let's now start building the docker image for our windows container. I am going to use the IIS image created by Microsoft which is available in Docker hub to create ours. Now we need to create a manifest file which will be used by Kubernetes to define the state of the cluster, which image to use, which port to use etc. Our file will have the following contents
apiVersion: apps/v1beta1
kind: Deployment
metadata:
  name: aks-app
spec:
  replicas: 1
  template:
    metadata:
      labels:
        app: aks-app
    spec:
      containers:
      - name: aks-app
        image: microsoft/iis
        ports:
        - containerPort: 80
      nodeSelector:
        beta.kubernetes.io/os: windows
---
apiVersion: v1
kind: Service
metadata:
  name: aks-app
spec:
  type: LoadBalancer
  ports:
  - port: 80
  selector:
    app: aks-app
In the yaml file, we will provide details for provisioning a deployment as well as a service. In the deployment section, I will specify
the number of nodes needed,
name of the container that is going to be created,
the image used to spin up the container,
the port needs to be executed
And in the service section, I will specify
the type of the service
the selector, which will be the name of our deployment
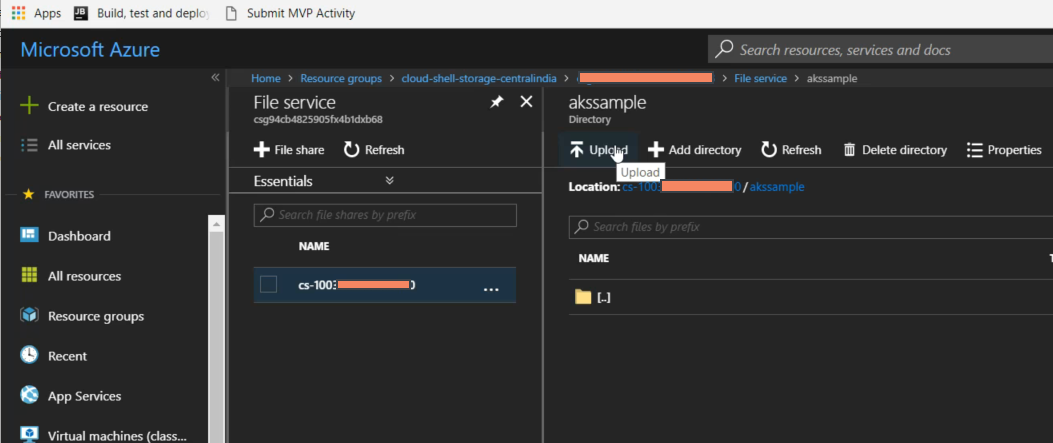
Now we need to upload this yaml file to Azure so that it will accessible for us in the Cloud Shell. When you invoke a Cloud Shell, it mounts a storage int Azure by default. So whenever you want a file to be used in the shell, you can upload the file to this storage. Here's the screenshot from my Azure subscription, you can see the Upload link which can be used to upload our yaml file to the storage
Step 6
Once you upload the file, we can spin up containers using kubectl create command using that. First, you need to go to the directory where you have uploaded the yaml file and then execute the following command
kubectl create -f app.yaml

When the command is executed, it will create a deployment as well as the service as shown in the image above. Let's see now how our deployments, services, and pods looking by executing the following commands
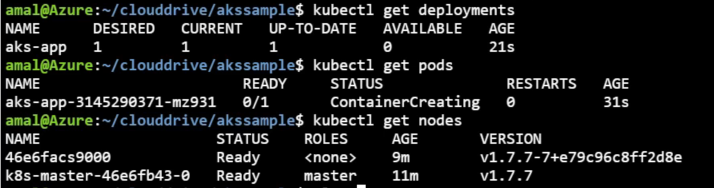

The kubectl get services sometimes may show the External IP as pending because it's provisioning the IP address which is used to access the app in the container from the wild as well adding necessary entries top open up the port. Once that finished you will get an output look like the following, use the external IP shown there to access our application
Step 7
To access the application hosted in the container, just type the external IP address shown in the above screenshot
No Comments
Connecting Azure Blob Storage account using Managed Identity
Posted 12/9/2022Securing Azure KeyVault connections using Managed Identity
Posted 11/26/2022Manage application settings with Azure KeyVault
Posted 11/9/2022Adding Serilog to Azure Functions created using .NET 5
Posted 4/3/2021Learn how to split log data into different tables using Serilog in ASP.NET Core
Posted 4/23/2020