Orchard
Disable a Module in Orchard SDF Database
Somedays ago I was dealing with an issue that caused my blog www.techrepository.in to go offline. I was playing around the SSL module in Orchard Dashboard and accidently saved it with some incorrect settings. It brought my entire site down and I was unable to login to the Dashboard too. One of the option I had was to download a backup, restore it in local and then upload it back to production which will subsequently override my incorrect setting. But I didn't want to go that way because it was time consuming and lot of work involved, so I decided to put it in the backburner for the time being and decided to consider it if nothing works out.
I googled a lot and finally stumbled on an article which explained the steps needed to disable a module using the database Orchard uses. Normally when we configure Orchard for the first time, we have the option to choose either SQL Server or SQL Server CE as the database. In my case I chose SQL CE database and now I needed to find a tool which can be used to connect and run queries against it. I found this wonderful utility called LinqPad for this and I have already published a detailed post on how to use it with a SQL CE database.
First thing you needed to do is to stop the website in IIS and download the SDF file from your hosting space. For an Orchard CMS, the default location for the database will be Site Root -> App_Data -> Sites -> Default. The structure of these two tables are given below.
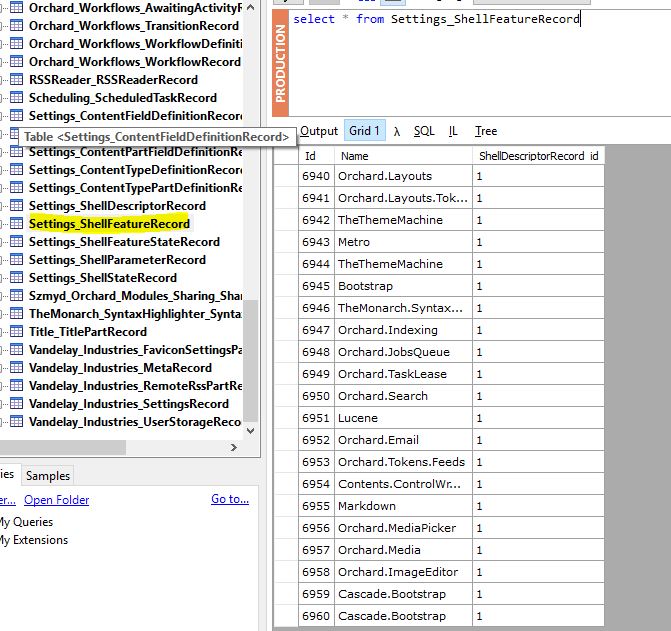
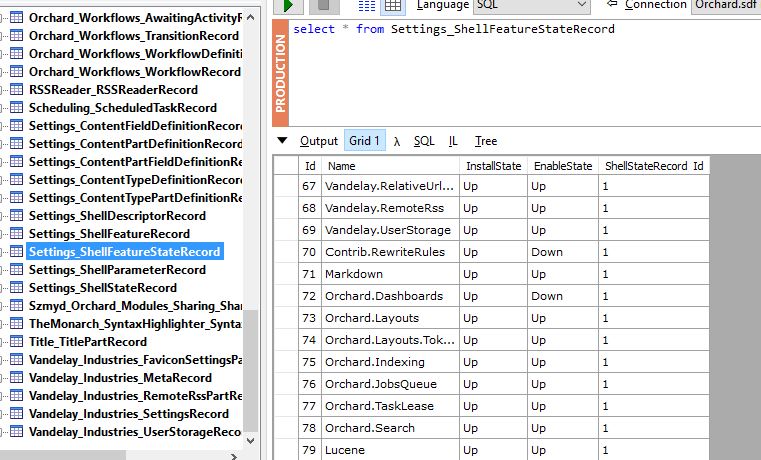
To disable a module, you will need to delete the entries for the module from the two tables
Settings_ShellFeatureRecord
Settings_ShellFeatureStateRecord
Once the entries are deleted, you can upload the SDF file back to your hosting space by replacing the existing one. Also you need to delete the cache.dat file in the App_Data folder before restarting the website in IIS. That's all you need to disable a module, now you will be able to access your site and can verify this by checking from your Orchard Dashboard.
Using LinqPad to Access Your Orchard SDF Database
Recently I was trying to setup SSL for my site www.techrepository.in and was playing around with the SSL module in Orchard. I accidently entered incorrect settings in the module which brought down the site and really wanted to bring it back as soon as possible. I definitely didn't want to download the backup, restore it in local and try to correct it by using the CLI tool available in Orchard. When I googled for solutions to resolve this issue, found one site that explained the steps to disable the module by directly updating the datastore of a blog hosted using Orchard.
I was using the SQL CE option as the backend for my blog, so I tried connecting to it using SQL Server Management Studio 2014 but only to found later that it's no longer supported. Again, I resorted to google and found this wonderful utility called LinqPad which support SQL CE databases. So in this post, I will be showing you how to connect the database and run queries against it.
About LinqPad
You may think that LinqPad can be used only for experimenting the Linq queries, but it's much more than that and according to the creators it's an ultimate scratchpad for C#, F# and VB. You can read more about the utility in their site and can be downloaded from here. The installer is around 14 MB only and installation won't take much of your time.
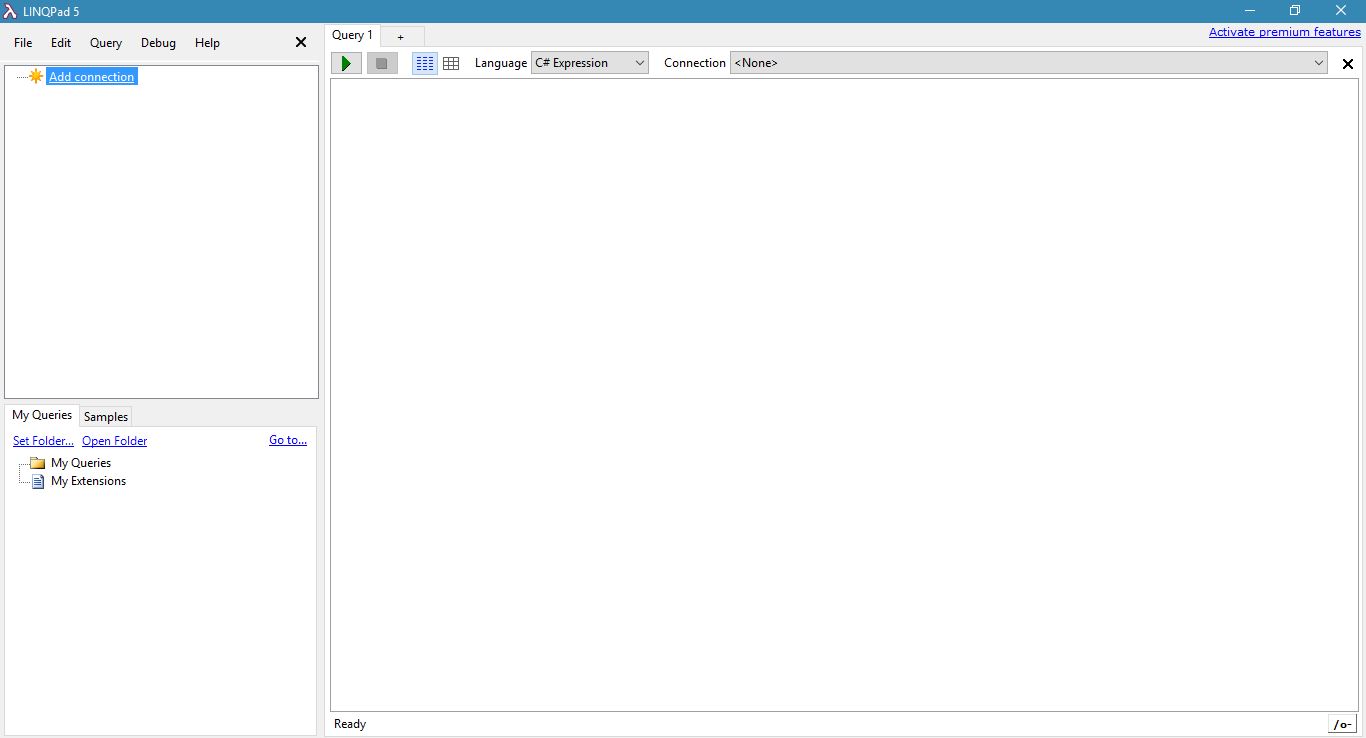
The home screen of the utility is a minmalistic one, has two list boxes on the left for showing the connections and other for showing the saved queries. The big one on the right is the playground where you can write and run queries against your database.
Adding Google Verification File in Orchard CMS
Whenever you want to serve a static file from your Orchard website, you will get a 404 error(page note found) error by default. This is happening for Orchard because in the web.config file the default configuration is set to return a page not found error for all the static files in the root. This will become an annoying issue whenever you try to verify the identity of the website by uploading a verification file in the root folder as I found out when I wanted to verify the identity of my site from Google Search Console.
This is issue can be resolved in two ways,
1. Configure a route in ASP.NET MVC to serve the static page.
2. Modify the web.config file in the route to return the correct page instead of 404
I will explain the steps needed to overcome this issue using the second approach. In this step, you needs to make couple of changes in the web.config file in the root directory of your Orchard site. The modifications is to be done in the sections <httpHandlers> and in <handlers> inside <system.webServer>. It is recommended to make these changes in both the places so that it works both on IIS6 and IIS7.
By default the <httpHandlers> and <handlers> sections will have the following entries in it
<httphandlers>
    <add path="*" verb="*" type="System.Web.StaticFileHandler"></add>
</httphandlers>

<system.webServer>
   <handlers accessPolicy="Script">
     <add name="NotFound" path="*" verb="*" type="System.Web.HttpNotFoundHandler" preCondition="integratedMode" requireAccess="Script"/>
   </handlers>
</system.webServer>
I have omitted some entries from the config file in the following snippet as it's not relevant for the topic which is being discussed in this post. Basically these two entries are telling the web server to return a page not found error whenever we request for a static file. So we will add the following entries into the config file for ignoring this rule.
<httphandlers>
   <add path="file.html" verb="*" type="System.Web.StaticFileHandler" />
   <add path="*" verb="*" type="System.Web.StaticFileHandler"/>
</httphandlers>

<system.webServer>
  <handlers accessPolicy="Script, Read">

     <add name="VerificationFile" path="file.html" verb="*" modules="StaticFileModule" preCondition="integratedMode"
       resourceType="file" requireAccess="Read" />

     <add name="NotFound" path="*" verb="*" type="System.Web.HttpNotFoundHandler" preCondition="integratedMode" requireAccess="Script"/>
  </handlers>
</system.webServer>
Please make a note of the following points to make our solution work
- If you add the entries before the existing ones which says to serve the 404, then our entries doesn't have any effect. So you should always over statement above the existing one.
- Give Read permission in accessPolicy for handlers in <system.webServer> section.
- Make sure that the name provided is unique across the handler entries in the config file.
Enabling Search in your Blog Posts in Orchard
One of the pain point faced by lot of developers/bloggers migrating to Orchard CMS platform is the process of enabling the search feature. In Orchard the search feature is disabled by default. So even if the search box is visible in the site, when you try to search the site/blog contents, it will return an error saying, "Please define a default search index". If you this error, then you can confirm that the it's not enabled and if you gets error message like "No results found" even if there exists content for the search criteria, you can confirm that the search is enabled, but index is not properly rebuilt after enabling the search.
In this post, I am going to show you how to enable the search functionality and to make sure that the contents are listed while searching.
To enable searching, you need to make sure that the following modules are enabled.
- Search - enables you to search the index using keywords on Lucene query syntax and returns list of matching items
- Index - creates an index on the items in the blog/site
- Lucene -Implements the searching by using the index we have created
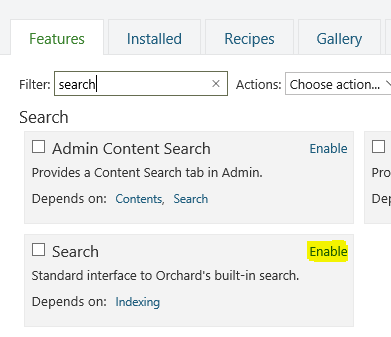
To enable it, go to Modules and search in the Filter box in the Features tab as shown below. If the module is installed then it will show there, otherwise you need to install it first. Clicking on the Enable link to make it available in the site.
Enabling Search Box in the UI in Orchard Blog Module
When you setup the blog module in Orchard CMS, you will be wondering why there is no search box coming in the home page of your blog. That's because search is disabled by default in Orchard and in this post I will guide you through the process of enabling it in the UI.
First and foremost, you need to make sure that the Search module is enabled or not. If the module is enabled, then it will list in the left menu in Admin dashboard under Settings as shown below.
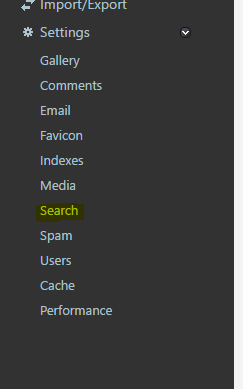
If it's not, then you need to enable it from the Modules section. Search for the module by typing search in the filter box and click on the Enable link to enable it. Once it's enabled, then in the Settings menu the link will be displayed.
Upgrading Orchard to v1.9
The blokes at Orchard has released a new version of their popular content management system bumping it to 1.9. You can read more about it here detailing the features added and bug fixes. If you are using Orchard as your CMS, the following steps will help you to migrate to the latest version.
First of all to check the version of your Orchard instance, log on to your admin dashboard and scroll down to bottom right of the page.

There are multiple options for upgrading the instance which is detailed in this blog post and I will be using the approach. In this approach I will be using a copy of the site in my local machine which acts as a staging site and will upgrade the Orchard in this instance and if every thing is fine then will upload the files back to the production site.
Step 1 : Backup
It is very important to take the back up of the production site and the database so that we will be able to restore it back to the original state as a last resort if something catastrophic happens. Also if you are using the SqlCe database make sure that the sdf file inside App_Data folder is also backed up.
Step 2 : Download the latest version
You can download the package from the Download section in the Orchard website, but for my case I will be cloning the full source code from the GitHub Repository which is detailed in this blog post. Once the cloning is completed the folder structure will look like as given in the figure below.

Maintaining a blog powered by Orchard using WebMatrix
Orchard is one of the most powerful content management system developed on top the Microsoft stack and is widely used across the globe with the recent being the blogs hosted under weblogs.asp.net is now being powered by Orchard. You can read more about it in John Galloway’s blog here.
I have also migrated mine from DotNetNuke to Orchard at turn of the year and it’s been good journey so far when compared to DNN, eventhough faced some hiccups here and there. When compared to other CMS like WordPress or Blogger, Orchard is lacking some of the features and needs to do some workarounds for acheiving that. Couple of things I liked most in Orchard is the support for Bootstrap theme and the widgets, it’s really easy and fun playing with it.
So coming back to our topic, I am not a good fan of the inbuilt editors in the dashboard of many CMS for authoring the posts, so I normally use Windows Live Writer for writing and publish my posts. If you are a blogger and hearing it for the first time, go ahead to download page at Microsoft site to have try. If you are a developer, then certainly you will like to play around with the inner working of various components in Orchard. Even though there are variety of options like Visual Studio itself, I found WebMatrix as a great tool for doing most of the nitty gritty works. It’s free, small download size, light weight and easy to use. To know more about it, go through this link and also has the link for downloading it too.
The home page will have the options as shown in the image below.

How to add Read More link for your post in the summary page in Orchard Blog
Whenever you create a blog post in Orchard you don't need to show the full content in the home page or in the summary page for posts. By default Orchard will strip all the markups and show only the first 200 characters in the summary.
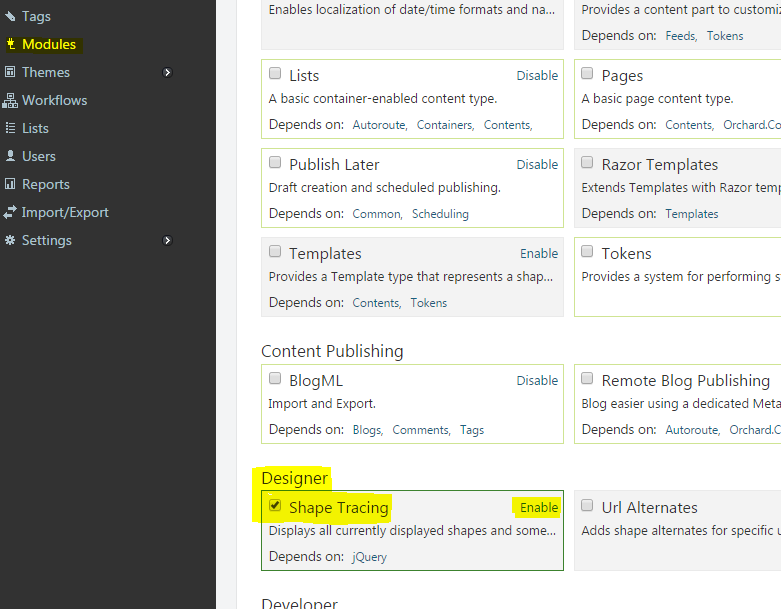
First, let's find out how Orchard handles this with the help of Designer Tools. If you are using Orchard 1.7 or higher then this module comes with default and don't try to install it because you may run into compatiblity issues. For those with older version you can install them from the Modules section. You need to enable Shape Tracing which will be disabled by default after installation and can be done from Modules as shown below


Connecting Azure Blob Storage account using Managed Identity
Posted 12/9/2022Securing Azure KeyVault connections using Managed Identity
Posted 11/26/2022Manage application settings with Azure KeyVault
Posted 11/9/2022Adding Serilog to Azure Functions created using .NET 5
Posted 4/3/2021Learn how to split log data into different tables using Serilog in ASP.NET Core
Posted 4/23/2020