Docker
Spin up Docker Containers in a Kubernetes Cluster hosted in Azure Container Service
In one of the earlier posts, I have explained in details about the steps that need to be performed for running Docker containers in a Kubernetes cluster hosted in Azure. In that example, I used the default IIS image from Docker Hub for spinning up a new container in the cluster. In this post, I will show you how to containerize an ASP.NET Core MVC application using a private Docker registry and spin-off containers in a cluster hosted in Azure using Azure Container Service
Pre-Requisites
You need to install both the CLI tools for Azure and Kubernetes in your local machine for these commands to work and needs an Azure subscription for deploying the cluster in Azure Container Service.
Step 1: Create a Kubernetes Cluster using Azure Container Service
The first step is to create the create the cluster in Azure, for that we will use the az
acs create command available in Azure CLI. You need to provide a resource group and a name for the cluster. A resource group in Azure is like a virtual container that holds a collection of assets for easy monitoring, access control etc. The --generate-ssh-keys parameter will tell the command to create the public and private key files which can be used for connecting to the cluster.az acs create --orchestrator-type kubernetes --resource-group TrainingInstanceRG1 --name TrainingCluster1 --generate-ssh-keys
Step 2: Get the credentials for the Kubernetes Cluster
Now we need to download the credentials to our local machine for accessing the cluster.
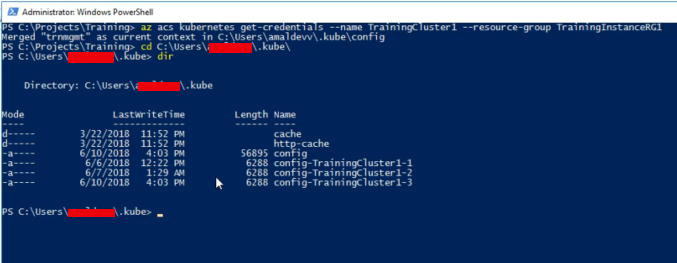
az acs kubernetes get-credentials --name TrainingCluster1 --resource-group TrainingInstanceRG1
When the command is executed it will download the key files to your local machine and by default, it will reside in a folder under user folder.
Running Sql Server Linux on a Docker Container
One of the new features added to the SQL Server 2016 is the ability to run it on Linux. Along with that, they brought in support for Docker and released an official image which is available in Docker Hub. It has already got over 5 million + pulls from the repository and is gaining momentum day by day. Let's see the various steps for setting up a container based on this image.
Step 1
Search for the image in the Docker Hub and pull the official image from the Docker hub
docker search microsoft
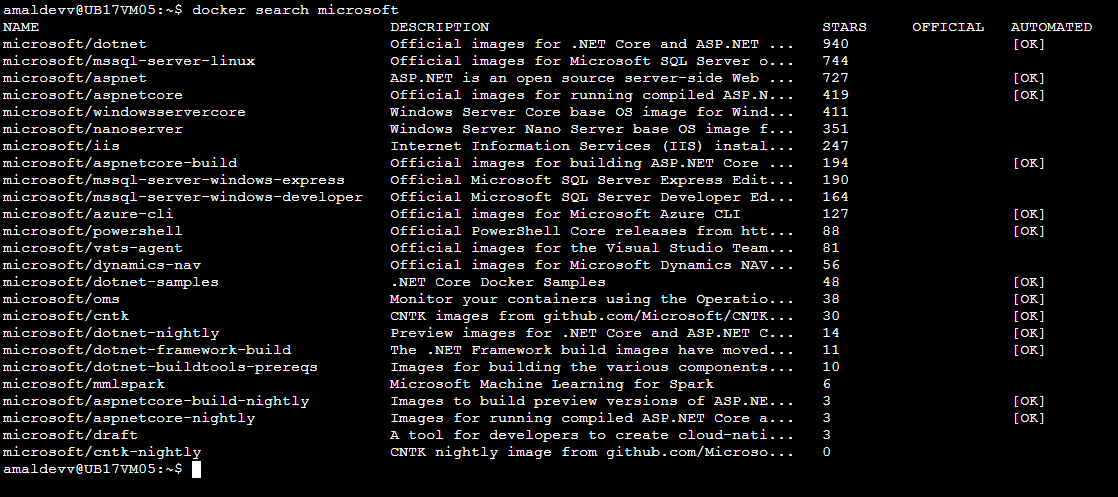
So the image we are looking for is mssql-server-linux
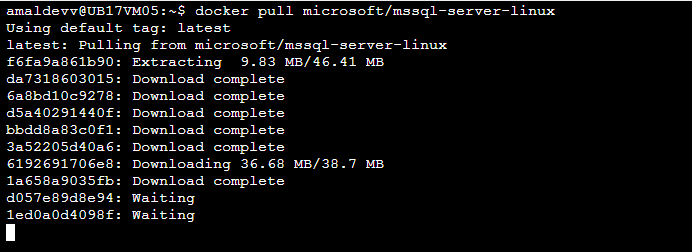
docker pull microsoft/mssql-server-linux
Creating a Kubernetes cluster using Azure Container Serivce and Cloud Shell
Azure Container Service(ACS) is a service offering from Microsoft in Azure which helps you to create, configure and manage a cluster of VM's for hosting your containerized applications. It has got support for orchestrators such as DC/OS, Docker Swarm, and Kubernetes. There are a lot of ways in which you can set up ACS in Azure like setting it up directly from the Portal itself or using Azure CLI from your local machine etc. But in this post, I will be using the Azure Cloud Shell to set up the service and the orchestrator will be Kubernetes.
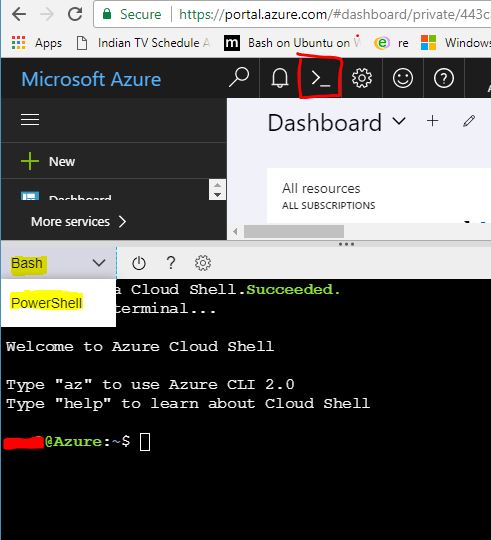
All the steps shown in this post is executed from the Azure Cloud Shell, it's an online terminal available in the Azure portal itself and can be invoked by clicking on the icon in the top right corner in the portal. Since Azure CLI and Kuberbetes is installed in the shell by default we can straight away go and execute the commands used in the post
Step 1
Whatever resource we creates in Azure like Web Apps, Virtual Machines, IP Addresses, Virtual Machines, Blob storage etc needs to be associated with a resource group. A resource group acts as a container that holds all the resources used by the solution in Azure and it is recommended to keep all the resources that are related to your solution in a single resource group.
Let's create a resource group first in Azure using the following command
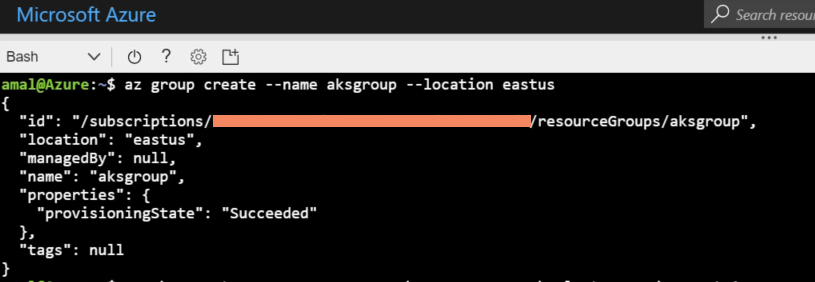
az group create --name aksgroup --location eastus
This command will create a new group with name aksgroup in the data center located in East US region
How to a create a private Docker registry in Azure
The containerization technology has been around for some years, but it only came to the forefront when a company called Docker released their toolset which is also called Docker. Just like what shipping containers did to the logistics industry, docker revolutionized the
way which we shipped software. Along with the tooling, they also created a public registry called Docker Hub to store the images created using the toolset. It's free and open to all, but in some case such as enterprises building their own proprietary software doesn't want to keep it in a public domain. So to avoid this Docker supports private registries also and it can reside in on-premises servers or in the cloud. In this post, I am going to show how can we create a private registry in Azure, Microsoft's cloud platform and then to use it for pushing and pulling images from it.Pre-Requisites
- An Azure Subscription
- Somewhat familiarity in Azure
- Beginner level knowledge in using Docker
I have already written an article about creating an image and a container based on it using Docker, please feel free to refer it if want to get a quick refresher.
Setup
In this post, I will be using the Azure Cloud Shell which is available on the portal to run all the commands. If you are hearing it for the first time, please refer the official documentation here. It basically gives a browser-based shell experience and supports both Bash and PowerShell. You can also the portal or Azure CLI for the same.
First of all, we will check what all subscriptions are available for you and will set one as default if you have more than one using the following commands
To list the available subscriptions,
az account list
and to set one as default
az account set --subscription <subscription id or name>
Creating Azure Container Registry
Whenever you provision anything in Azure, it will create a set of assets, for example in the case of a VM it will create storage, virtual networks, availability sets etc. It will hold all these assets in a container which is called the Resource Groups, which helps to monitor, control all the assets from a single location. So for our private registry, let's create a new resource group using the following command
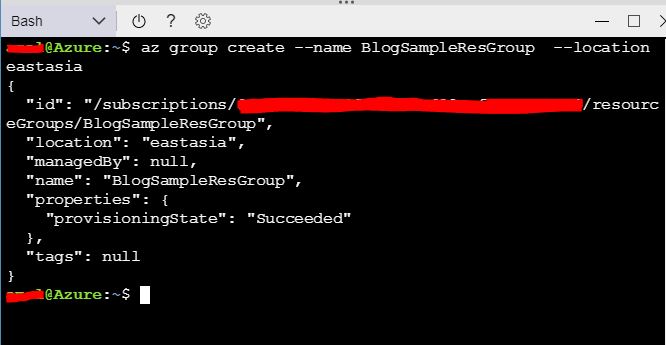
az group create --name BlogSampleResGroup --location eastasia
This will create a resource group named BlogSamplesResGroup in East Asia region
To create the registry, we will use
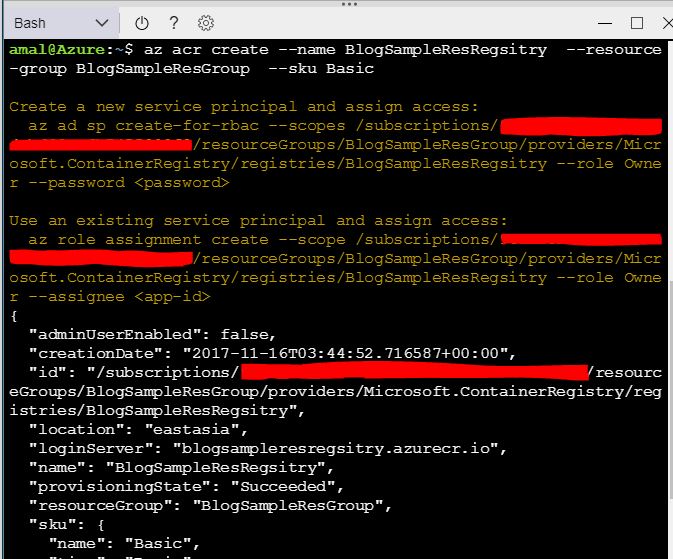
az acr create --name BlogSampleResRegsitry --resource-group BlogSampleResGroup --sku Basic
The value in the name parameter will be the name of our registry and will be created in the BlogSamplesResGroup. Azure Container Registry have 3 tiers which provide different pricing and other options. Those are Basic, Standard, and Premium. Please refer the documentation for more details. That's all we need to do for setting up the registry and if you go to the portal now, you can see the newly created registry.

Pushing Image to the Repository.
So we have the private repository up and running, now we let's push an image to the repository. For
this I will be making use of the hello-world image available in the Docker Hub. I will pull that image down to my local machine using the docker pull command.docker pull hello-world
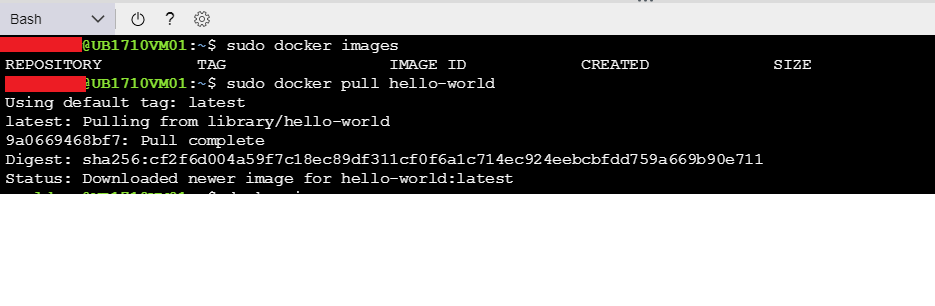
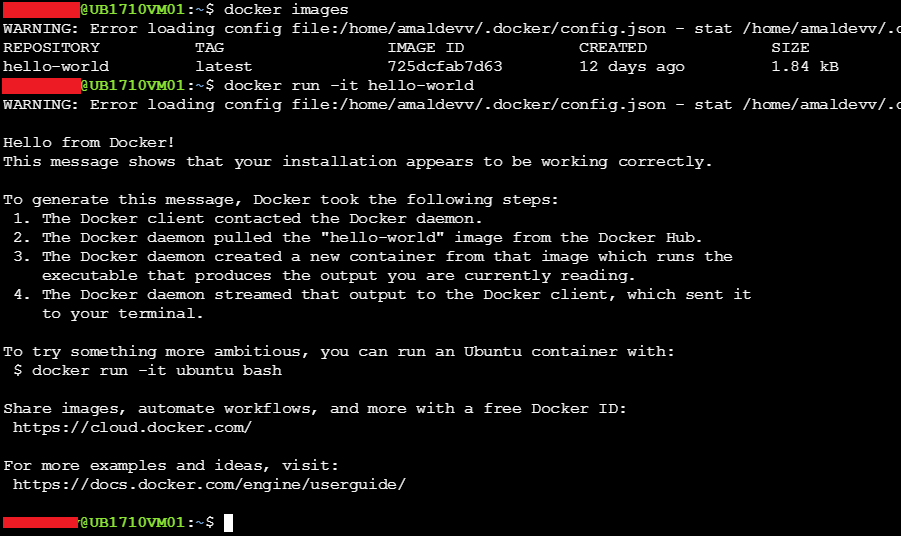
If you execute the docker images command. it will be shown on the list. To create a container in the local machine using this image, use the below command
docker run -it hello-world
The output of the command will be as shown in the image below.
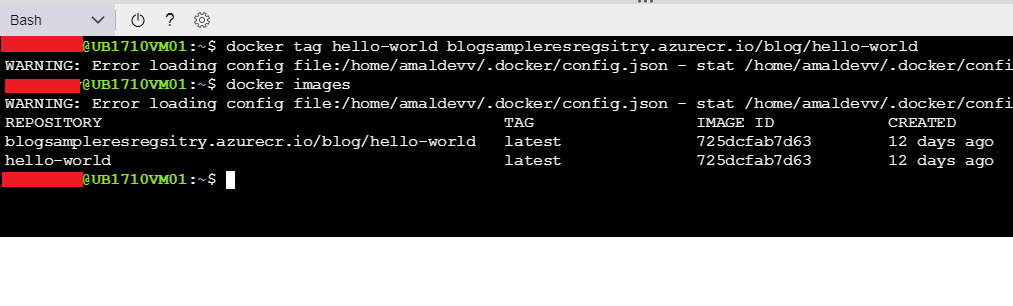
So, we have verified that the image is good and we can create a container using it. Now let's push that image to our private registry. Before that, I will use the docker tag command to tag the name of the repository that matches our registry name
docker tag hello-world blogsampleresregsitry.azurecr.io/blog/hello-world
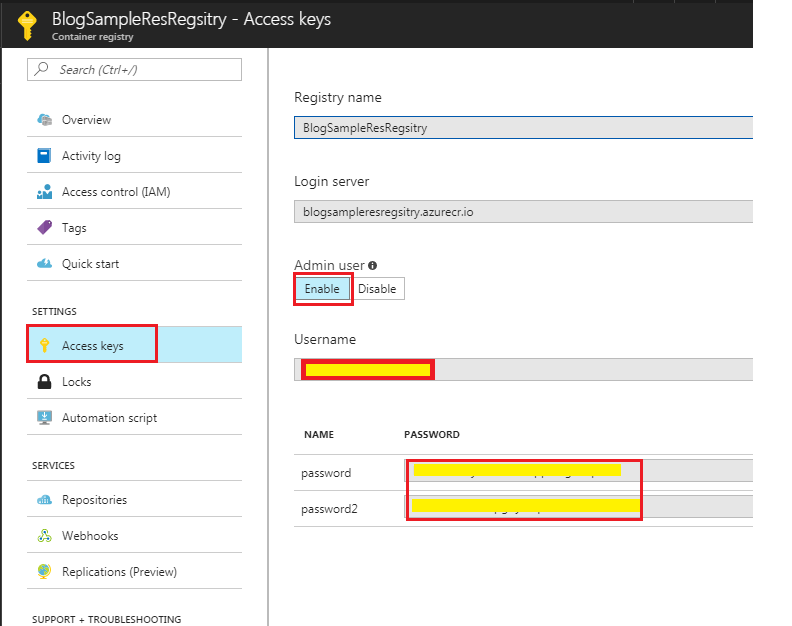
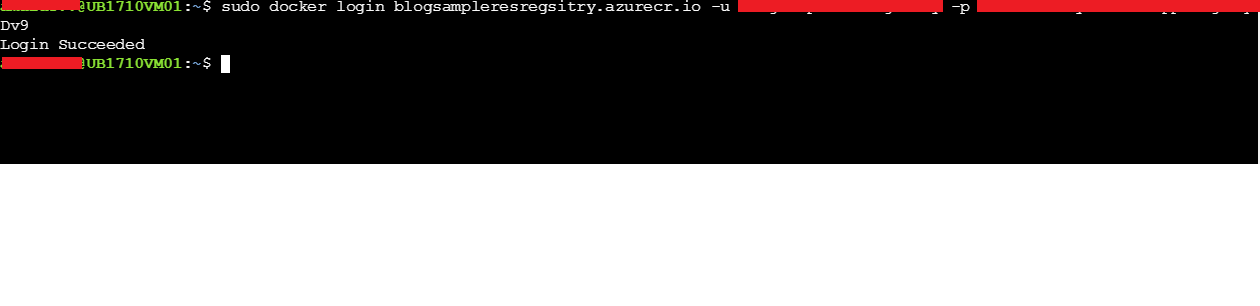
Before you push the image, the first thing you will need to do is to log in to our registry. For that, you will need to execute the docker login command and the parameters such as repository name, username and password are needed and you can get it from the Azure portal itself. You can find this information under Access Keys in Settings.
To upload the image to the repository, use the docker push command
docker push blogsampleresregsitry.azurecr.io/blog/hello-world
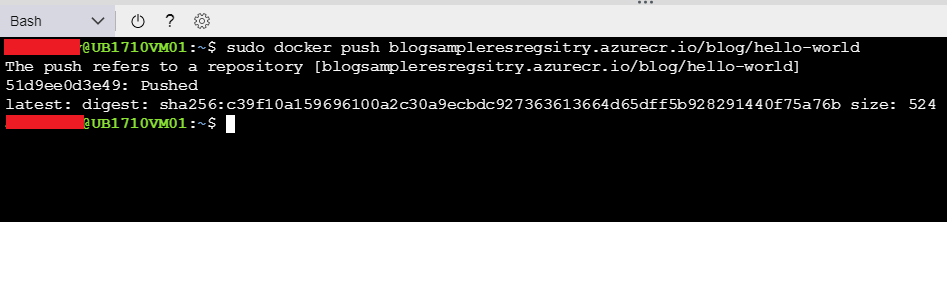
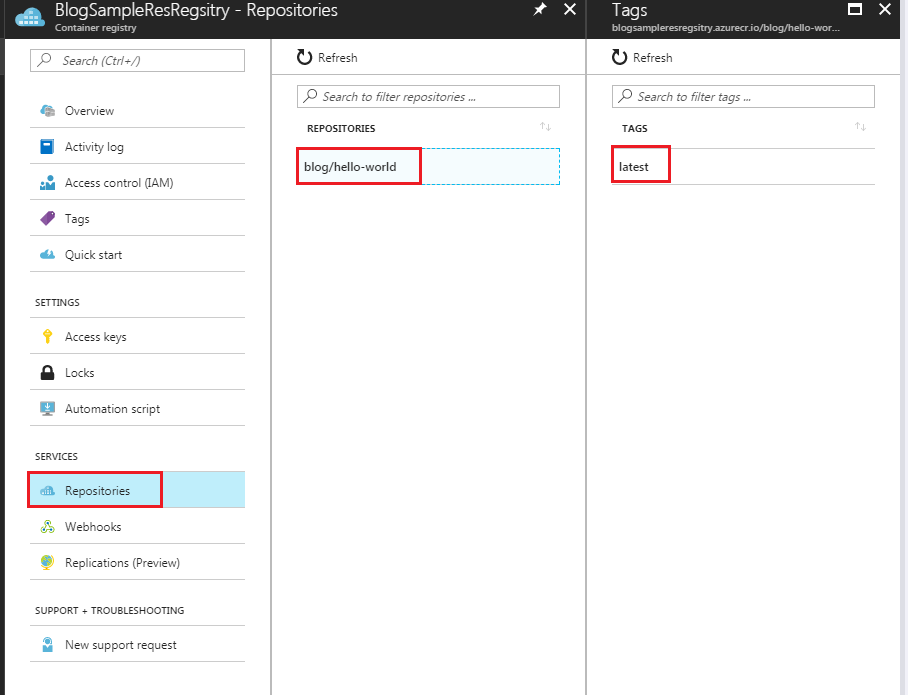
If you now go to the Repositories in the Registry, you will see our newly pushed image there.
Hosting a ASP.NET Core application in a Docker container using microsoft/aspnetcore image
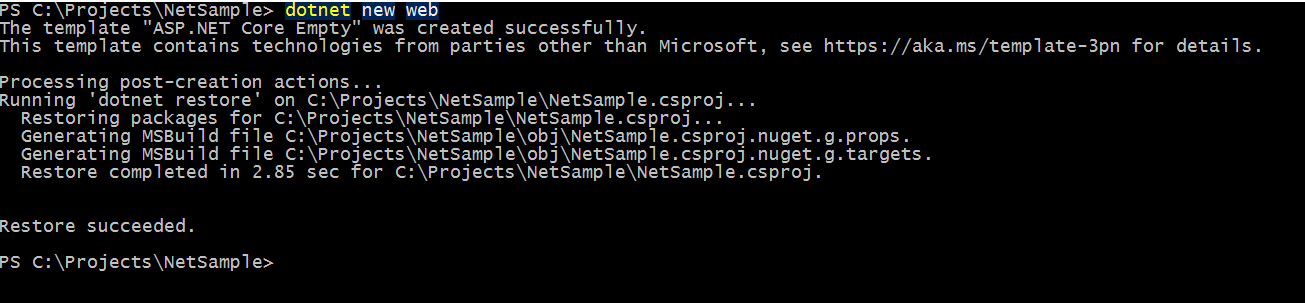
You all will be familiar with Docker by now given its popularity among developers and infra people and some of you may have already created containers using Docker images. One of the most widely used workflows among people using .NET Core will create a new web application by using the dotnet new command as shown below.
The below example uses ASP.NET Core 2.0 framework, in which the dotnet new command will create the project as well as restores the dependencies specified in the csproj file by default. I have already written a post about it and you can refer it for information about it.
Then you will do a build to see if there are any errors and use dotnet run command which will self-host the web application
Host ASP.NET MVC Application in a Windows Container in Docker
In an earlier post which I published a week go, went through the steps needed for setting up an IIS server in a Docker container running on a Windows Server 2016 machine. In this post, I will explain the steps needed to host an ASP.NET MVC application on a IIS server running inside a docker container based on Windows
Step 1 : Setup IIS with ASP.NET Support
First, we will create a new image based on the official IIS image released by Microsoft. Because in that image features such as ASP.NET 4.5 and Microsoft Web Deploy are not installed by default and we need to have it for deloying our application. So download the installer package for Web Deploy from the Microsoft site and store it in a folder in your local machine. To create the image I have created a Dockerfile as given below
FROM microsoft/iis RUN dism /online /enable-feature /all /featurename:IIS-ASPNET45
RUN mkdir c:\install
ADD WebDeploy_amd64_en-US.msi /install/WebDeploy_amd64_en-US.msi
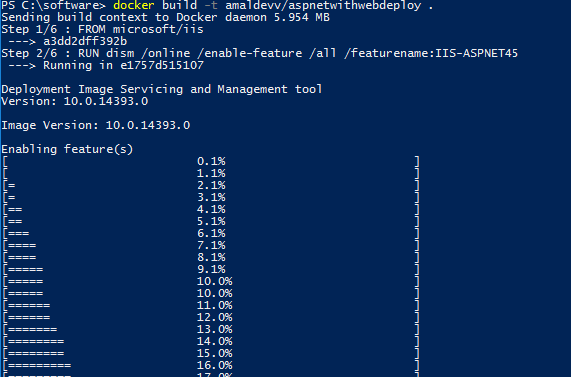
WORKDIR /install RUN powershell start-Process msiexec.exe -ArgumentList '/i c:\install\WebDeploy_amd64_en-US.msi /qn' -WaitLet's create the image by executing the following command
docker build -t amaldevv/aspnetwithwebdeploy .
When the command is executed, it will first check whether image for IIS is available in locally in docker and if it's not found then will download it from Microsoft repository in Docker Hub. The second statement in the file is for installing the ASP.NET 4.5 feature and once that is finished it will create a folder named install in the container and then copies the installer package for Web Deploy which we downloaded earlier into it. After that msiexec process is called using Powershell to install Web Deploy inside the container
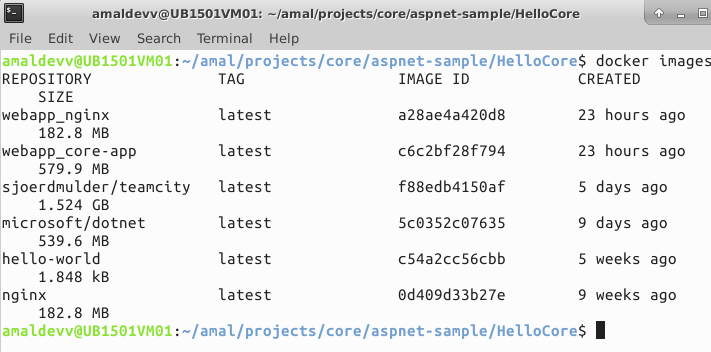
You can verify the images is successfully built or not by executing the docker images command as shown below

Running IIS from a Docker Container in Windows Server 2016
Many of you may already aware that Windows Server 2016 now natively supports Docker containers and it means that the same shared-kernel-isolation-paradigm from the Linux world is now well and truly supported in Windows too. The advantage of this approach is that your containers will load more speedily with minimum amount of resources. Please go through this link to read more about it. In this post, I will show how to host IIS in a docker container in Windows Server 2016 machine.
Step 1 : Get the base image for IIS
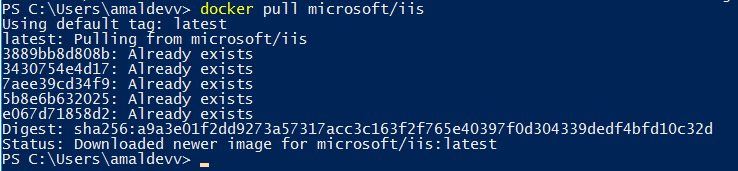
First you need to pull the latest image for IIS from the Docker hub by executing the following statement.
docker pull microsoft/iis
It will pull the image with the tag latest from the docker repository. If you want specify a different tag, then you need to specify that after the image name with a color(:) prepended to it
If you execute the docker images, our newly downloaded image will be shown in the list as shown below.

Step 2 : Create the Container
Now, you need to create a container based on the image which we downloaded in the earlier step. For that you will to need to execute the following command
docker run -it -d -p 80:80 microsoft/iis
With this command, we are telling Docker to create a container based on microsoft/iis image. The -d switch indicates that container should be run in the background and -p switch is used for mapping the port numbers for host and the container. In this example we are redirecting the requests coming into the port #80 in the host machine to port #80 in the container we just created. When it's successfully executed, it will emit the full container id and then returns to the prompt as shown below

You can verify whether the container is running or not by executing the docker ps command. The ps command will show all the active processes running in docker as shown below

Step 3 : Check IIS status
You verify whether the IIS running inside the container is properly serving content or not by typing in the IP address of the host machine in the browser. If everything is good you will see the default web site page of the IIS as shown below.
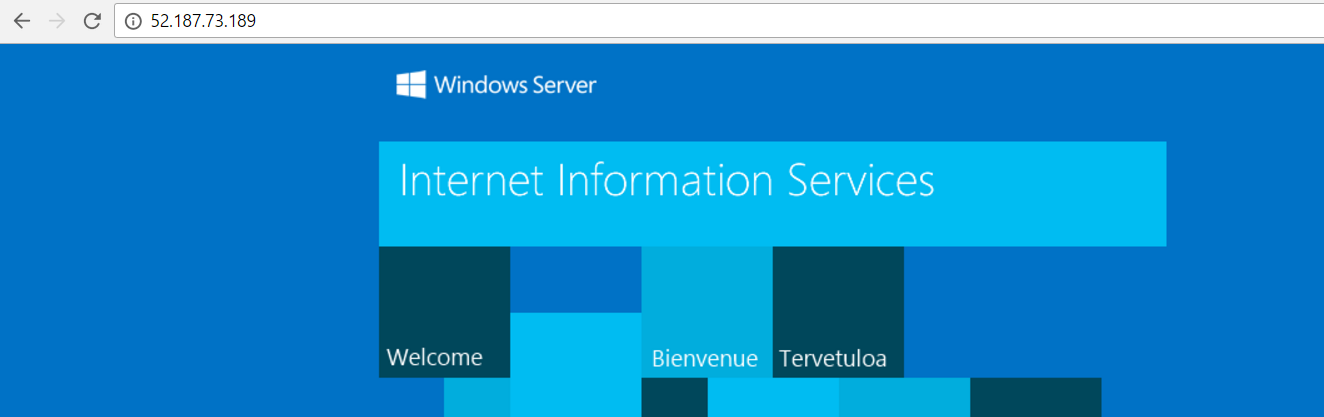
Since port # 80 is used for http by default and we don't need to provide that along with the IP address. The redirection magic is done by the daemon whom will see a request at port 80 is coming in the host machine, intercepts it and redirects it to the port#80 of our container which then spits out the default website page.
Deploying an Optimized Image of your ASP.NET Core MVC Web App in Docker
In one of the posts I authored in the blog, I have shown you how to deploy an ASP.NET Core Web application in a Docker container, but the approach in the post has got a significant disadvantage. In that approach we always copied the entire contents of the directory which included all the static files, source code files etc, then restores all the packages inside the container and builds the application before it’s hosted in the container. This increases the boot up time of the container as well as the file size of the container.
In this post, I will show you how to publish a web application into the container rather than copying all the files into container and then build the application inside that. I am going to create an .NET Core MVC web application using the dotnet new command, you can read more about that my post here.
Step 1 : Create Project
dotnet new –t web
Step 2 : Restore Packages
dotnet restore //restores all the packages referenced in the project.json files
Step 3 : Publish Project
dotnet publish –c Release –o publish
Publishes the output of the project to the publish folder using the Release configuration. Before running the command make sure that node, bower and gulp is installed in your machine otherwise the publish command will fail
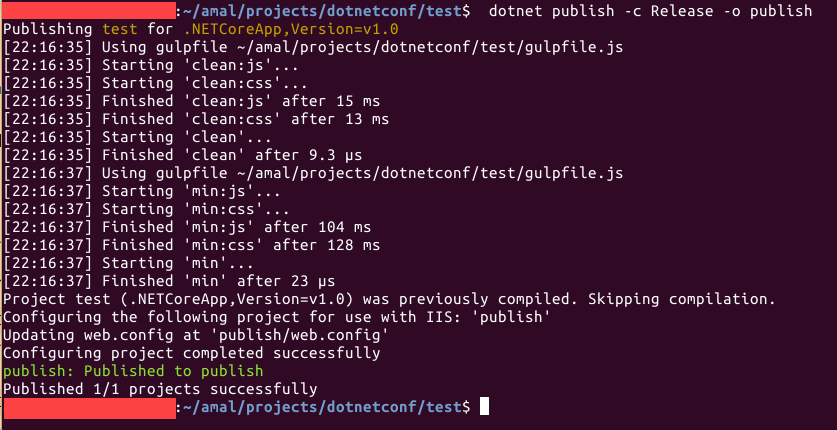
If you look inside the publish folder you will find that it has copied all our static files and resources along with the dlls of our application and the dependencies used in it
Using Nginx as a Reverse Proxy for ASP.NET Core Web App in Docker
One of the main features of .NET Core framework is the ability to run the applications on variety of environments such as Linux, MacOS etc. It includes a light weight server known as Kestrel which is used to run web apps targeting the .NET Core framework. But one of the main disadvantage of Kestrel is that it is primarily a development server and is not recommended for production environments. We always used IIS as server for hosting .NET Web app, but in the case of .NET Core since it's cross platform and we can't rely on IIS for platforms other than Windows. In the case of Linux, Nginx is one of the most popular web server out there and is very good at serving static content. But, for the example in this post we are going to make use of the reverse proxy(passing requests to other servers) feature in Nginx to serve our core web app from a docker container running on a Linux distro.
I had already written a post about the on how to get started with Nginx and I recommend you to go through the post here if you are working with Nginx for the first time. In this post, I am going to host a .NET Core web app in a Docker container using Nginx and Kestrel to serve the site on a Linux machine.
Before I get started with coding, here's a little advice for all you guys. It is always a recommended thing to follow a proper structure for your source files in your project. In this case, I have created two folders, one for putting all the files related to .NET and one for putting all those related to Nginx as shown in the screenshot below.

Step 1 : Create .NET Core App
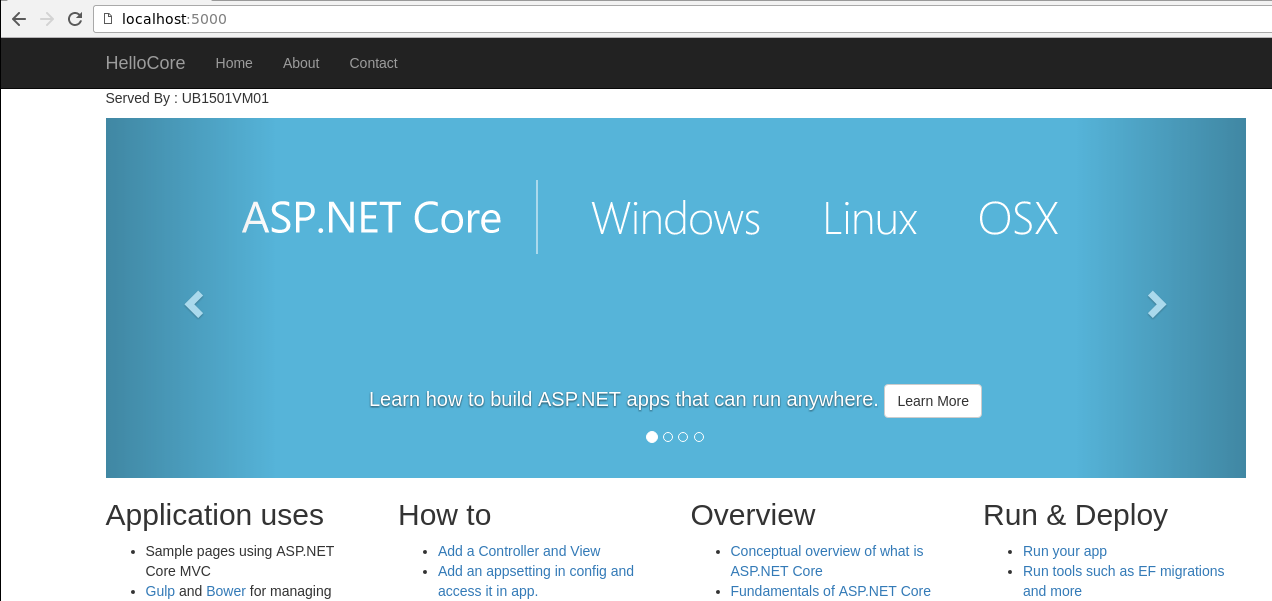
Create a sample mvc core application under the dotnet folder. I created this one using the boiler plate template provided by yeoman which generated all the folders and files showed in the above image. If you run the application now using the dotnet run command, it will host the application in Kestrel and can be accessed by using the url http://localhost:5000. I have modified the sample page to show the name of the server using the below code.
Served By : @System.Environment.MachineNameSince I'm running it from the local machine, the page will show the name of my local box as the server name as shown in the image below.
Since we are going to host our application inside the Docker container, let's create a docker file which contains some instructions to Docker to set up the container. It basically tells which base image should be used, copies the files from the current folder to a folder called app inside the container and sets it's as the working directory. Then it executes two dotnet commands to restore the packages first and then executes the build. Once the build is completed it exposes the port #8018 for serving the app from the container. The ENTRYPOINT command is used execute the application when we start the container and in our case it will execute the run command to host the application.
Serving Static Files Using nginx in Docker
nginx is an open source web server lighting up the hosting world with rapid growth and is catching up with the sector leader Apache very fast. It's very fast, light weight web server which can also act as a load balancer or a caching server. One of the main feature of nginx is it's capability to handle a large number of concurrent connections and is the main reason why the popular sites such as wordpress.com, Hulu etc is using it. In nginx, scaling is implemented using an asynchronous architecture instead of threads to handle simultaneous requests. This helps nginx to serve lot of requests concurrently without consuming lot of system resources.
In this post, I am going to take you through the various steps needed to set up nginx in a Docker container to serve static files.
Step 1 : Pulling Docker Image
The image for ngnix for Docker is available in the Docker Hub and can use the below command to pull down the latest image into your local Docker client.
docker pull nginx
It will pull the latest image from the hub if it's not found in your local docker client and once the download is completed we can verify the same by executing the docker images command. I had downloaded the image some time back and you can see that in the below screenshot as the last item in the list.
Hosting ASP.NET Core Web App in Docker and Accessing it from outside
In one of the earlier posts here, I have explained the steps needed to deploy a console application created in your local machine into a docker container. Today, I am going to go through the various steps needed for deploying a .NET Core web app into a Docker container using a dockerfile.
Please refer the links given towards the bottom of the post to know more about Docker for Windows and .NET Core Apps.
Creating the Project.
In this post, I am going to use Yeoman for scaffolding a ASP.NET Core web app from the command prompt. You can read more about Yeoman and how to set it up in machine by referring the links given below.
Getting Started With Yeoman
Scaffolding Using Yeoman
The command used for scaffolding a ASP.NET Core web app is
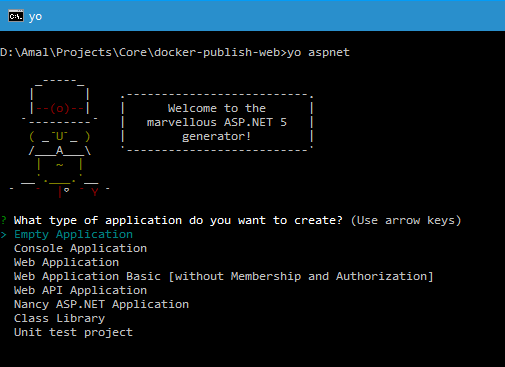
yo aspnet
When this command is executed, Yeoman will list the available options as shown in the image below.
Pushing images to Docker Repository
Today, in this post I am going to explain the steps needed for publishing an image in your local Docker daemon to the Docker hub.
Docker hub is central registry of images maintained by Docker. We can use the images to build containers by downloading them into the local machine. For example, in of the previous post, I showed you how to build and deploy .NET core apps in Docker. This was done by downloading the .NET Core image from the Docker repository to my local machine and created the console application using the downloaded image and deployed it to a container.
You can access the public repository of Microsoft for Docker images @ https://hub.docker.com/u/microsoft/
The main difference between a registry and repository in Docker terms is that, Registry can be hosted by a third party like Docker hub, Google Container Registry where as a docker repository is collection of different images with same name but with different tags.
So let's see how can we push our image in the Docker repository.
Step 1 : Create an account in Docker Hub.
It's necessary that you should have an account with Docker for maintaining your repositories. So if you haven't created one yet, goto http://hub.docker.com and create if before proceeding to the next steps.
Step 2 : Create an Image locally.
Please refer my earlier post here to how to create a console application using .NET Core in Docker. I am going to reuse the image created in that post for pushing it into the public repository.
Publishing .NET Core Application in Docker Using DockerFile
In one of the earlier posts in the blog, I have showed you how to create and run a console application created in .NET Core from a docker container. Please refer the post here to know the details about it. In this post I am going to show you can publish an app created in the host machine to Docker container using a dockerfile.
A dockerfile is used by Docker to build automatically by reading the instructions inside it. The complete help file is available in Docker documentation site and you refer that for detailed information on the commands that can be used in the file.
You can go through my earlier posts on how to setup Docker for Windows Beta in your machine and how to troubleshoot issues you face while trying to get started with Docker in your Windows machine.
Also I will be using .NET Core for creating the console application and will be using the CLI commands and a normal editor for writing the source code for this example on a Windows 10 machine.
Creating Project
Let's create a new HelloWorld project in .NET Core using the following command.
dotnet new
The above command will create a boilerplate console application which will have a C# file named Program.cs and a project.json file which will have dependencies specified.
Publish a Web App Into Docker Container From Visual Studio
As most of you may know already that Docker has released a beta version of their Windows avataar some time ago. Unlike the stable version, this one is using native components like Powershell and Hyper-V to leverage it's capabilities in the local machine. You can read more about the beta program and the installation procedure in the links given below.
Docker for Windows Beta announced
Installing Docker For Windows Beta
Native Docker comes to Windows and Mac
Installing Visual Studio Tools For Docker
The Visual Studio team also released some tooling for creating containers directly from VS as well as for debugging application hosted in Docker. These are called Visual Studio Tools for Docker and is available for download from the following link.
Download Visual Studio 2015 Tools for Docker
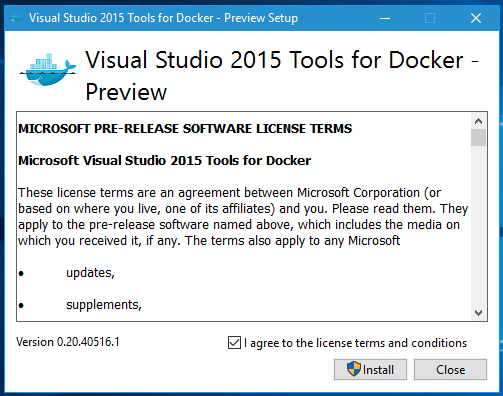
The installer is around 30 Megs in size and the installation process is pretty straightforward. You just need to double click on the downloaded installer to start the installation. The first screen will be as shown below, and to start the installation you will need to agree the license terms by clicking on the checkbox.
Create and Run a Sample C# Program Using .NET Core RC2 Image in Docker
You all may be knowing that Microsoft is in the process of rebuilding the .NET framework from the scratch to embrace the rapid advancements happening in the technology world. Last week they released the RC2 version on .NET Core which is vastly imporved from the last release with more APIs and performance improvements. You can read more details about the changes in one of the posts I have blogged earlier here.
In this post I am going to show you how to make use of the Docker container images for .NET Core to create and execute a C# program in Docker. Meaning I am not going to install the framework in my machine, rather host the runtime in a docker container and use it for compiling and running the program.
So one of the pre-requisite for this procedure to work is to have Docker installed in your machine. I am going to use a Windows 10 machine for this example and I have the latest Docker for Windows Beta installed in it. Please read my earlier posts on how to install Docker for Windows Beta in your machine and to troubleshoot the issues which may come up during the installation.
1. Installing Docker For Windows Beta
2. Docker : Troubleshooting Installation Issues
Downloading the Image and Running the Container
The first step is to download the RC2 version of the image from the Docker Repository. You can use the following command in the powershell window for that. It will download the image and runs the container when the download is completed.
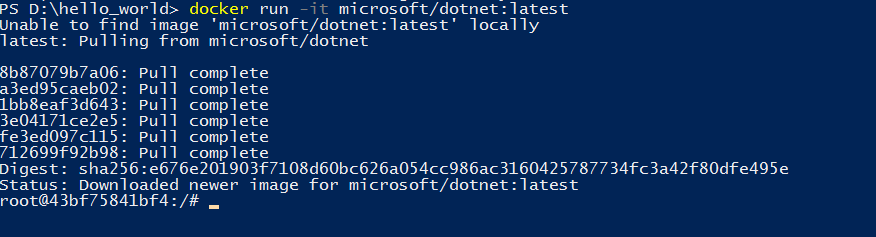
docker run -it microsoft/dotnet:latest
It will pull the latest version, that is RC2 in our case from the repository and once it completes the download you will get a bash shell prompt, from where you can execute the CLI commands. You can refer the Microsoft repoository in Docker to know about more options such as downloading a specific version etc.
Docker : Troubleshooting Installation Issues
In the earlier post, I have detailed the process of registering for private beta program and installing the beta version of Docker in Windows machine and in the last part I have mentioned that I faced some issues while initializing the Docker in my machine. In this post I am going in detail about the issues faced and the steps I took to resolve it.
After the installation, when I launched the Docker instance,it showed me an error saying that there is not enough memory to start Docker after some time.
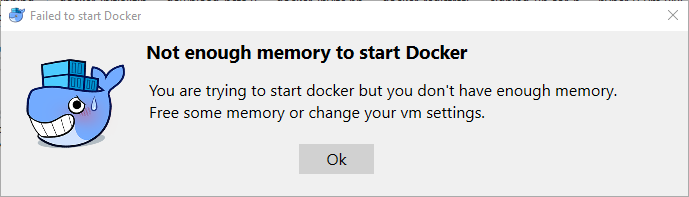
My machine was running on Windows Insider Preview build 14295 which has got only 3 gigs of memory. So, I closed all the unwanted applications which was consuming a lot of memory and was able to bring down memory usage to 50%.
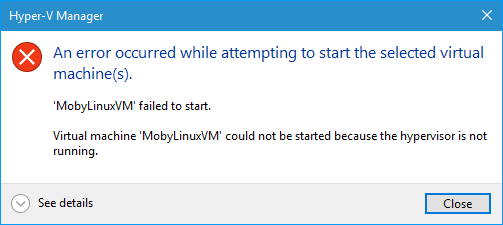
Enabling Hypervisior
When I started the Docker again, the above error went away but got another one this time saying that the VM cannot be started because the hypervisor is not running.
Installing Docker For Windows Beta
Containers are gathering pace these days and many more companies are moving their virtual machines to containers at a faster rate. Docker is built on top of Linux Containers(LXC) which has got it's own file system, storage, RAM and CPU. One of the key differentiator with the Virtual Machines is that VM's emulate hardwares virtually, which itself consumes resources and comes down heavy on the underlying OS, but the advantage is that we can install any guest OS inside VM's. But with containers such as Docker it uses a shared OS which means that all the containers in a machine should have the same OS, advantage being that, by sharing it can utilize the resources more efficiently and will be light when comapred to virtual machines.
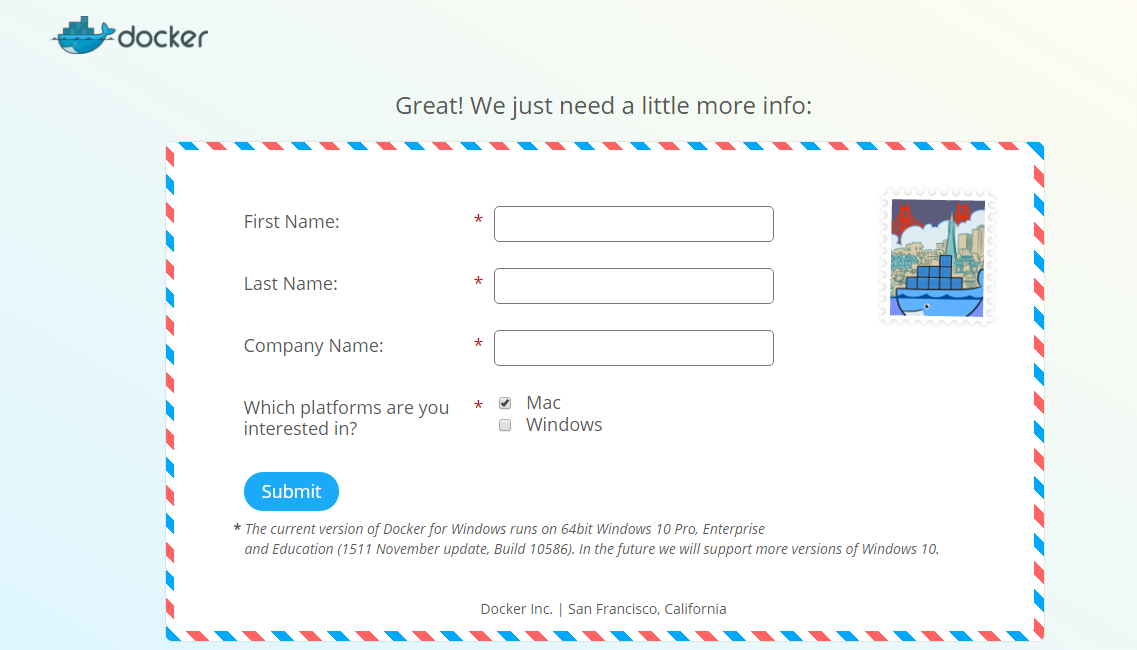
While celebrating their third birthday, Docker announced a beta program of Docker for Windows and Mac which contains an integrated environment for building, assembling and shipping applications for Mac and Windows. For more details, refer this excellent blog post by
This is a limited beta program from Docker and is not open to all. First you need to go to beta.docker.com and sign up using your Docker ID. Once you are successfully validated, you are redirected to a page where you can fill up the information as shown in the below screen grab.
Connecting Azure Blob Storage account using Managed Identity
Posted 12/9/2022Securing Azure KeyVault connections using Managed Identity
Posted 11/26/2022Manage application settings with Azure KeyVault
Posted 11/9/2022Adding Serilog to Azure Functions created using .NET 5
Posted 4/3/2021Learn how to split log data into different tables using Serilog in ASP.NET Core
Posted 4/23/2020