Visual Studio Team Services : Creating Build Definitions
In the one of the earlier post in the blog, I have showed you how to host your project in Visual Studio Team Services. In this post, I am going to show the steps needed for creating a build definition in Team Services so that whenever we checks in the changes it will trigger the build process automatically.
Creating Building Definition
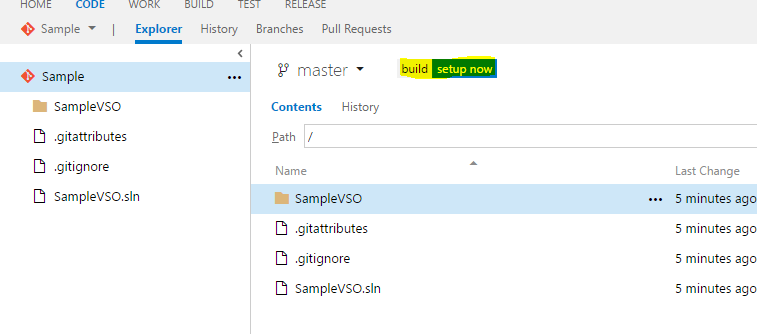
You can create a new build definition from either the dashboad or from Build page or from the Code page. In the code page it will show a link to set up the build process along side the name of the branch if it's not setup as shown in the image below.
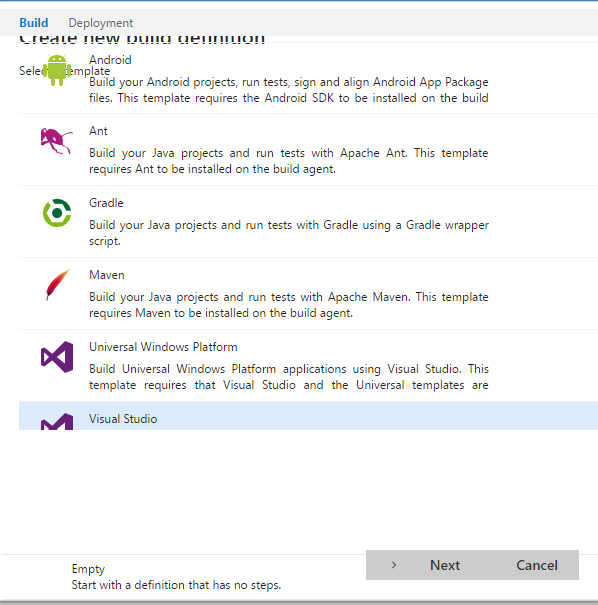
When you click on the setup now, a dialog box will be shown containing the list of build templates available in Team Services. Select the Visual Studio template from the list and click on the next button.
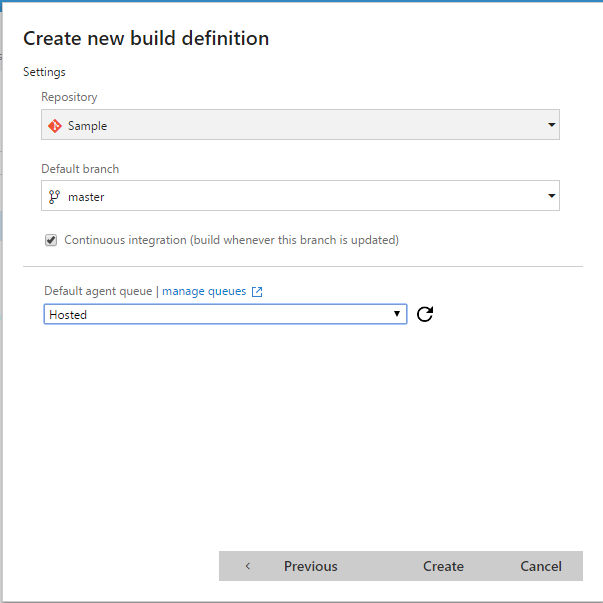
In the Create New Build Definition window, select the repository and the branch you want to build and also don't forget to select the checkbox for Continous Intergration otherwise build won't be triggered when you do a check in. Select Hosted as the default agent and click on Create button
Build Page
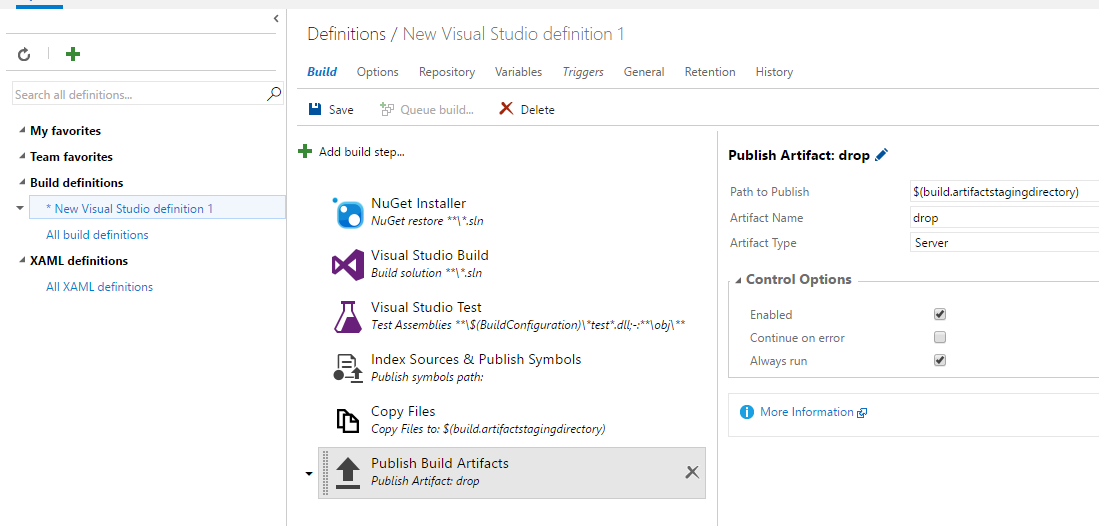
When you click on the Create button, you will be redirected to a page where you can define the steps in the build process as well as various settings for repository, triggers etc.
When you create a new definition for Visual Studio build, following steps will be added by default.
- Nuget Installer - Restores all the packages in the project to then build folder
- Visual Studio Build - The actual building of our code happens in this phase
- Visual Studio Test - Executes the test cases if any
- Index Sources and Publish Symbols
- Copy Files - Copies the output of the build to the staging directory
- Publish Build Artifacts - Publishes the output of the build
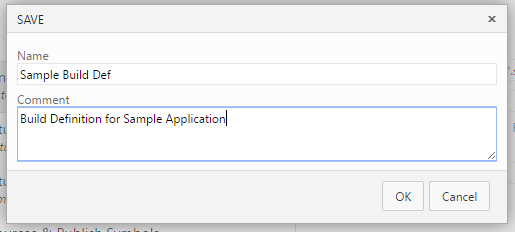
So to save the new definition, click on the save icon and gave a name and description in the dialog box and click Ok.
Options Page
In the options page, you can enable builds for targetting different environments or create a work item automatically if the build is failing so that it can be tracked later.
If you wan't your project to be built using debug and release configurations or to target x86 and x64 architecture, you can do that by enabling the Multi-Configuration option in this page.

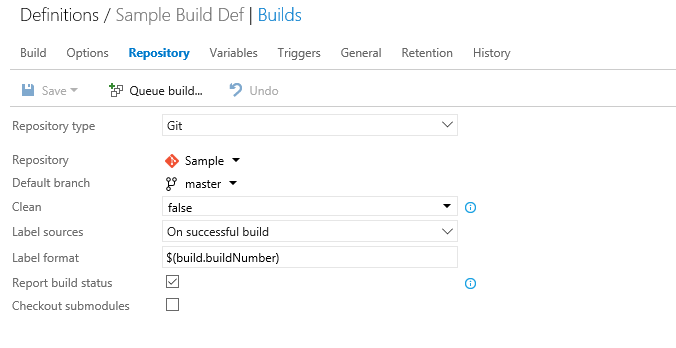
Repository Page
While starting the build process, the agent will download the files from the remote repository to a local directory and starts the build from there. Here you specify the repository and the branch from where the source code needs to be downloaded. Also, there are additional options like to clean the solution before building as well as option to apply the label to tag the files used in the build etc
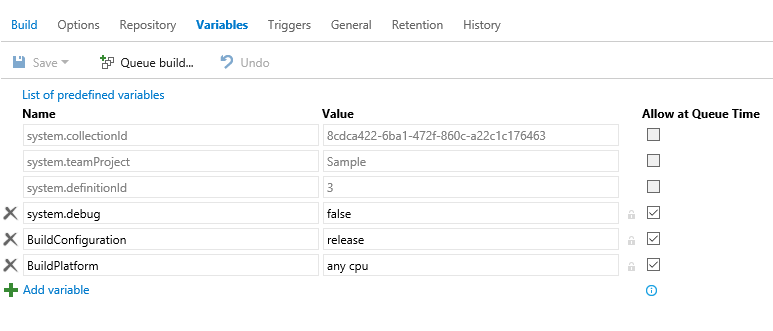
Variables Page
From here you can define key-value pairs which can be later used in your scripts or as inputs. There are a set of predefined variables which can be accessed by clicking on the List of predefined variables link.
You can click on the lock icon to make a value as a secret variable. Then the actual will be masked and will be stored as encrypted. This feature comes in handy when you want to define a password in the variable list and doesn't want to expose the value to all who has got access to build definition.
You can refer the MSDN page for the complete list of variables
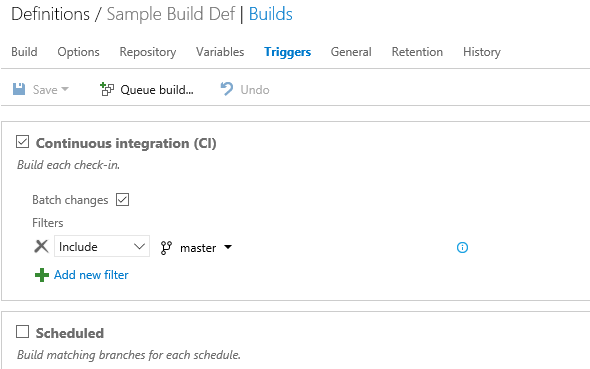
Triggers Page
In this page, you can specify the actions which will trigger your build. If you want to enable build during every check in then make sure that the Continuous Integration is checked. Also if you have lot of people working in the project and doesn't want to trigger the build every time a person check in and want to reduce the number of builds happening, select the Batch Changes option. When this option is enabled, it will queue all the changes when a build is running and will execute it in a single build rather than triggering builds for each commit.
Another option is to specify the branches that needs to be used for the build. In certain scenarios you may want your core branch as well as the feature branch needs to be triggered for build, you can use these options for that.
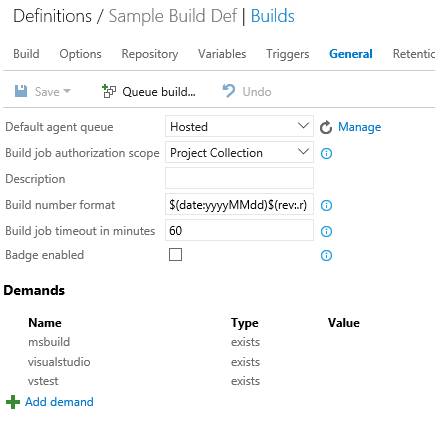
General Page
In this page, options are available for specifying the default agent queue, build number format, build job timeout etc.
In the demands section, we can specify the pre-requisites for the build. In our case we need to have msbuild and visual studio installed on the build agent. So whenever a build happens, it will first assert the ones specified in the demands and will continue the process if and only if it's passed the assertion successfully.
Refer the MSDN page for more about the build number format and demands.
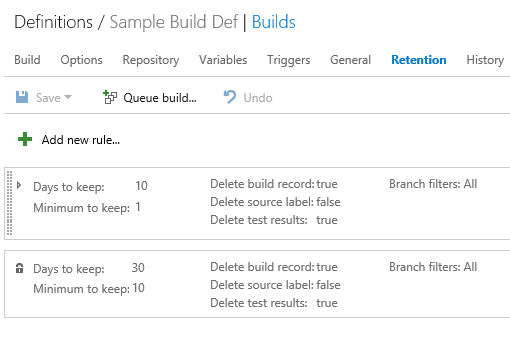
Retention
In the retention page you can specify the number of days to keep the logs for successfull builds. When you set the retention policy it will automatically deletes the items that matches the criteria and avoids the clutter.
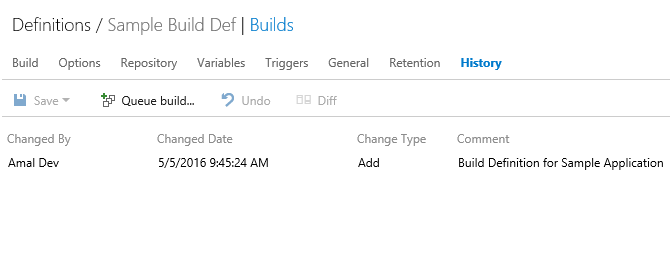
History
The History tab will list all the revisions made to the build definitions with details such who made the changes and when. Also you will be able to view the difference between two entries by selecting both and chose Diff option to see the changes.
You refer the MSDN page here to know more about each of pages we discussed here.
No Comments
Connecting Azure Blob Storage account using Managed Identity
Posted 12/9/2022Securing Azure KeyVault connections using Managed Identity
Posted 11/26/2022Manage application settings with Azure KeyVault
Posted 11/9/2022Adding Serilog to Azure Functions created using .NET 5
Posted 4/3/2021Learn how to split log data into different tables using Serilog in ASP.NET Core
Posted 4/23/2020