Serving Static Files Using nginx in Docker
nginx is an open source web server lighting up the hosting world with rapid growth and is catching up with the sector leader Apache very fast. It's very fast, light weight web server which can also act as a load balancer or a caching server. One of the main feature of nginx is it's capability to handle a large number of concurrent connections and is the main reason why the popular sites such as wordpress.com, Hulu etc is using it. In nginx, scaling is implemented using an asynchronous architecture instead of threads to handle simultaneous requests. This helps nginx to serve lot of requests concurrently without consuming lot of system resources.
In this post, I am going to take you through the various steps needed to set up nginx in a Docker container to serve static files.
Step 1 : Pulling Docker Image
The image for ngnix for Docker is available in the Docker Hub and can use the below command to pull down the latest image into your local Docker client.
docker pull nginx
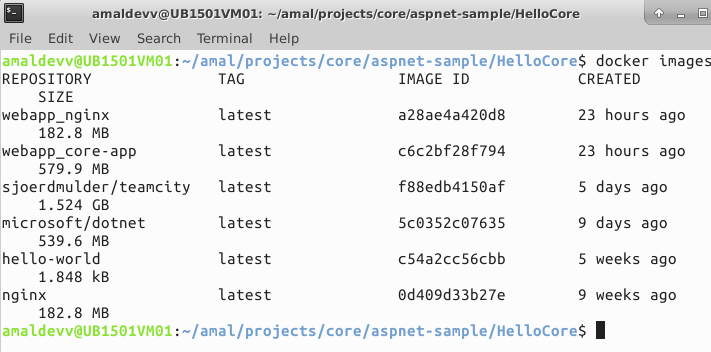
It will pull the latest image from the hub if it's not found in your local docker client and once the download is completed we can verify the same by executing the docker images command. I had downloaded the image some time back and you can see that in the below screenshot as the last item in the list.
Step 2: Create Static File
In this example, the static files will be created in the host machine and I am going to use the volume mounting feature in Docker to make it available for the container. By doing this way, all my files will be safe in my host even after the container image is deleted in Docker. If you store your files inside the container's file system, we will lose that too when the container is deleted.
I have created a folder inside the root folder for storing all the static files and then created the index.html file with the following content
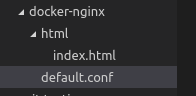
index.html
Step 3 : Creating Config File for nginx
nginx will use a default configuration file located in the folder /etc/nginx/conf.d/ with name default.conf in the container. Let's override that and create a new config file which is going to be used for serving our site.
In that I am will specify the server name, port number, location from where the files will be served. For server name you can either specify IP address or the name of the machine. If you want specify some other DNS name, then make sure that the appropriate entry is made in the hosts file.
nginx Config File
Step 4 : Bring up the Server to Life
Let's execute the docker run command along with some parameters as shown in the image below.
- --name -> uses the value provided for the parameter is used to tag a name for the newly created container
- -p -> is used to redirect traffic to port #80 inside the container whenever there is a request comes in at port #80 in the docker host
- -v -> mounts the wwwroot folder in the host into container at /usr/share/nginx. Second one the mounts the default.conf file we created into the config folder inside the container
- -d -> to run the container in detached mode
- ngnix -> base image that needs to be used
docker run --name docker-nginx -p 80:80 -v ~/amal/projects/BlogSamples/core/sample/docker-nginx/html:/usr/share/nginx/wwwroot
    -v ~/amal/projects/BlogSamples/core/sample/docker-nginx/default.conf:/etc/nginx/conf.d/default.conf -d nginx
When the command is successfull executed, it will output the unique id of the container and returns to the terminal prompt

We can verfiy the container is up and running by executing the docker ps command which lists all the running containers.

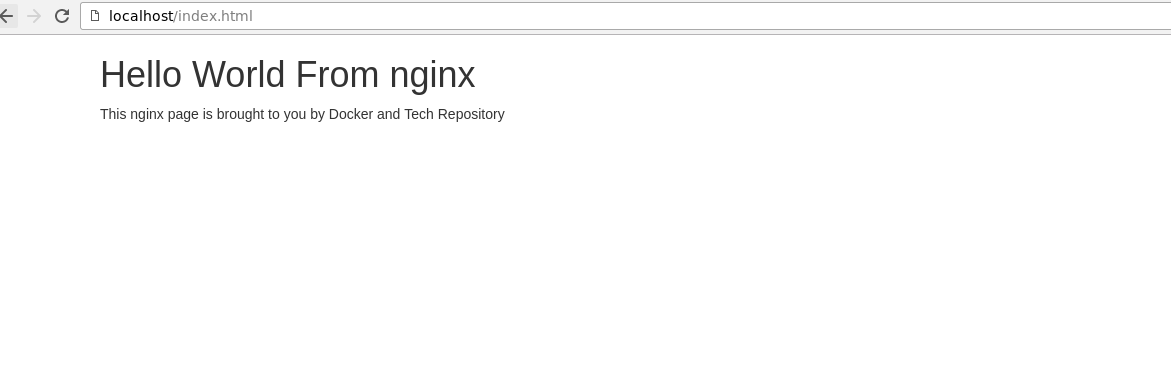
To access the file, fire up up the browser in your local machine and type http://localhost/index.html and you will get the static file which we had created earlier served by nginx. So what has happened here is that since the http uses port #80 by default, Docker client will see this request and since we have specified the mapping while executing the docker run command it will redirect the traffic into the port #80 in the container which we created in Step 4. The nginx server is listening in the port #80 inside the container will pick up this and returns the index.html as response to the Docker Client who will subsequently send that to the browser.
Source code for the sample can be found here in Github
2 Comments
Connecting Azure Blob Storage account using Managed Identity
Posted 12/9/2022Securing Azure KeyVault connections using Managed Identity
Posted 11/26/2022Manage application settings with Azure KeyVault
Posted 11/9/2022Adding Serilog to Azure Functions created using .NET 5
Posted 4/3/2021Learn how to split log data into different tables using Serilog in ASP.NET Core
Posted 4/23/2020