Installing packages using Bower From Visual Studio
In one of the earlier post, I have explained the procedure for installing Bower in your Windows machine using command line tools. Now, it's possible to install packages using Bower from Visual Studio too, if you are wondering what actually Bower is then please go through this post which I have published earlier.
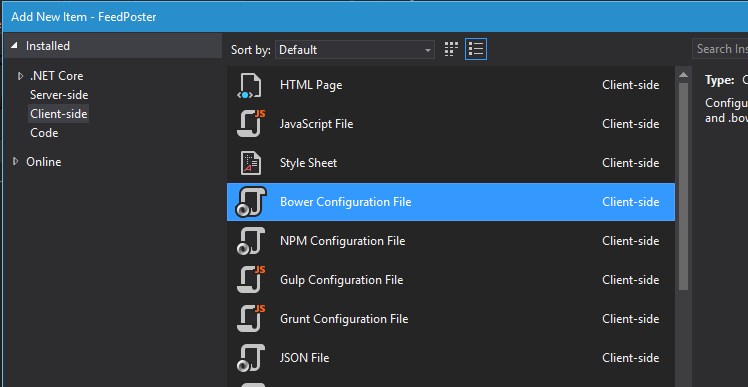
The first step in installing the package is to create the Bower Configuration File which will be used to save all the information about dependencies and metadata like name of the project, description entry point.
To create the configuration file, select the Bower Configuration File option from the Add New Item dialog box which can be brought up from the context menu by right clicking on the project.
I have saved the file as bower.json and if you open it now, the contents will be,
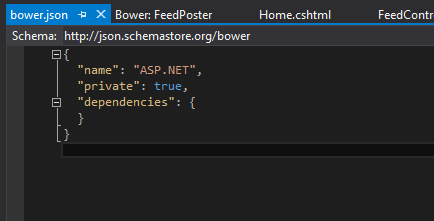
By default the name of the projects will be ASP.NET and can be changed and note that there are no entries under dependencies. Also, Visual Studio will add a file called .bowercc which will contain the commands and you can view that in the tree by clicking on the arrow next to bower.json file in the solution explorer.
?
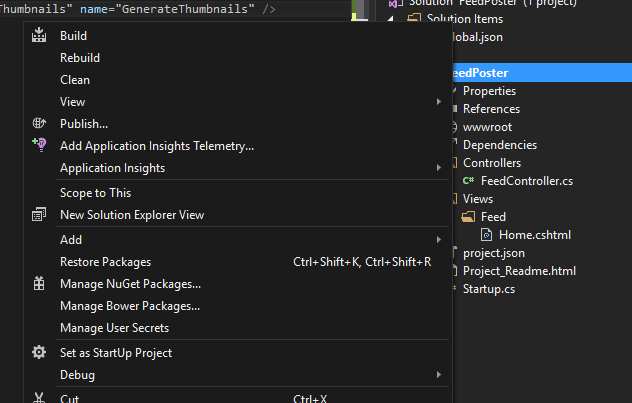
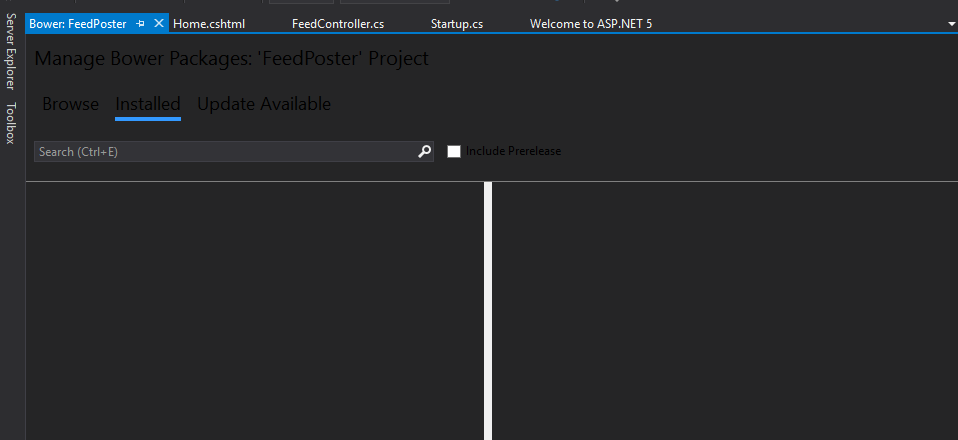
Adding the package can be done from the Bower Package Manager page which has got similar UI to NuGet Package Manager . Select the Manage Bower Packages from the context menu which can be invoked by right clicking on the project.
By default, it will open the installed tab and as you can see from the screenshot that we don't have anything installed yet in the project.
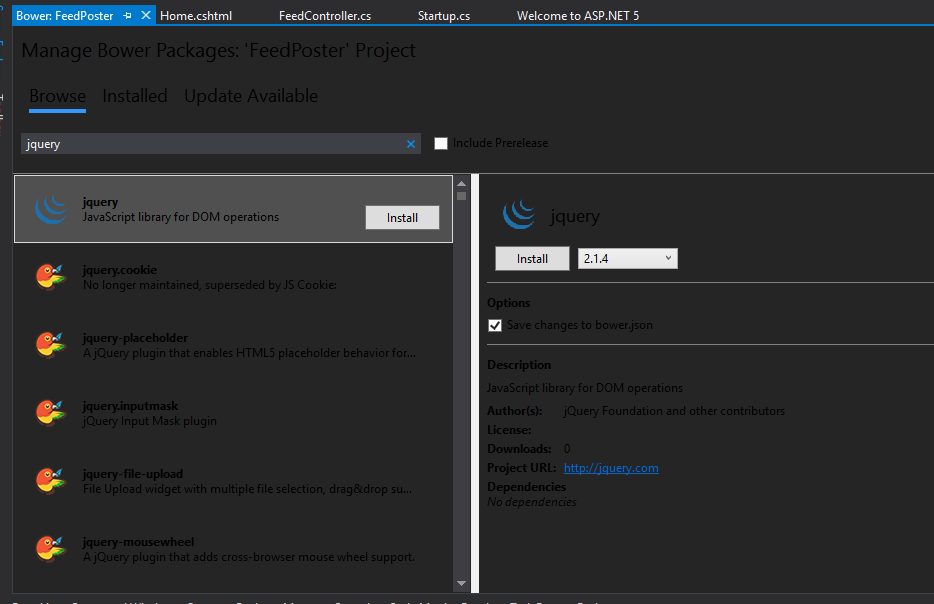
Let's install jQuery in our project using Bower. For that, just go to the Browse tab, enter jQuery in the search box. It will list in the search results, click on the Install button to start the installation. Also , please don't forget to click on the Save changes to bower.json option also. You have the option to chose a specific version in this page, by default the latest one will be selected.
If you look at the output window and select Bower/npm from the Show Output From, it will show the command used by bower for installation and it's progress.

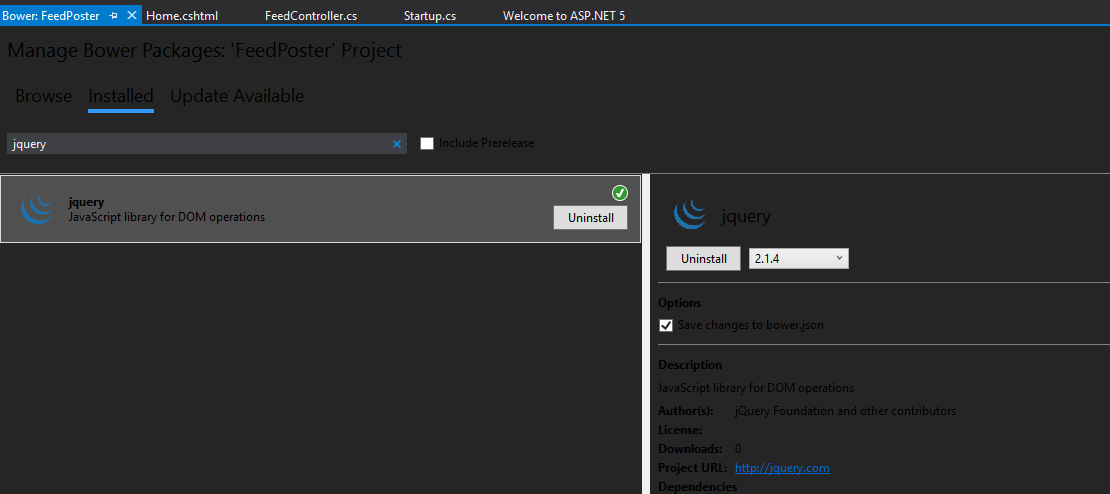
If you go to the Installed tab now, it will list the jQuery there and also the option for uninstallation will be available.
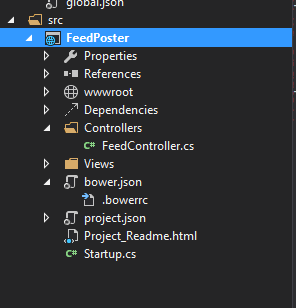
Let's now see where our package is installed in our location. Open the solution explorer, under the wwwroot folder you will see a new folder created called lib and a folder named jQuery inside that as shown below.

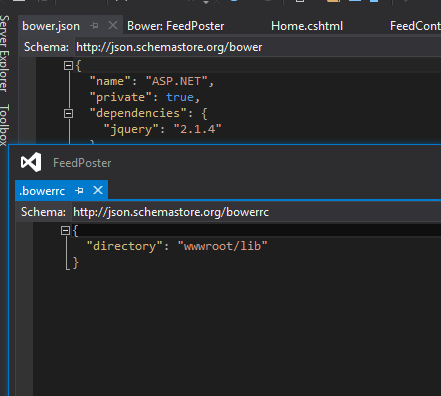
If you open the bower.json file, it will have the entry for jQuery under dependencies and in the bowercc file, will have the directory where it installed the package. Actually bower uses this entry in the bowercc file to find out the install location for the package.
That's all we need to setup jQuery for using in our project.
No Comments
Connecting Azure Blob Storage account using Managed Identity
Posted 12/9/2022Securing Azure KeyVault connections using Managed Identity
Posted 11/26/2022Manage application settings with Azure KeyVault
Posted 11/9/2022Adding Serilog to Azure Functions created using .NET 5
Posted 4/3/2021Learn how to split log data into different tables using Serilog in ASP.NET Core
Posted 4/23/2020