Check out and Check in files hosted in VS online account using VS Community edition
In the previous post I showed you how to add a newly created file to the source control and in this post I will be discussing about the check out and check in process from the IDE.
Checking out files
To check out the file, you need to right click on the file in the Solution explorer to bring up the context menu where you will find the option for checking out the file.
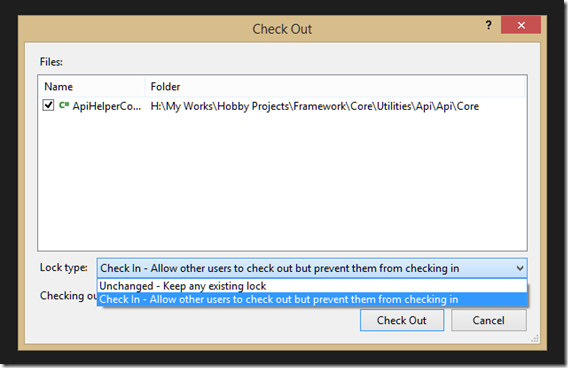
When you click on the Check out for Edit menu item, you will be presented with a dialog box which will have two option, the first one will retain an exclusive lock after the check out and prevent others from check in. The second one will allow other users to check out the file but won’t be able to check in their changes until the the one who has the lock check in the file. I am going to select the first one which is also the recommended option.
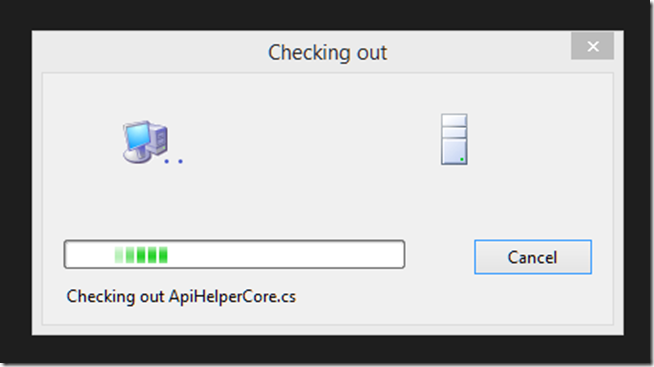
Once the operation is completed you will be free to make any changes in the code and save the files locally. When you are done with the editing we can see how the files can be checked in to the source control.
Checking In Files
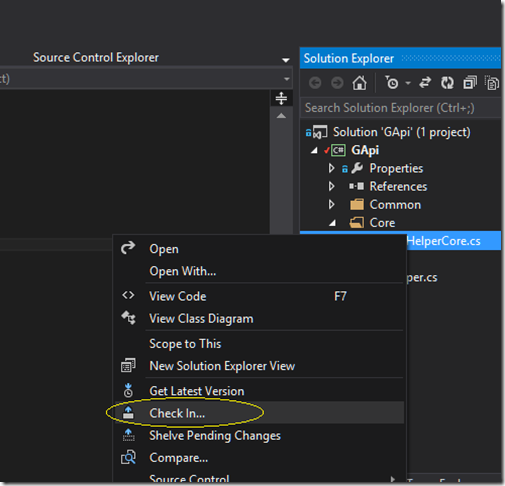
You have two options for checking in the files, right click on the file in the solution explorer to bring up the context menu and click on the Check in option.
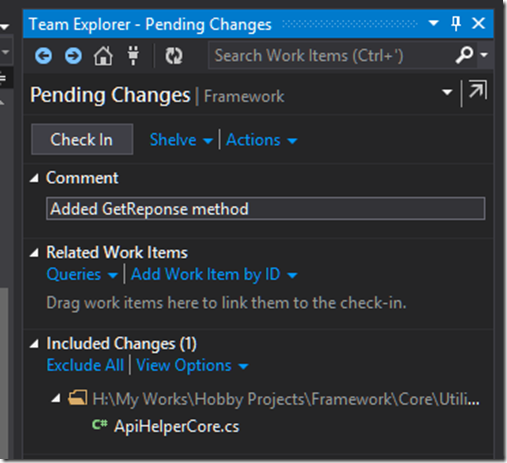
The second one is from the Team Explorer window where, the file we have changed will be listed under the Included changes section as shown in the figure give below. Also when we click on the check in option from the solution explorer, the file will be added to the Included changes section in Team Explorer and the tab will be displayed.
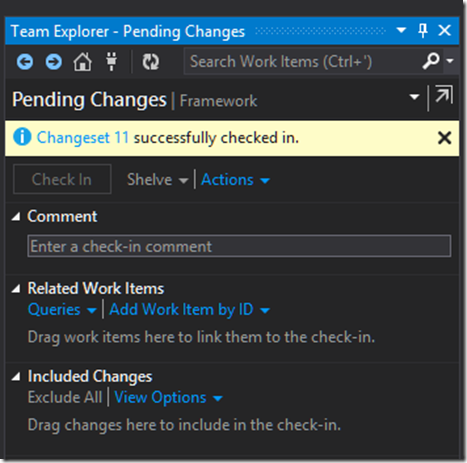
The flow from here is same as what we saw when we added the file for the first time in TFS. When checking in you has the option to provides comments and once the operation is completed, change set number will be displayed and details can be viewed by clicking on it.
Shelving & Unshelving Code
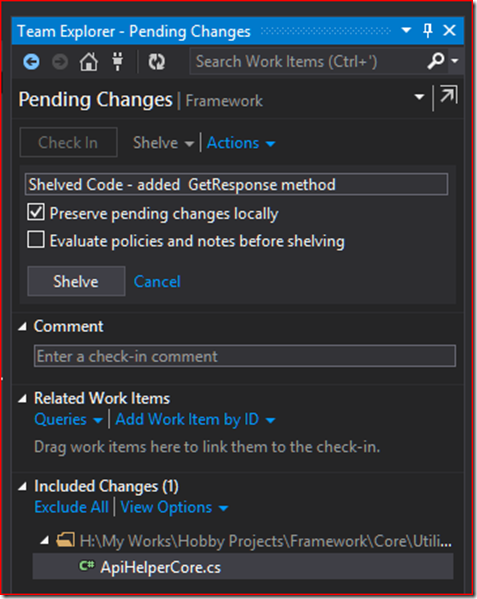
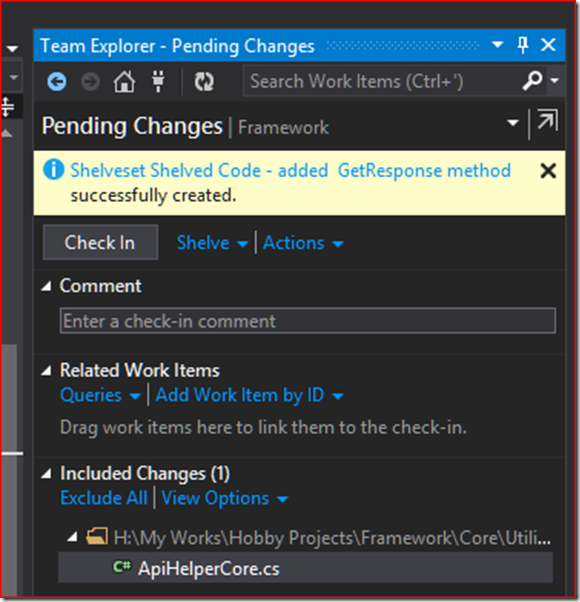
Sometimes we may have some unfinished work which are not ready for check in, but want to save it in the source control to suspend it for the time being or work on other high prioritiy items. That’s where shelving comes in handy for you. It helps you to save the changes in the server and won't be reflected in the codebase when you take the latest. The Shelve option is in the Pending Changes window and just like checking in files those under the included changes section only will be shelved. You need to give a name for the shelve set which can be later used to retrieve it from the store.
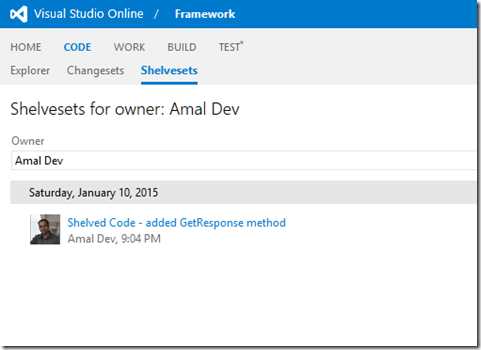
You can view these details from the online account also, by giving the shelve set # or change set # in appropriate tabs to get the details.
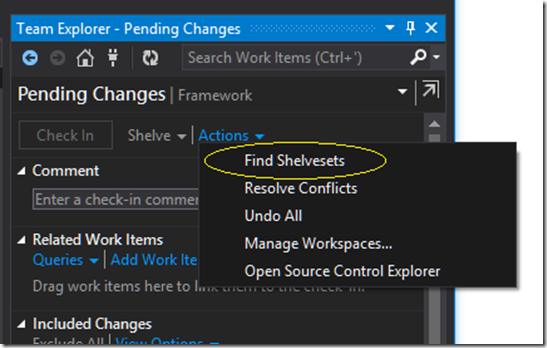
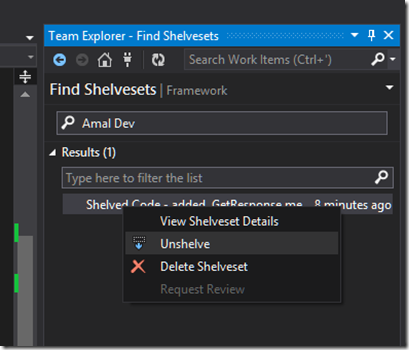
For unshelving the code, select the Find Shelve set option from the Pending Changes tab, retrieve the shelve set and then select the Unshelve option, which will then merge the code appropriately.
That’s all folks for the time and till next time Happy Coding !!!!
No Comments
Connecting Azure Blob Storage account using Managed Identity
Posted 12/9/2022Securing Azure KeyVault connections using Managed Identity
Posted 11/26/2022Manage application settings with Azure KeyVault
Posted 11/9/2022Adding Serilog to Azure Functions created using .NET 5
Posted 4/3/2021Learn how to split log data into different tables using Serilog in ASP.NET Core
Posted 4/23/2020

